Search Results for: 2V0-62.23 Schulungsangebot, 2V0-62.23 Testing Engine, VMware Workspace ONE 22.X Professional Trainingsunterlagen 🐟 Öffnen Sie ⮆ www.itzert.com ⮄ geben Sie ➽ 2V0-62.23 🢪 ein und erhalten Sie den kostenlosen Download 🌮2V0-62.23 Testengine

Links

Social Media

Other Concertina Makers

There are too many to list, but here are a few people who have particularly helped me out with advice and instructions. Geoffrey Crabb also deserves a place on the list but as far as I know he doesn’t have a website.

Miscellaneous

No. 1: Brun Part 7: Reed Pans

The seventh part of the story of how I built my first concertina is about the reed pans; the removable boards that carry the reeds and valves.

One thing I have learned is that the reed pan layout is one of the most difficult and important aspects of designing a new instrument from scratch, and it has to be done in conjunction with the action board layout. It’s no good coming up with a nice logical arrangement of chambers on the reed pans, if it means some of the pad holes end up underneath the keyboard, or the levers have to snake around all over the place to reach the appropriate pads, or you have to use levers that are too short to operate smoothly. Sometimes you have to compromise in one area or another, either in the reed pan (e.g. making reeds smaller because there isn’t room for the ideal size of chambers), or in the action (e.g. making two levers cross over each other or bend sideways).

This being my first instrument and a brand new design, I spent several days at the design stage figuring out a good compromise. When I began the process, I wasn’t even sure how many buttons I was going to end up with (the design brief specified the overall size of the instrument, to include as many buttons as practical in that form factor). The design I came up with looks pretty simple and logical, however in order to reach it, I tried and discarded a number of more complex arrangements. The three main compromises I ended up making were that a few of the levers are shorter than ideal (those buttons feel a bit stiffer than their longer neighbours); six of the chambers are in the centre of the instrument (for reasons I don’t fully understand, they sound a bit less good than chambers on the outside – this is a well-known phenomena in the concertina world); and I was forced to abandon the idea of including an air button.

You might find it interesting to take another look at the photos of Wheatstone’s Duett concertina of the 1850s. My Brun is the same size but with an extra three buttons per side. To achieve that, I went with a similar reed pan arrangement but with a second, smaller pan on each side. Wheatstone’s had one pan with two rows of six chambers; mine has a pan with two rows of five and a second pan with one row of five. Five columns is actually a fairly tight fit in the available width. I tried fitting in six and it was ridiculously tight: I suspect Wheatstone must have used narrower reed frames and smaller diameter pads, which probably had a negative effect on the sound it produced. My actions are a more conventional riveted lever type, and I suspect are probably more comfortable to play.

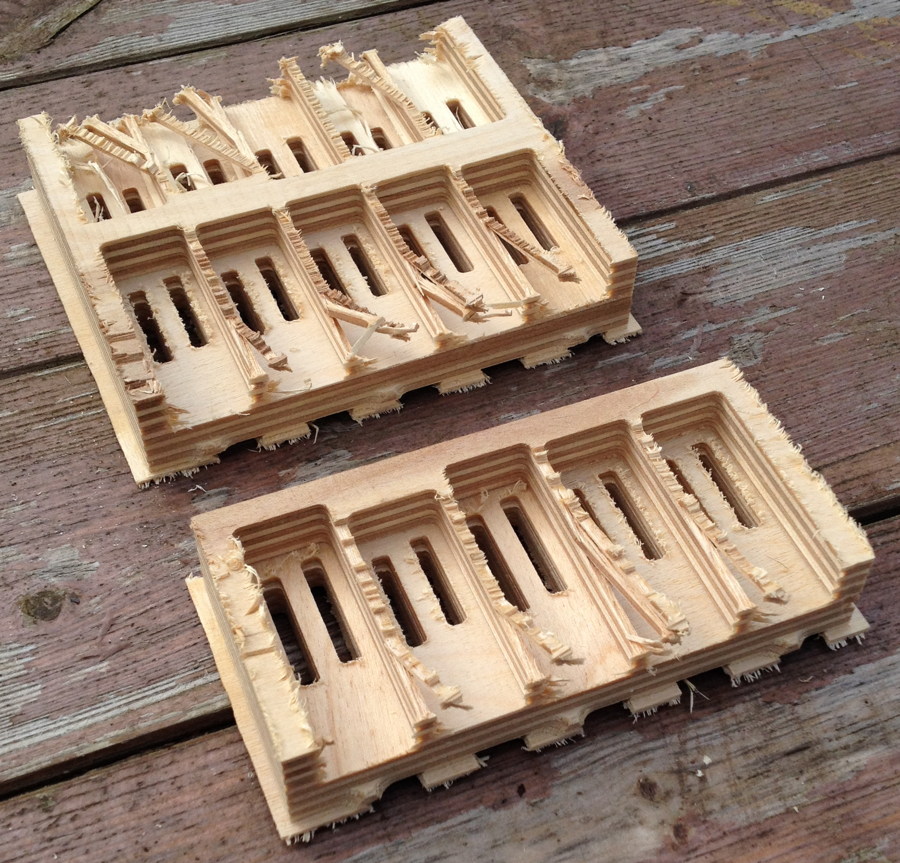
My first idea for making the reed pans was to mill them from thick pieces of birch plywood. This didn’t really work, because the chamber dividing walls were too weak due to the cross-grain layers, causing them to break during the machining process.

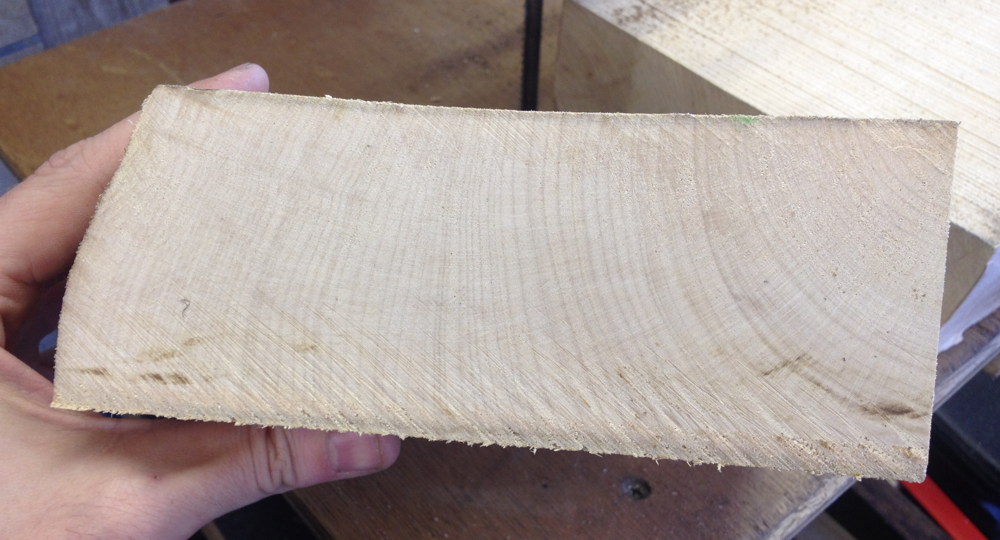
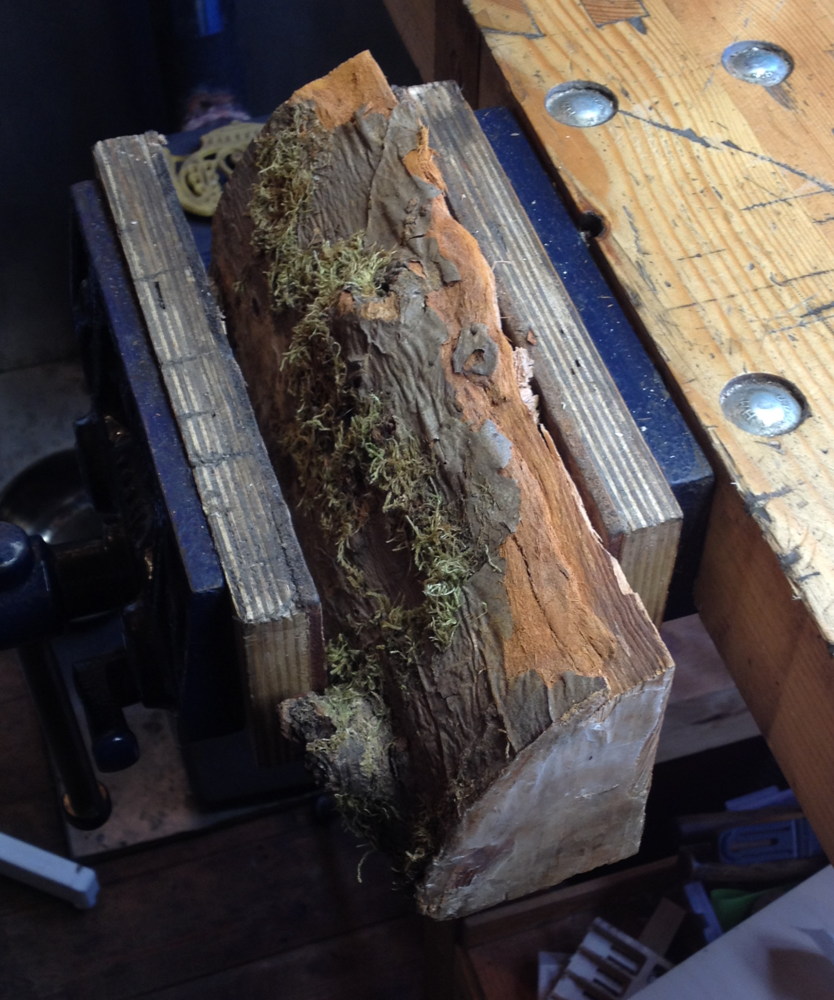
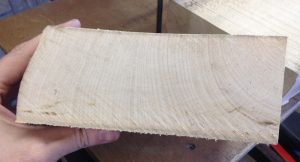
Plan B was to mill them from solid quartersawn sycamore. Using quartersawn wood means it will move and warp less due to changes in humidity level. The little bandsaw I had at the time was just barely powerful enough to rip the slab I had in the thin dimension.

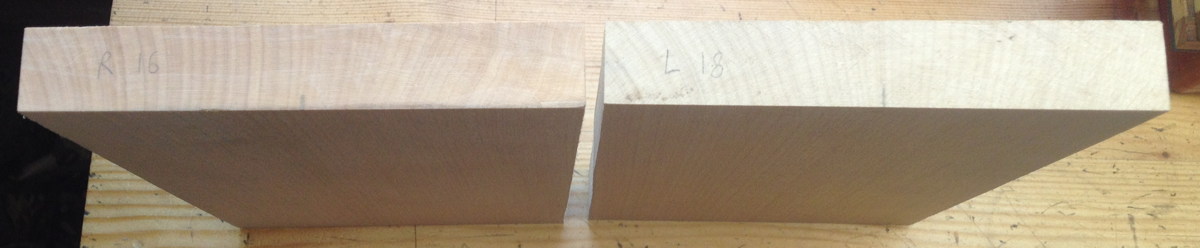
Looking at the end grain, you can see it is reasonably quartersawn towards the bark side of the piece. Because the pans only needed to be a little over 4″ wide, I was able to pick the best section.

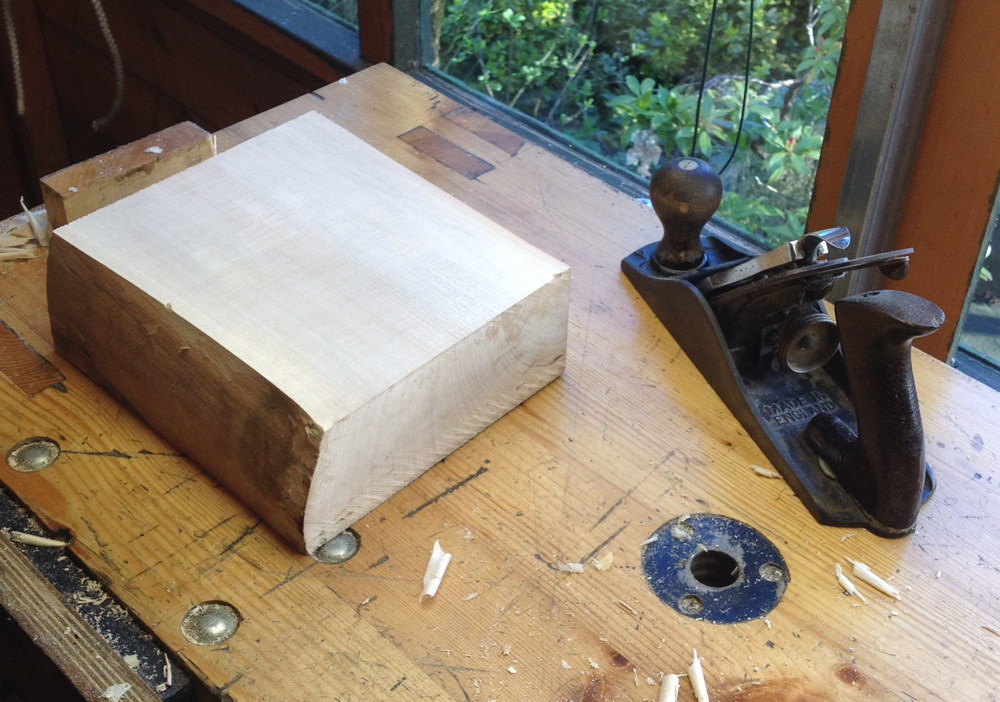
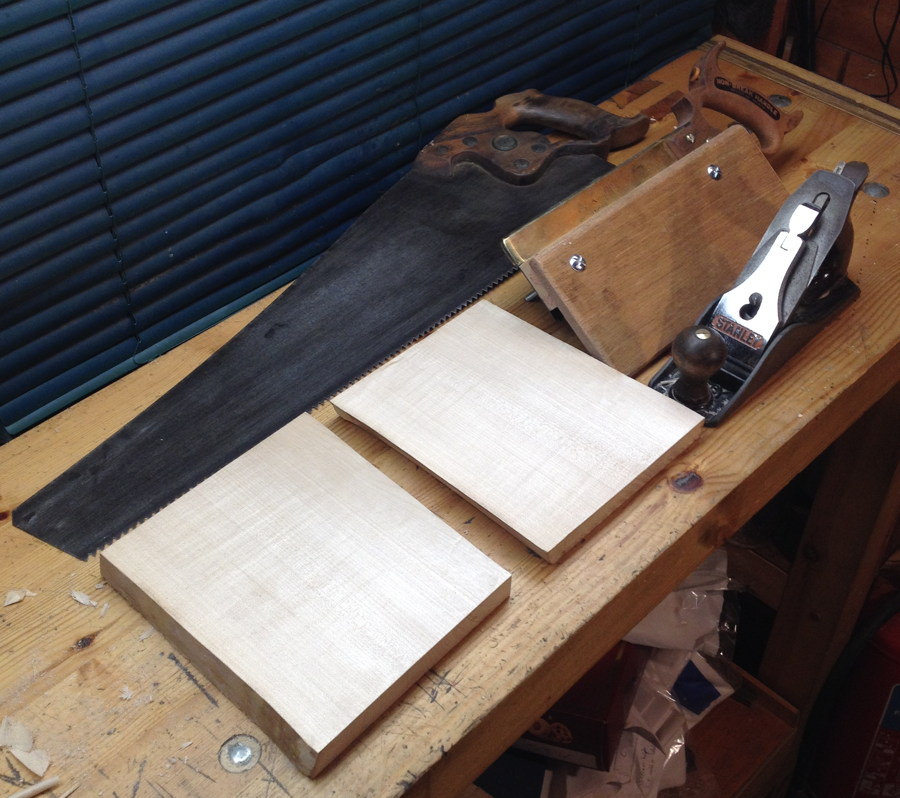
Planing one face true.

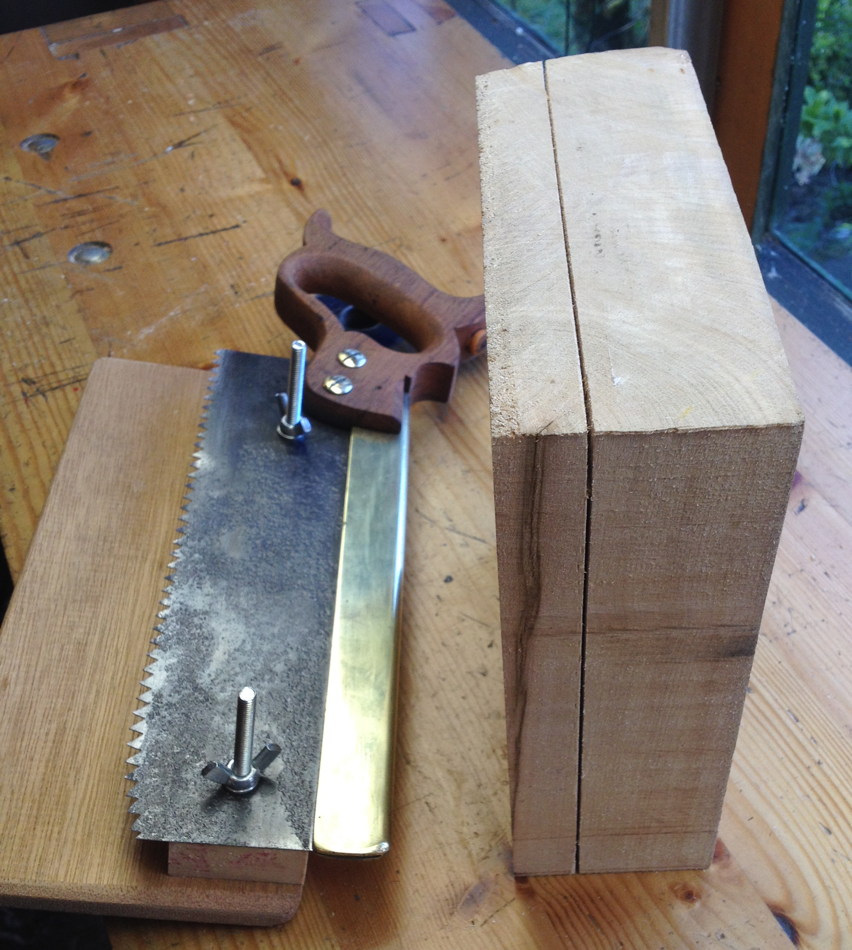
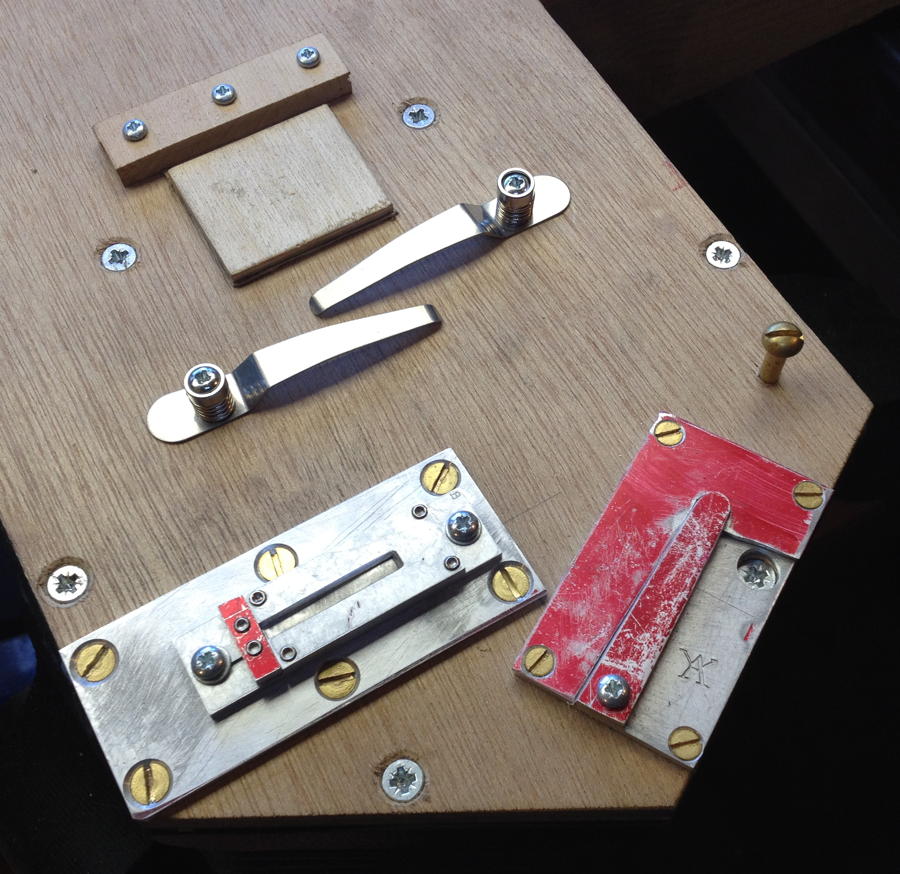
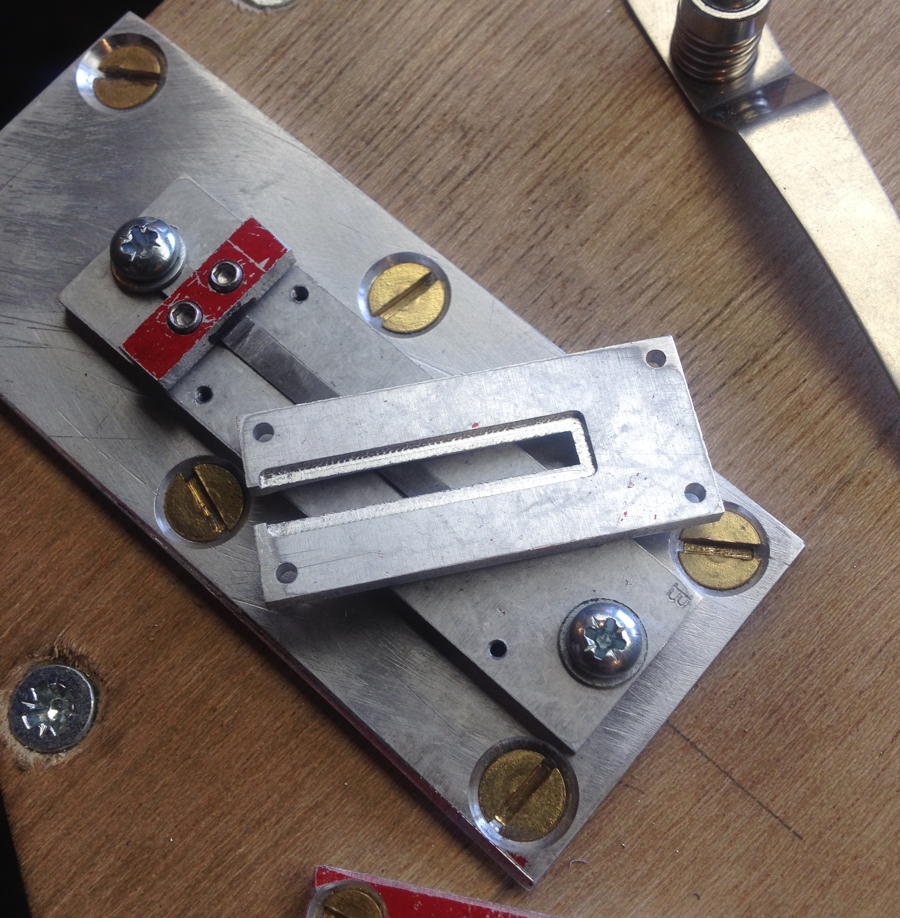
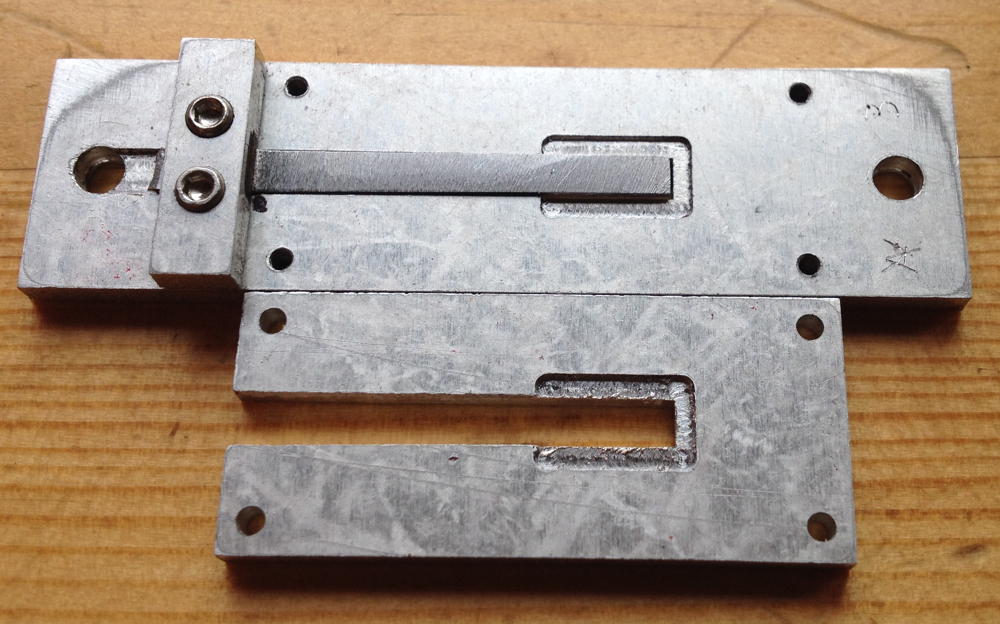
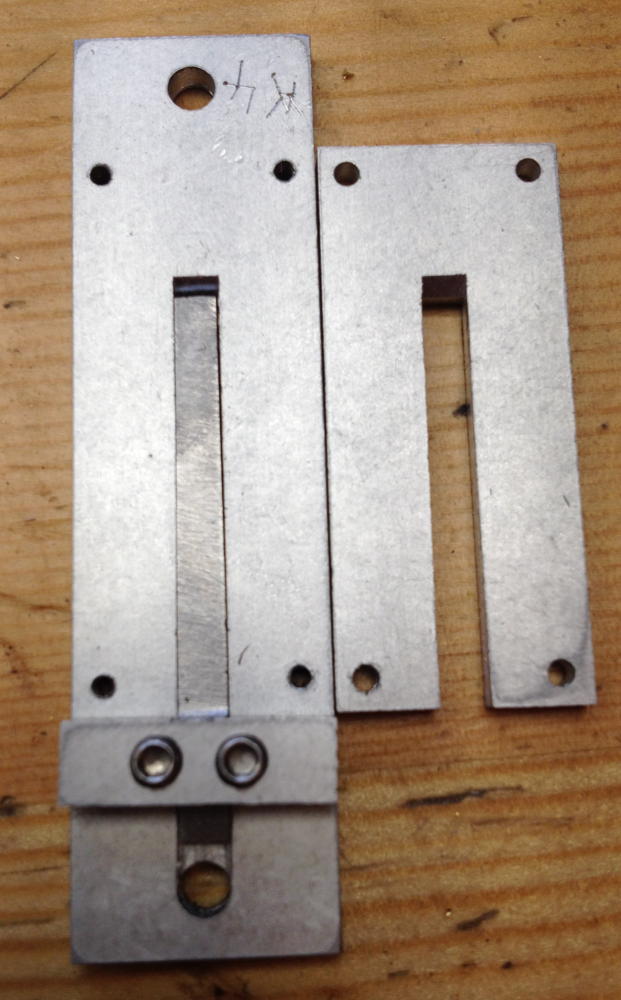
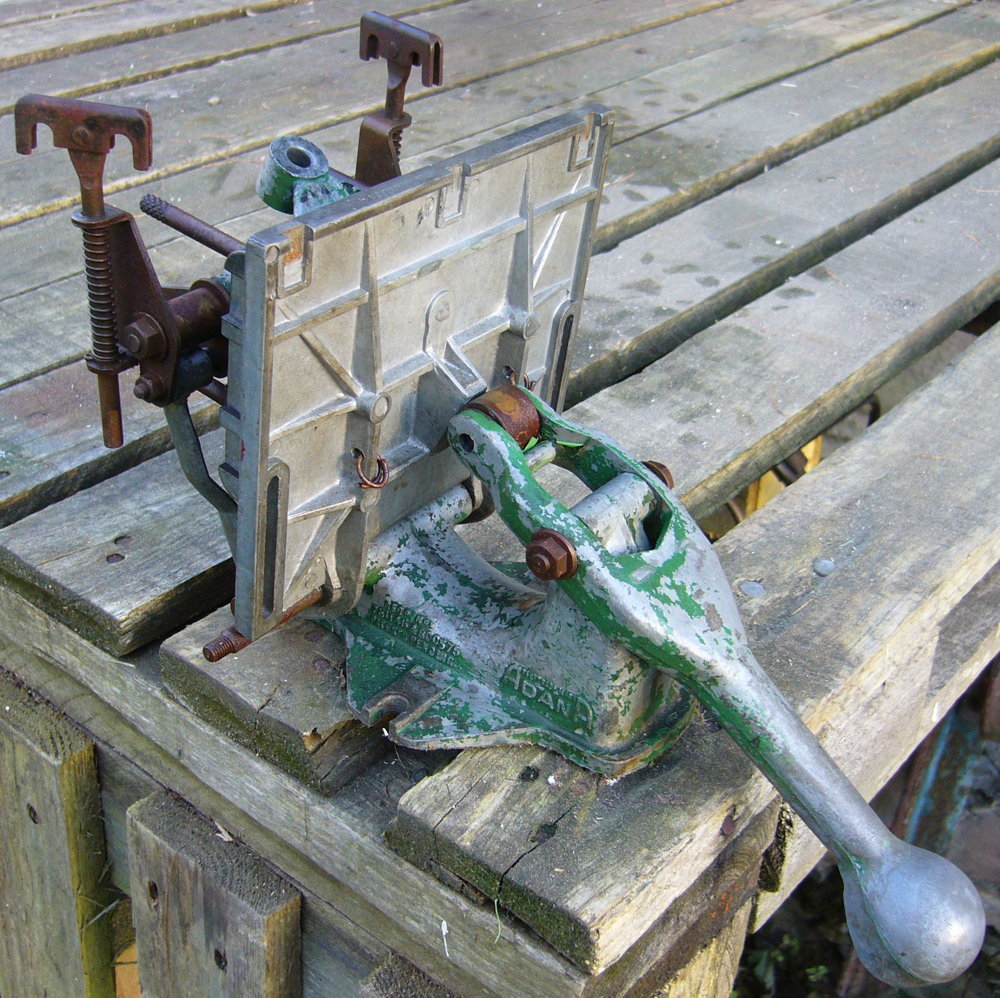
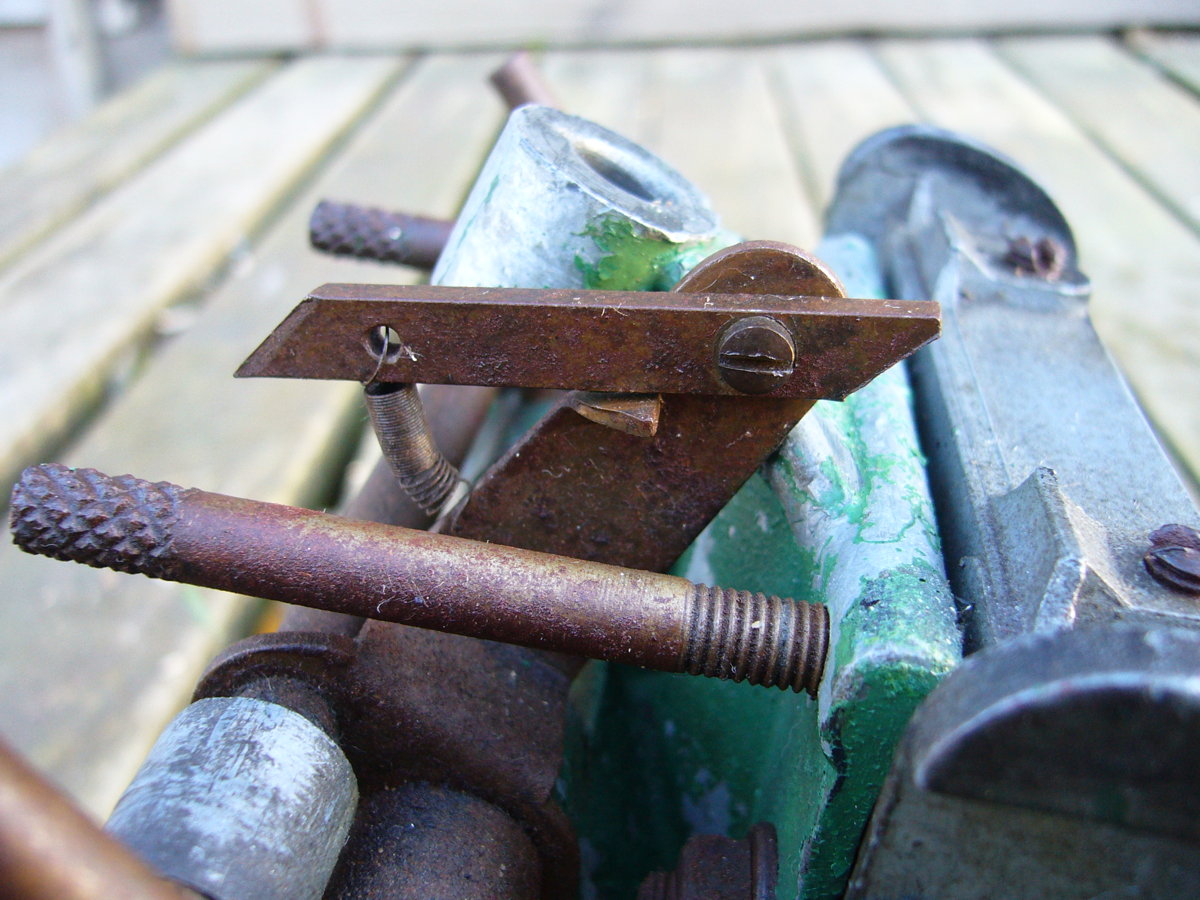
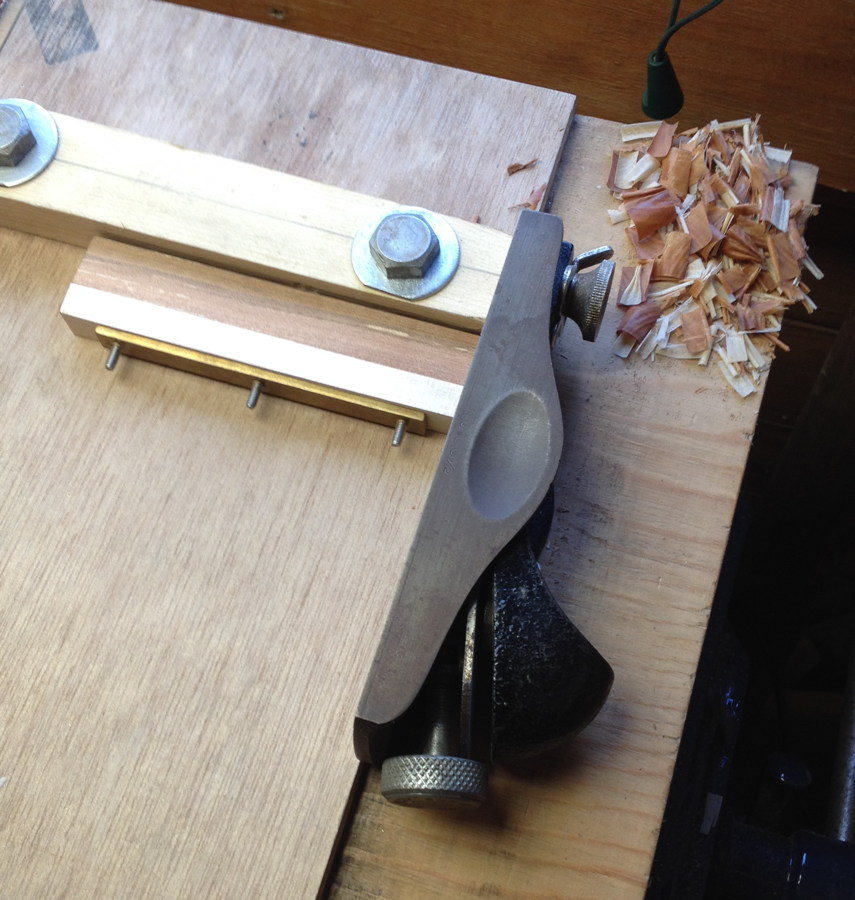
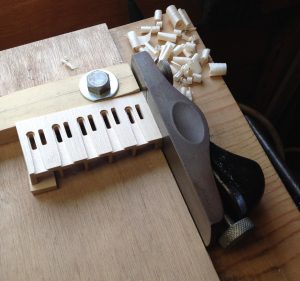
The bandsaw was never going to resaw the full width of the board, so I had to do it by hand. Step 1 was to make a kerfing saw; a special tool that cuts a shallow kerf at a specific distance from the face of the board.

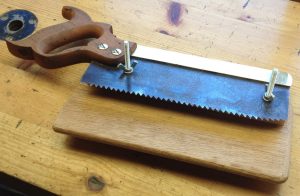
This kerf was then used to help guide the path of an ordinary rip saw.

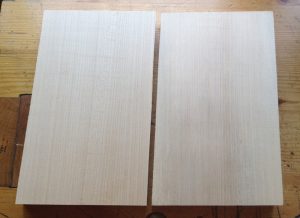
Here are the two roughly sawn reed pan blanks, with the rip saw I used behind them. I’ve since got a bigger rip saw with coarser teeth that would have made the job a bit easier, but it wasn’t too bad really because the boards are so small.

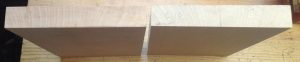
At this point I put the blanks on one side and started recording their weight once a day. Although this slab was supposedly kiln dried before I bought it, it still seemed to have a higher than equilibrium moisture content inside. They lost a few grammes of moisture each over the first few days, and warped a little too. After a couple of weeks they stopped losing weight, so I felt they were probably stable enough to carry on working on them. First I planed one face of each flat and smooth (this face was to become the bottom of the pan) and ripped them narrower, being careful to follow the direction of the grain as closely as possible.

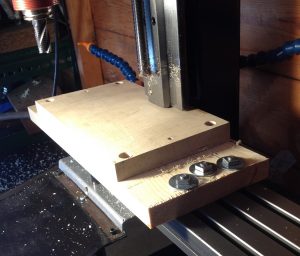
I left the other face alone because I planned to use the milling machine to flatten it, thus getting it very accurately parallel.

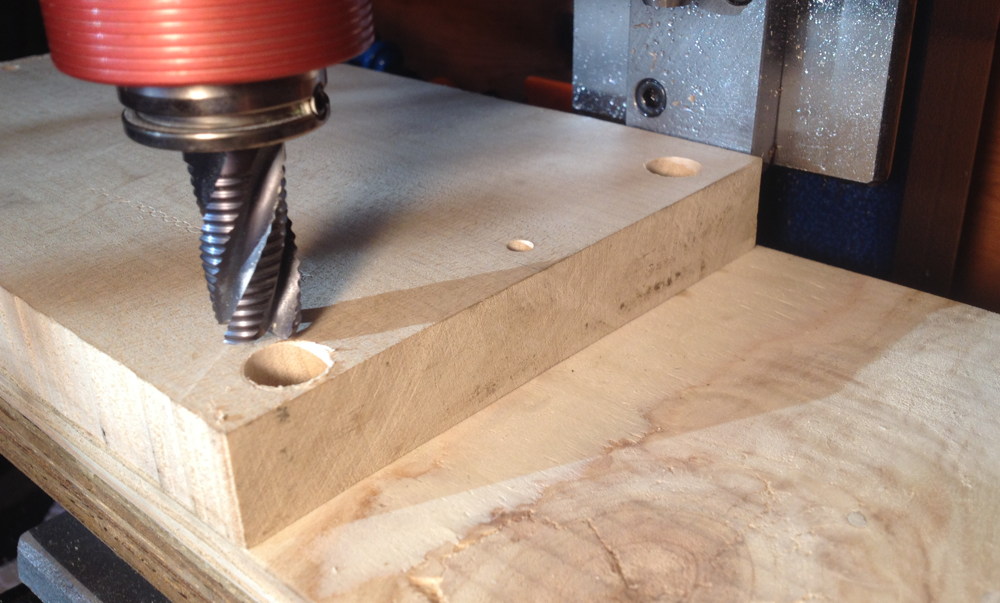
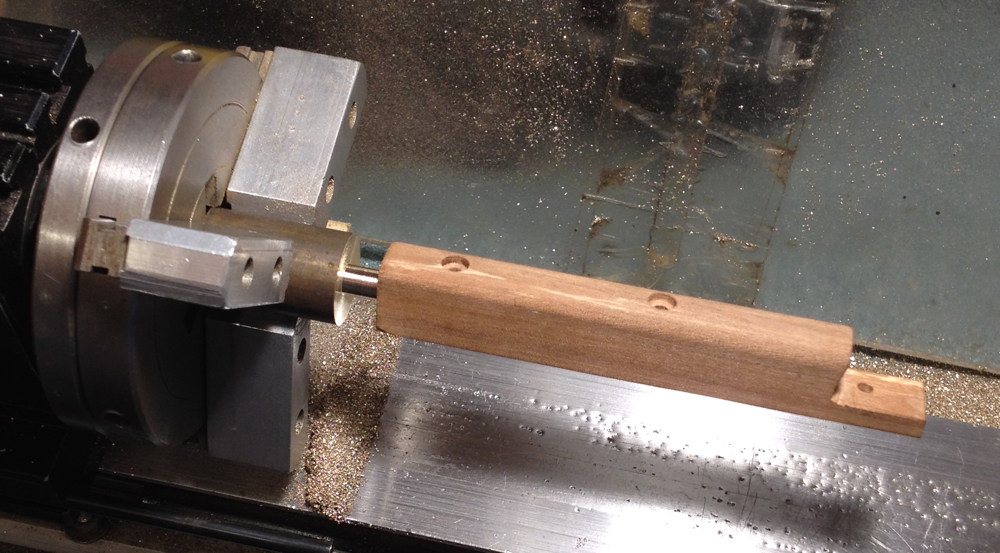
Problem! When I mounted the blank on the milling machine, the back edge fouled on the bottom of the Z axis slide before it was far enough back for the cutter to reach the front of the board.

The solution was to make a thinner fixture that (just) allowed the blank to fit under the Z slide. The two small holes in the middle of either end match with registration pins in the spoilboard, thus allowing the blank to be flipped over and still be in the same position, so the bottom reed slots end up in the right place relative to their chambers.

Oops. I did something stupid in zeroing the Z axis and plunged the 1/2″ end mill a few mm deep into the first blank. This could have been a major setback as I didn’t have a spare blank prepared, but luckily I managed to reposition the pan on the blank such that the damage was in an area that was due to be milled out anyway.

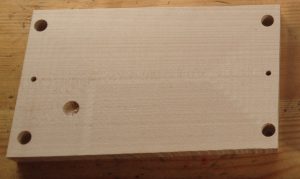
After truing up the top surface, I flipped the piece over and cut the bottom slots. There needed to be little pockets next to each dovetail slot for the dovetail cutter to start in, because the tool isn’t designed to be able to plunge into the work. I cut the wind slots for the bottom reeds at the same time as the dovetail slots, to ensure they are perfectly aligned with each other.

Bottom reed slots cut.

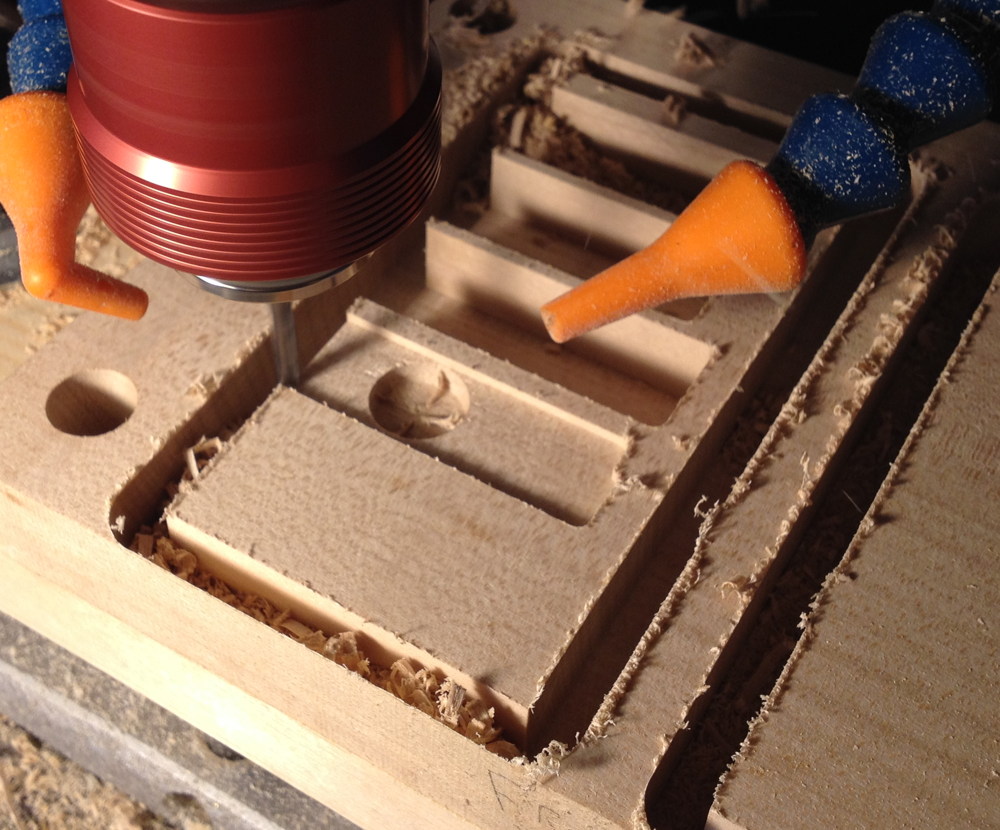
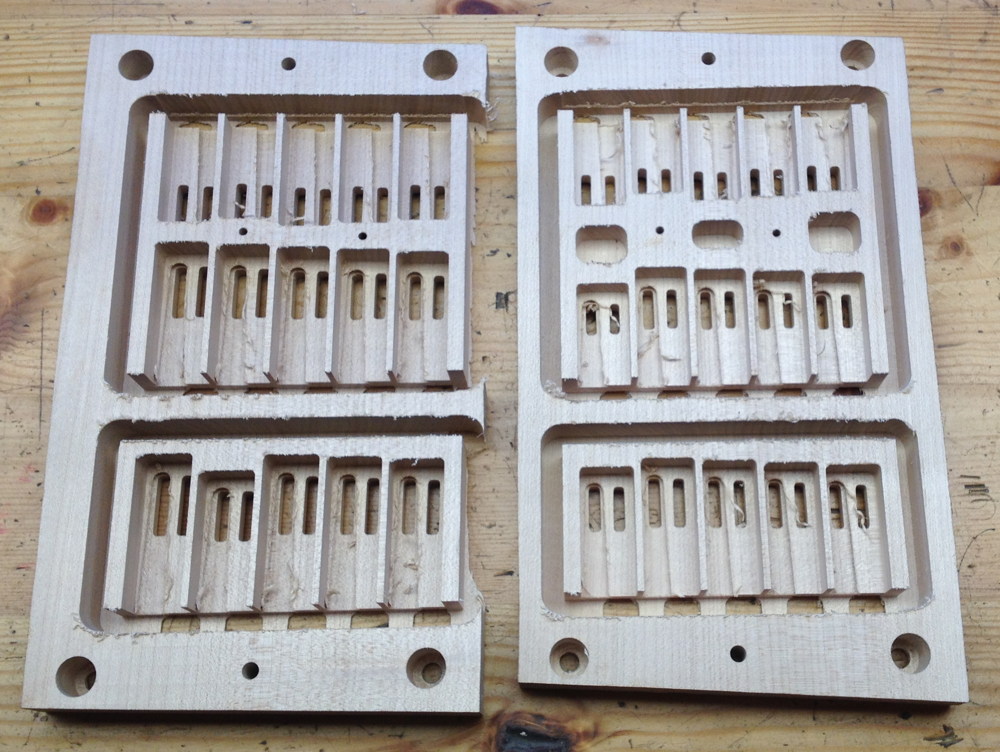
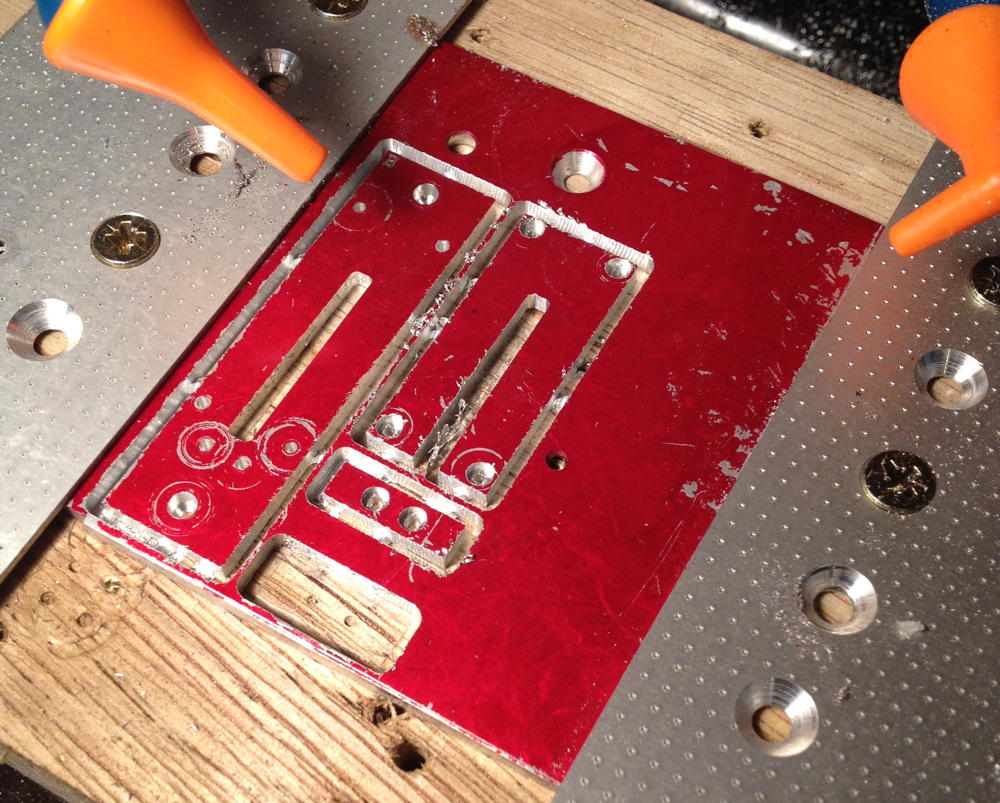
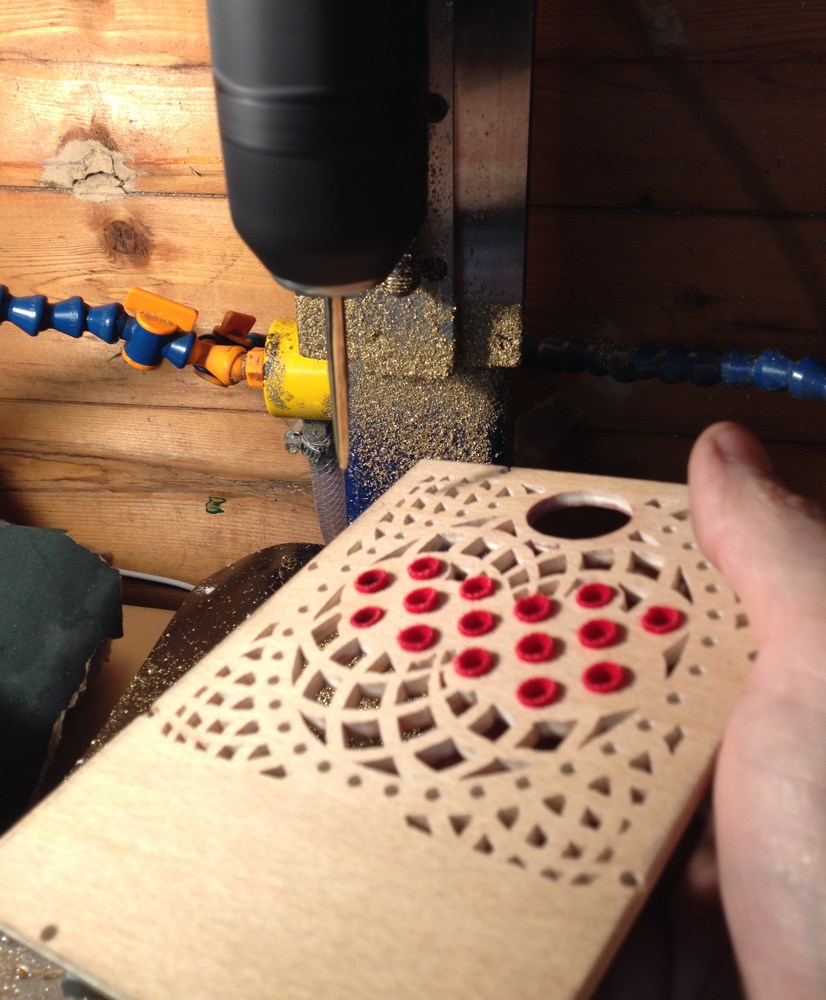
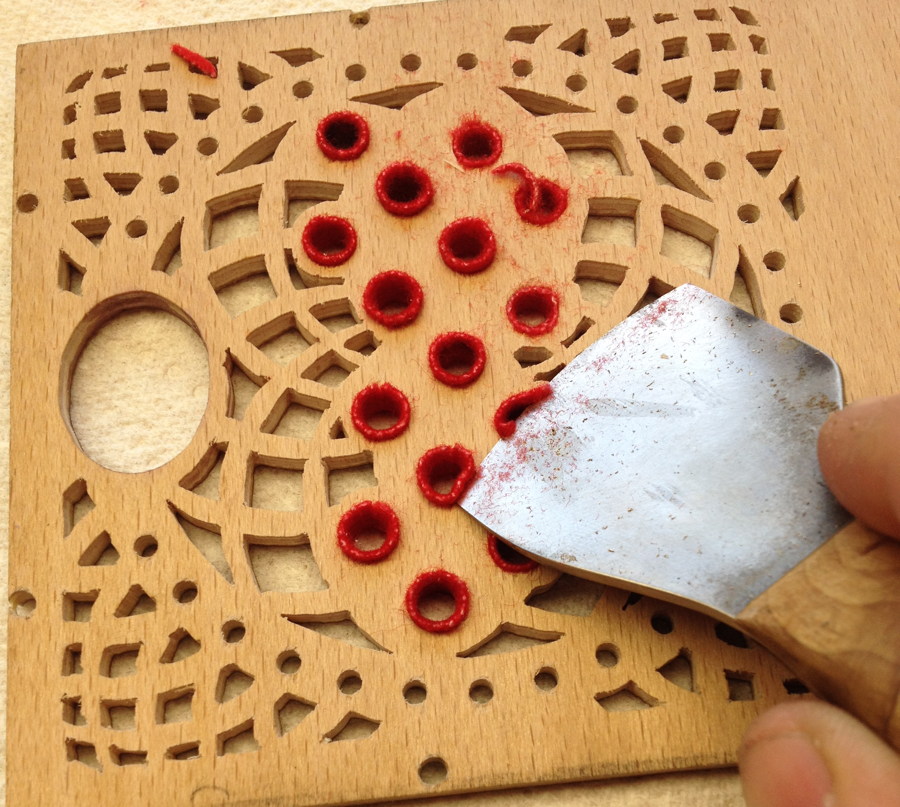
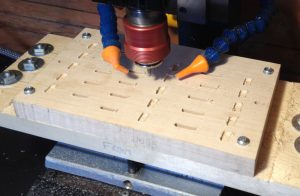
Back to the top again. I cut the outsides of the pans before the chambers, but not all the way through the board, because this reduced the amount of stress on the dividing walls. This picture shows how I managed to position my previous accident inside a region that was due to be removed.

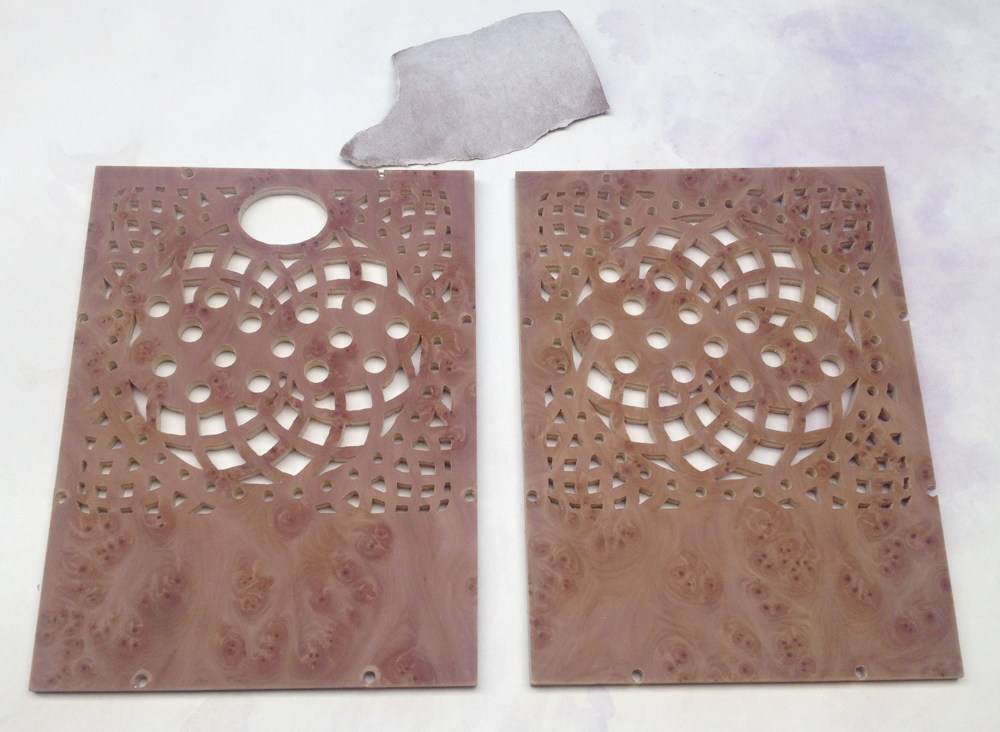
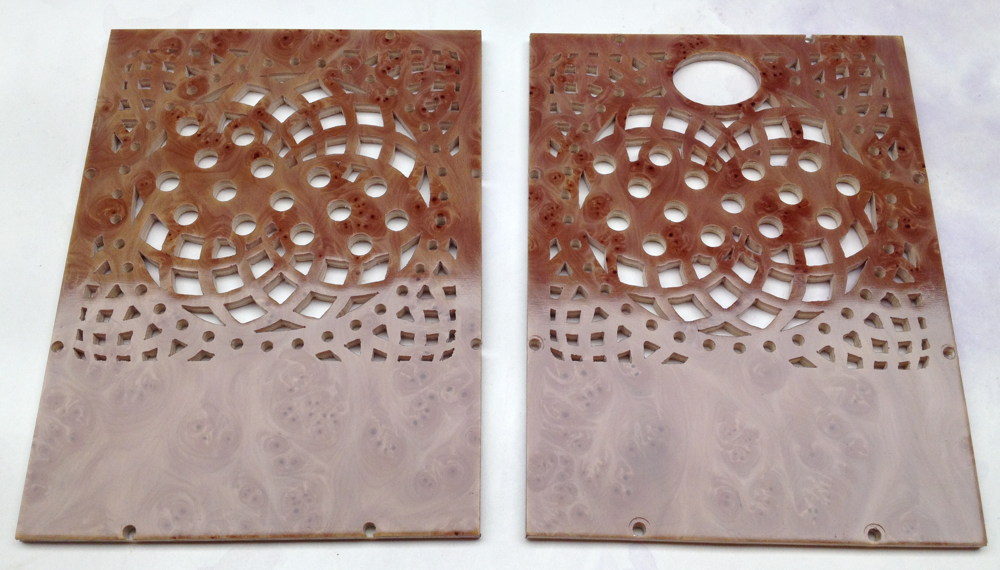
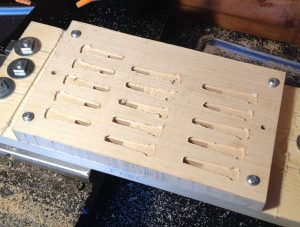
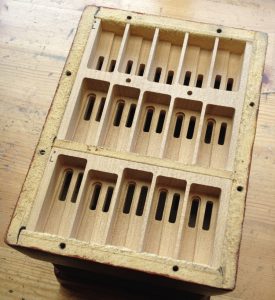
Both reed pans fully routed. The left hand one is off-centre because of the previously mentioned repositioning.

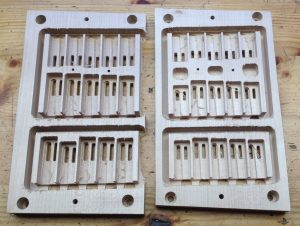
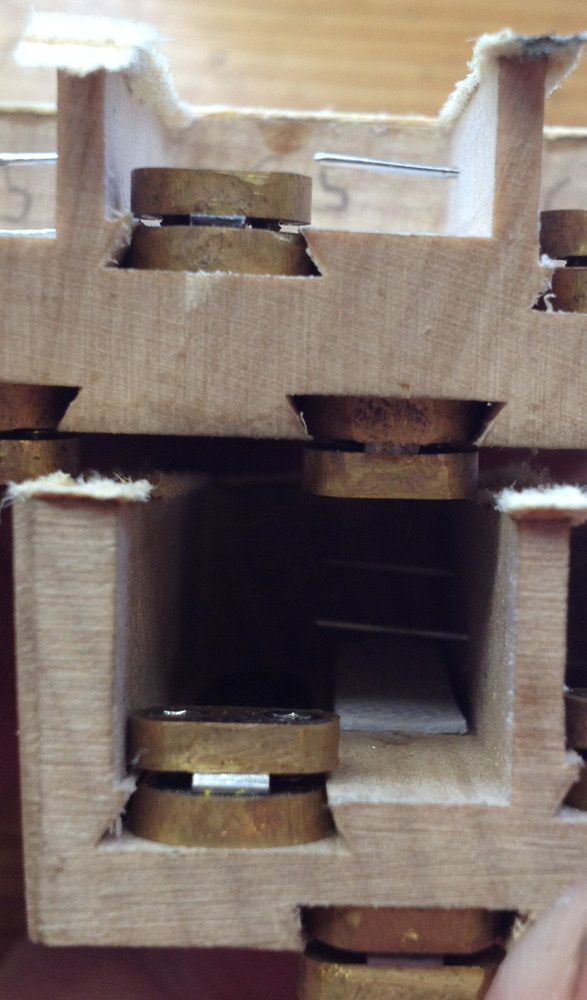
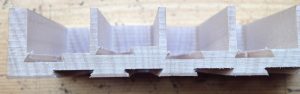
This picture shows a few interesting things. In order to fit the reeds in as tightly as possible, the frames overlap, but not quite enough for a dovetail slot to break into the opposite side’s wind slot. They also undercut the walls slightly, more so at the outside edge (because the frames are tapered). Thirdly, I tried something new here that I haven’t heard of any other maker doing in this way: I made the chambers different depths, based on a ratio of the chamber length. It was common for English concertinas to have sloping pans, where the chambers at one end were deeper than at the other, but that only really works when it’s possible to arrange the pan in such a way that the pitches gradually increase from one end to the other. The way I did it here, it was possible to have a deep chamber right next to a shallow one (the first and second chambers are an octave apart).

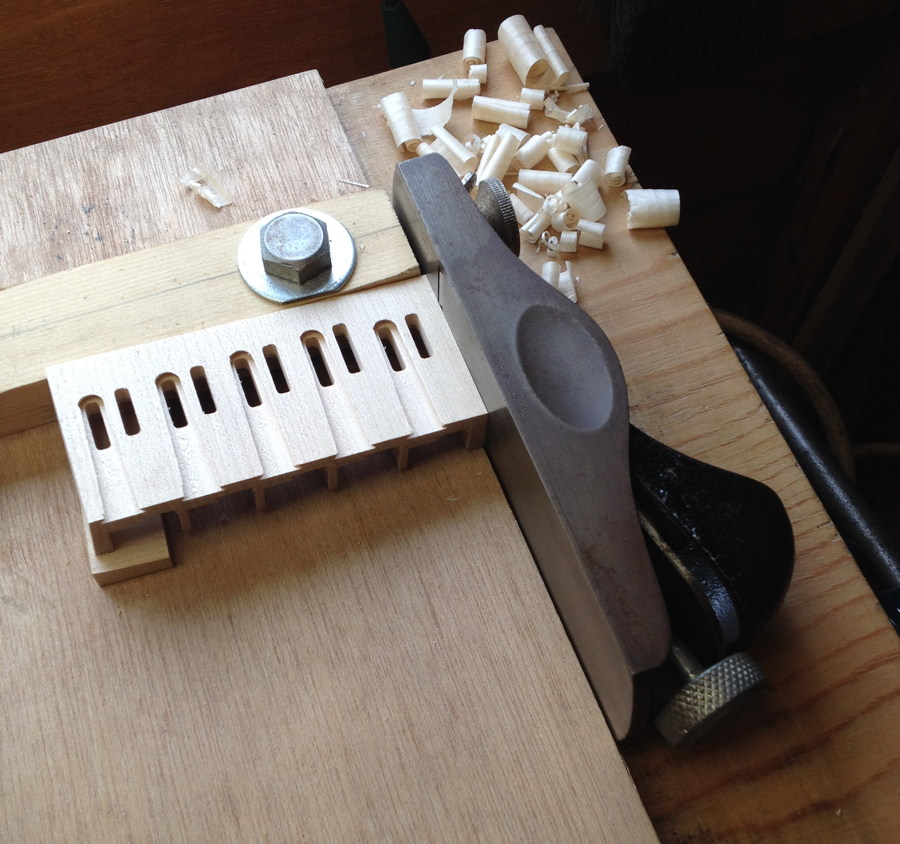
The inner walls of the bellows frame are tapered to get a good seal, so I had to cut a matching taper on the outsides of the reed pans. The side walls I was able to do on the shooting board with a shim to tilt it up.

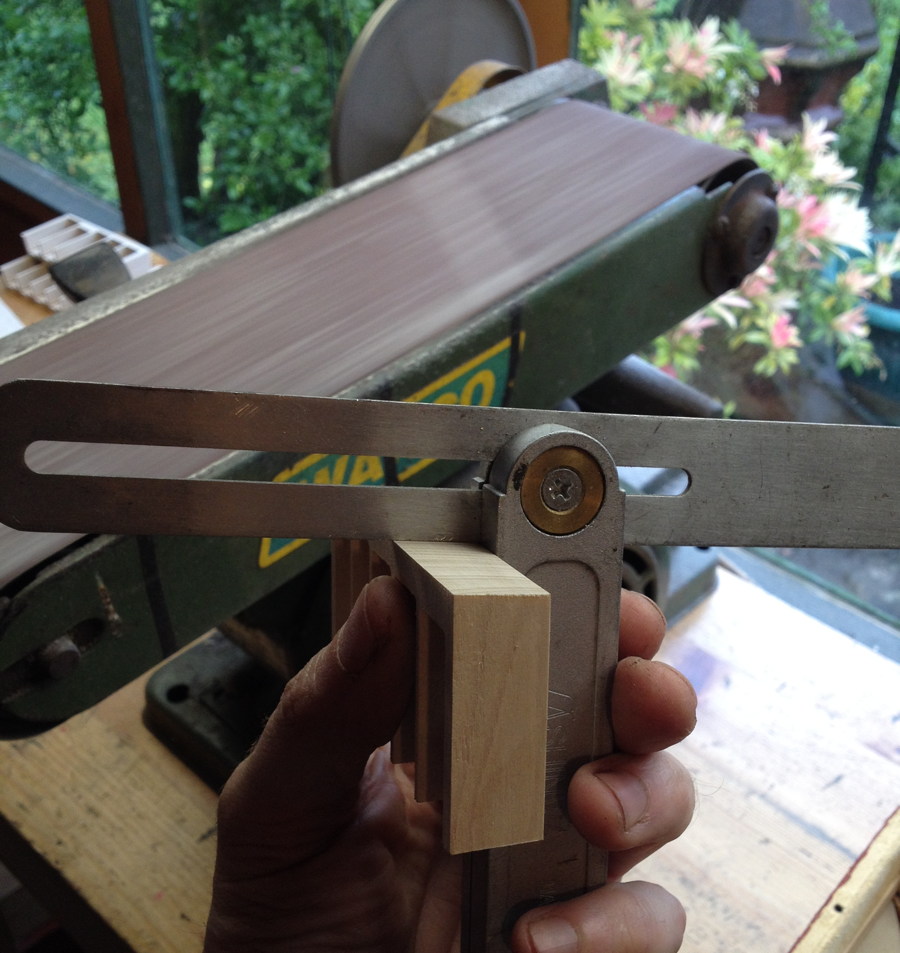
I daren’t try to use the shooting board to plane across the ends of the chamber walls, so I used the linisher for that instead.

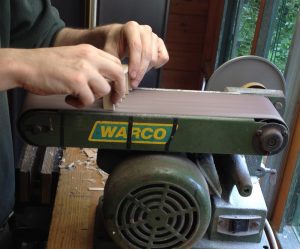
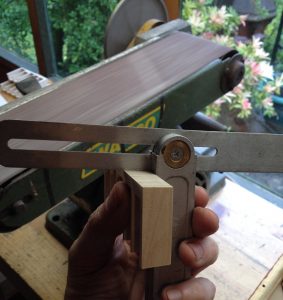
Checking the angle with a bevel gauge.

It took a fair bit of careful work to get a good fit because the earlier problems with the frames not gluing together perfectly square meant the holes the reed pans had to fit into weren’t quite square either. In hindsight it might have been easier if I’d fit the pans to the frames before I put the chamois leather gaskets on the frames, and it definitely would have been much easier to do it before attaching the bellows to the frames.

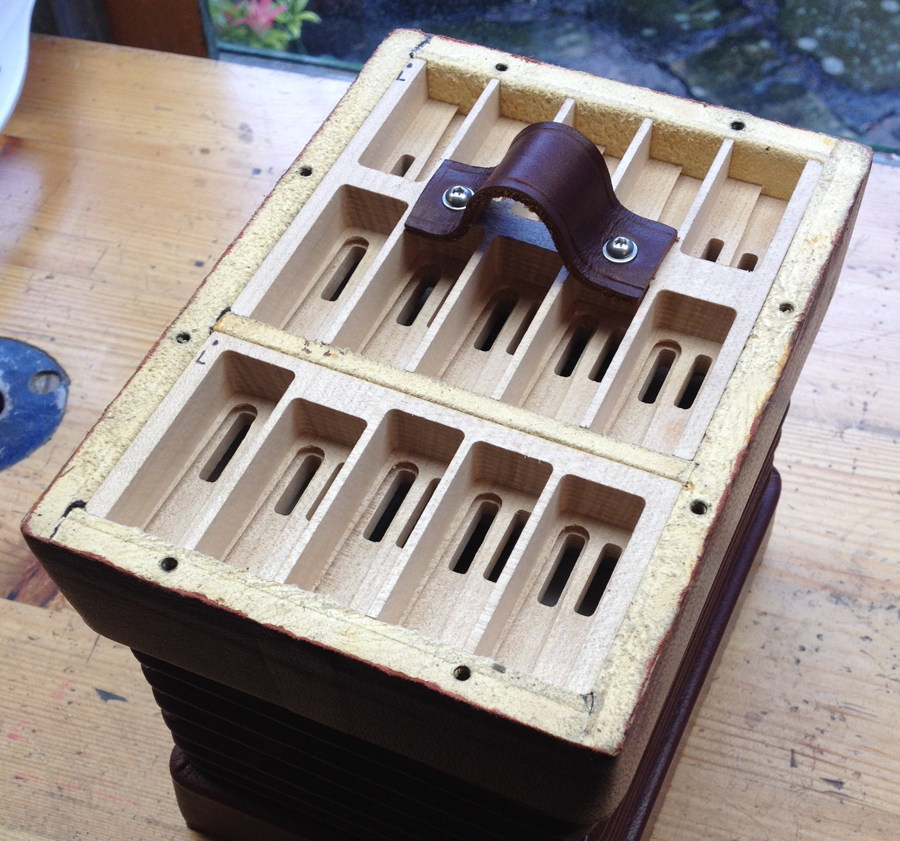
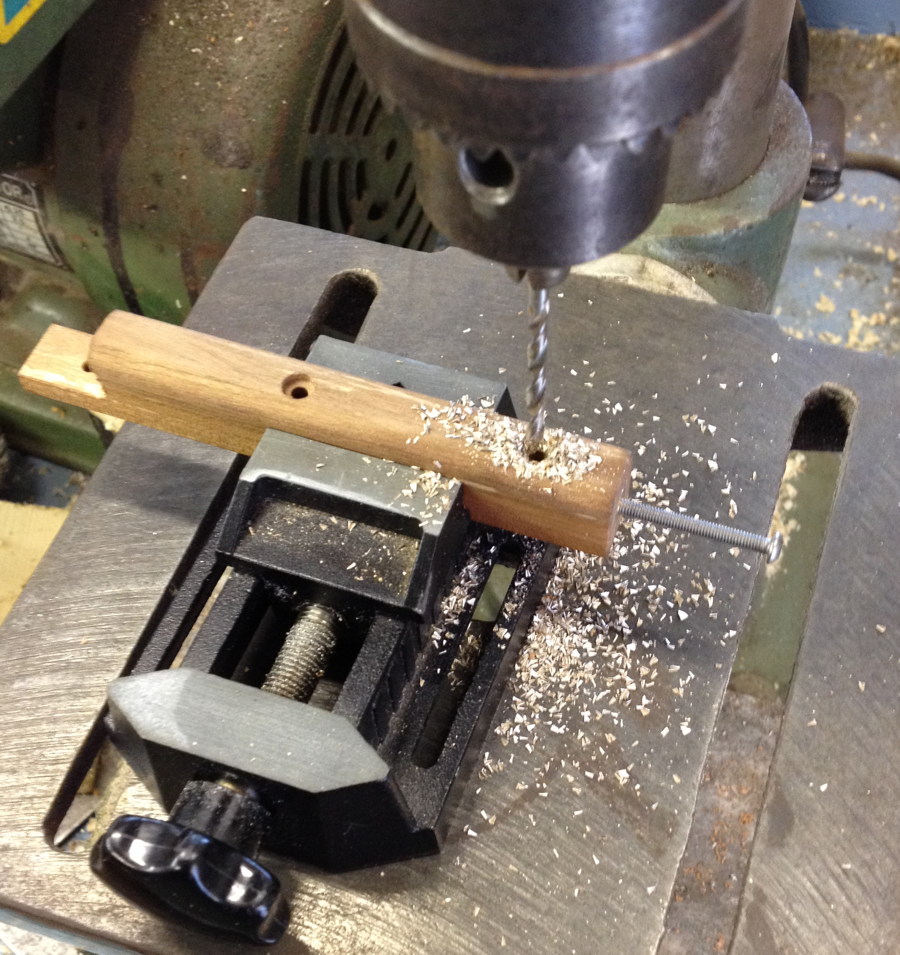
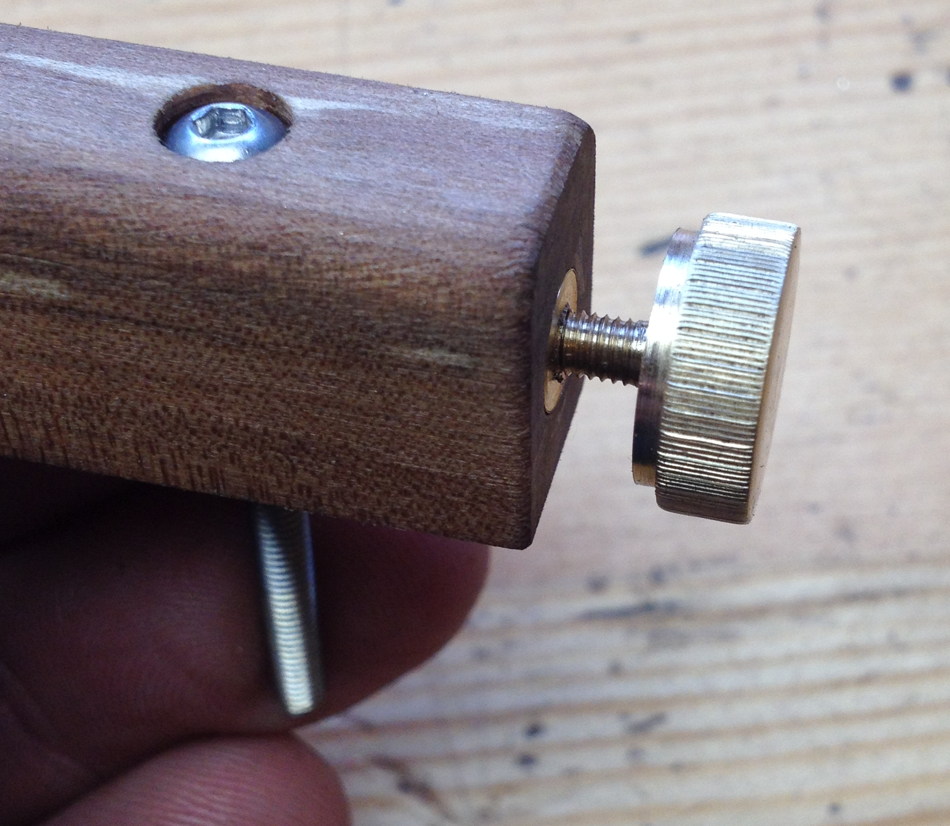
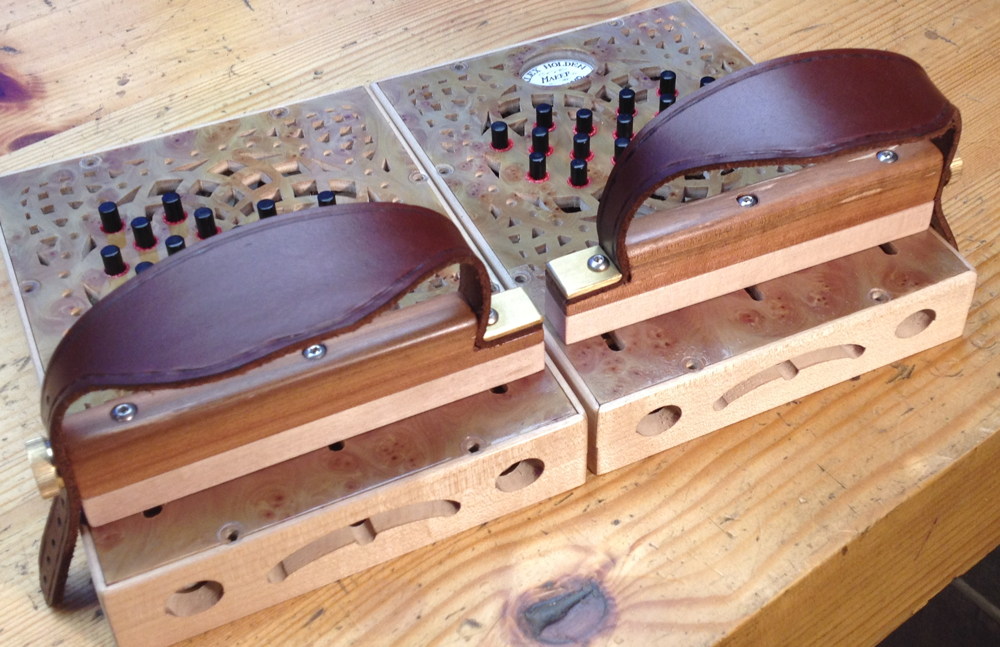
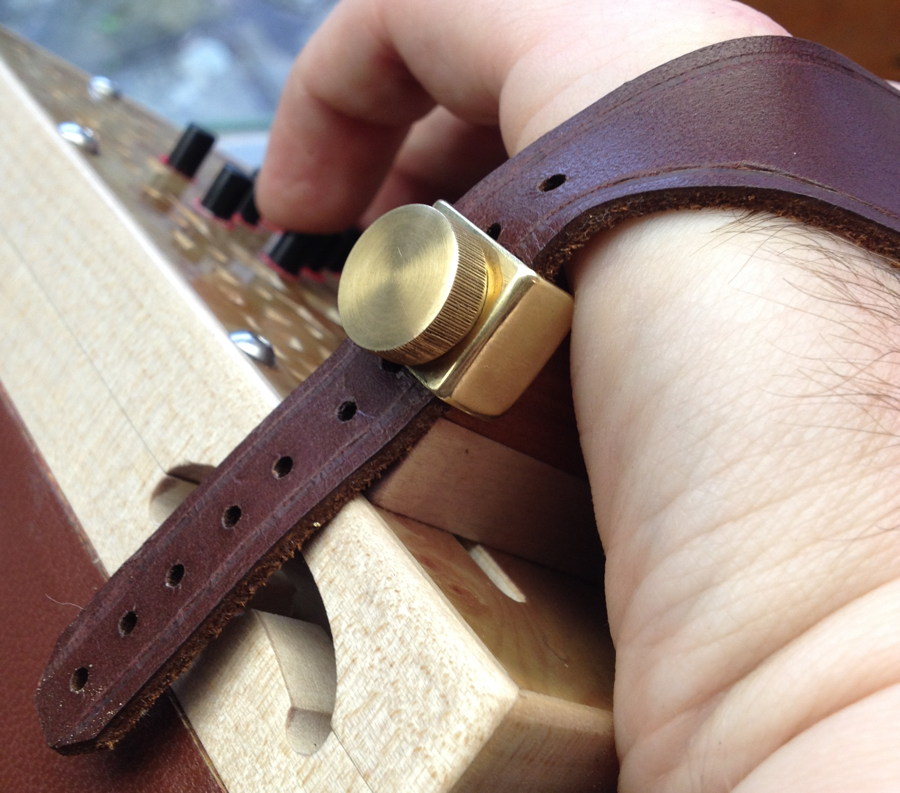
If you’re familiar with more conventional concertina reed pans, you’re probably wondering at this point how you pull out the reed pan (which tends to be a fairly tight fit) without a hole in the middle to put your fingers through. Because I didn’t have any space for the finger hole, particularly on the left hand side, I instead attached captive nut plates on the bottoms of the larger pans and made a leather handle that screws onto the pan.

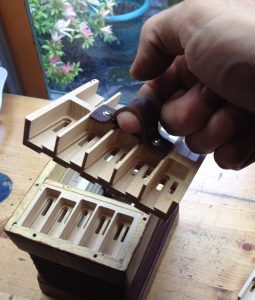
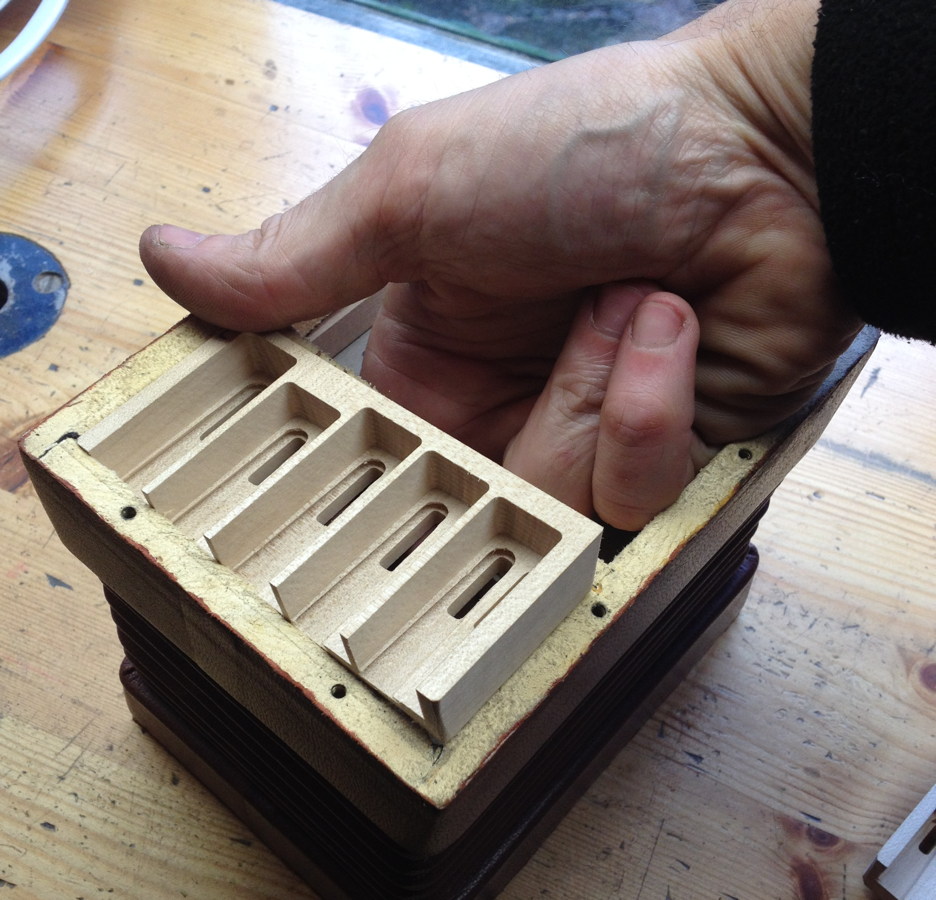
Once you have lifted out the larger pan, you can put your fingers through the hole and push out the small pan from underneath.

Here’s a quick video clip showing the first time the instrument made a sound:

https://www.instagram.com/p/BUKcZ9XDiGZ/

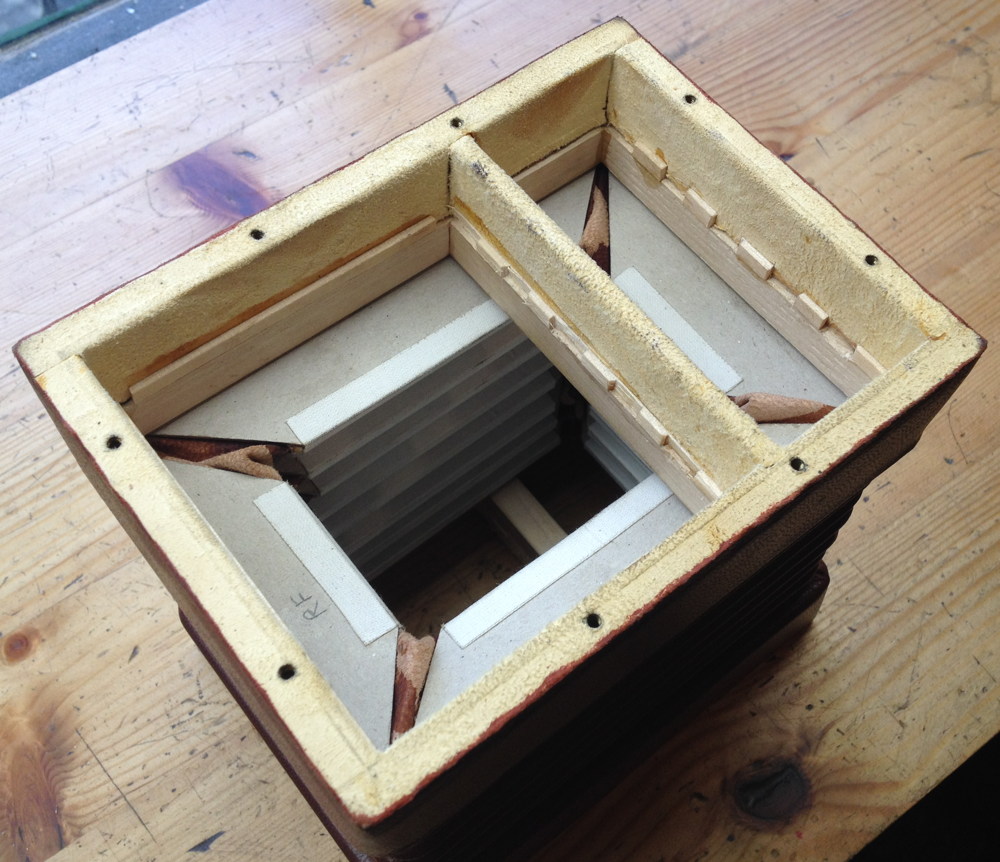
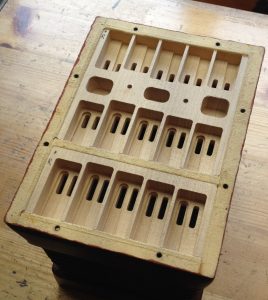
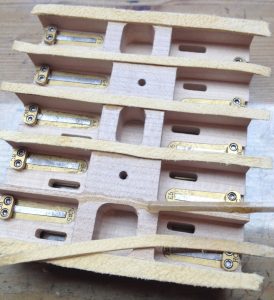
When I made the bellows frames I didn’t know how deep the reed pans were going to be, so I allowed a generous depth of 20mm and put off the decision until later. As it happens, I eventually made the left hand pan 18mm deep and the right hand pan 16.5mm, which meant I then had to add some sort of spacer blocks that stopped the pans going in too deep. I thought I could just make strips that went all the way around, but they fouled on the bottom reed clamps so I had to cut a lot of notches out of them. In hindsight I went about this a particularly difficult and tedious way, and on future instruments I will be reverting to the traditional-style corner blocks instead, preferably fitting them to the frames before the bellows!

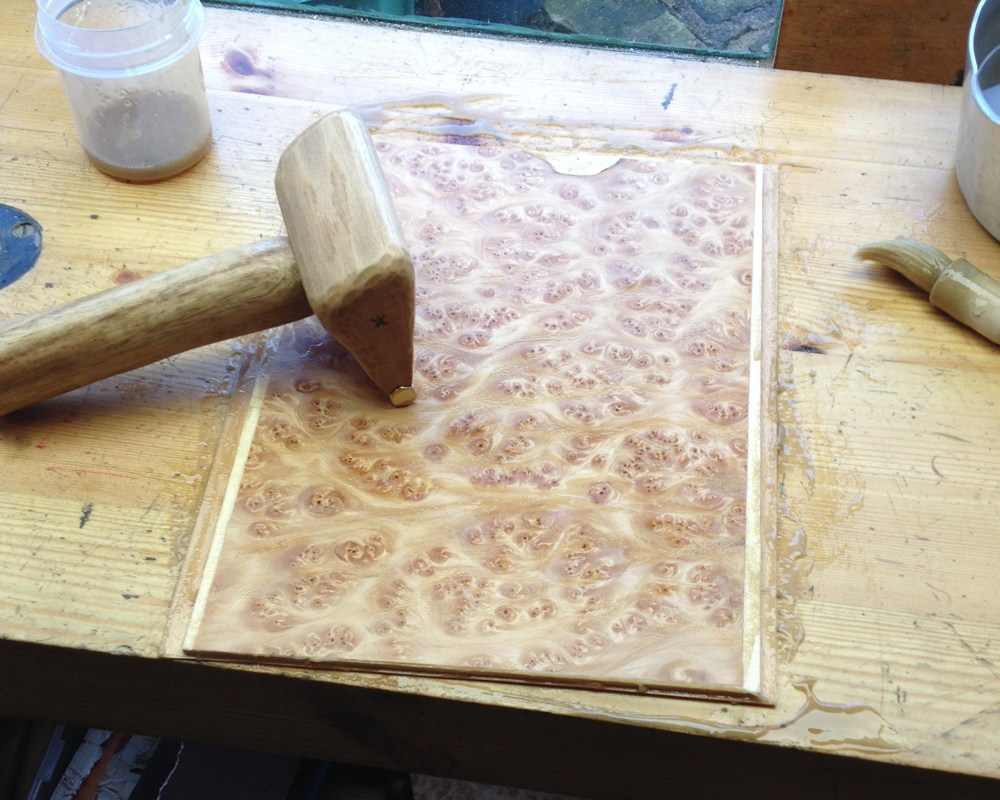
Gluing strips of chamois leather to the tops of the walls with rabbit skin glue. I found that skiving the ends of these strips needs a slightly different technique to skiving bellows leather because the chamois is so soft and stretchy.

All the gaskets installed.

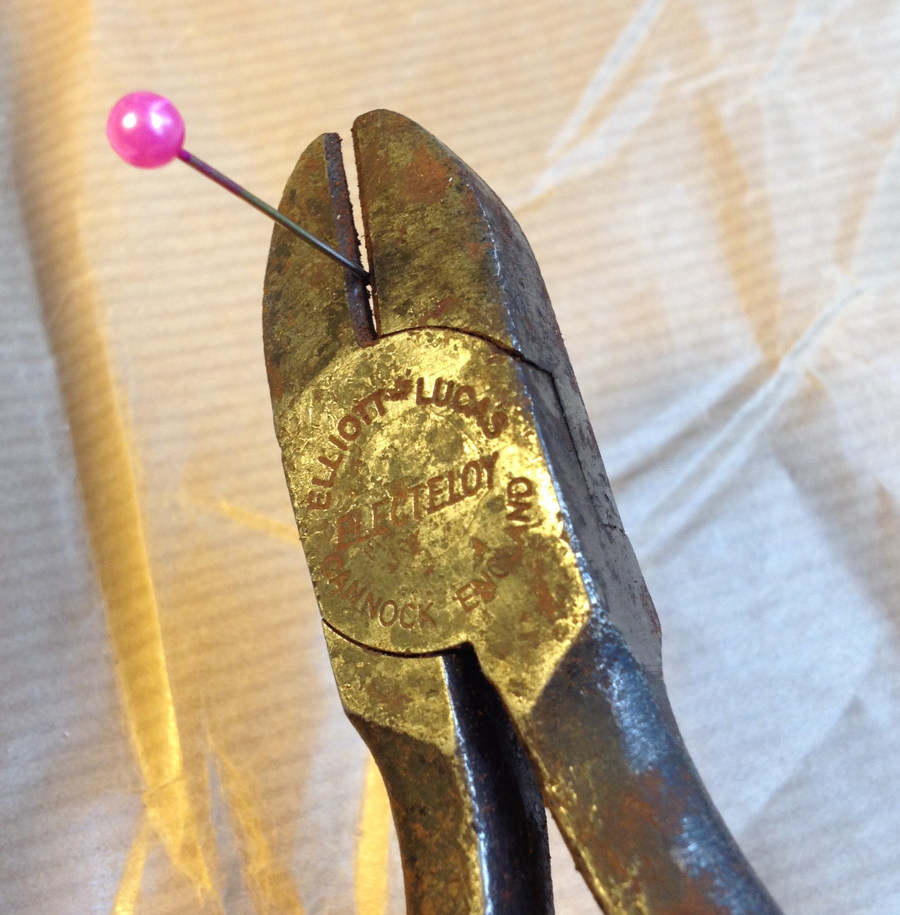
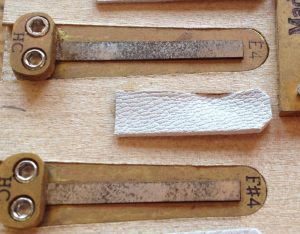
I made the valve restraint pins from chrome plated sewing pins. After struggling to push a few of them through the chamber walls with needle nose pliers, I found they went in a bit easier if I sharpened them on a stone first.

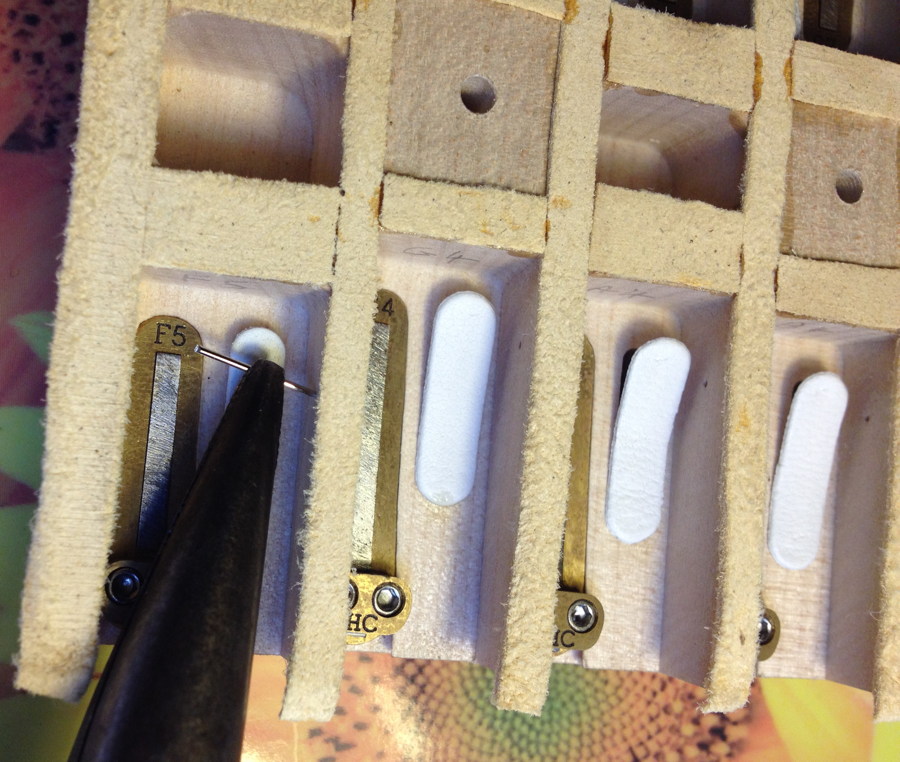
There’s a bit of a knack to deciding exactly where to place the pins, so as to allow the valve to open properly without getting stuck. On my next one I’m planning to try making the pins from a slightly smaller diameter stainless steel spring wire instead.

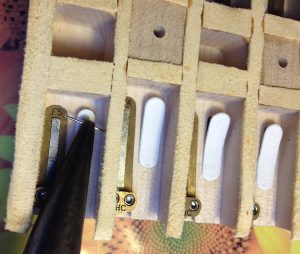
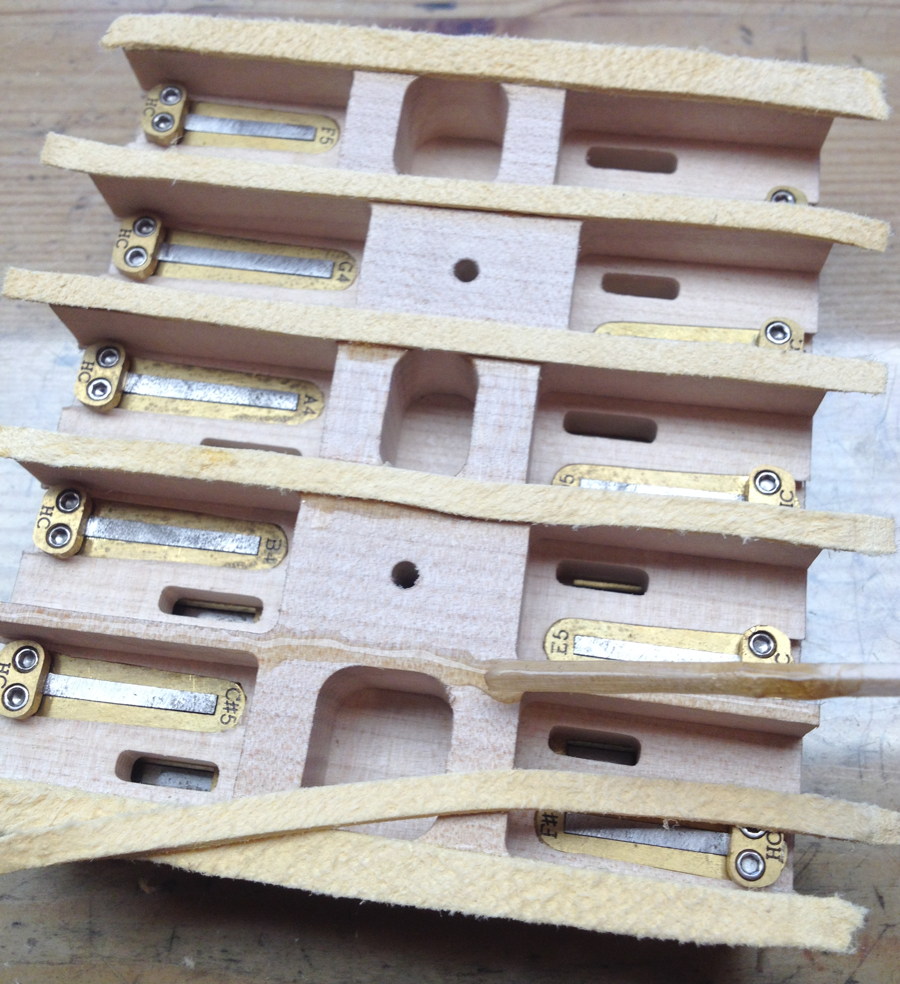
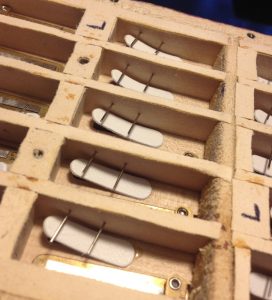
I had lots of problems with the valves. My first attempt, I cut them by hand from sheepskin skiver, and they were terrible. The leather was too stiff, and every note sounded muffled if it played at all. My second attempt, I bought a set of valves from a parts supplier, and I’m not totally sure what the problem was but they didn’t seem to want to stay flat against the pans. This photo shows how some of them have lifted up until they are touching the restraint pins. This caused a problem with the bottom few notes making a sort of ‘raspberry’ noise if you changed bellows direction while holding the button down because the valves weren’t keen to stay closed.

On advice from several other makers, I ordered some hides of Columbia Pneumatic Leather from Columbia Organ Leathers (who are based in a town called Columbia, Pennsylvania, not the Republic of Columbia). It’s not cheap but it’s nice stuff. I removed all the previous valves (I found the easiest way was to just rip them off, then use hot water to remove the remnants of the old glue) and cut a new set, mostly from the extra heavy weight hide, though I did use the heavy weight for the higher notes. It was recommended to me to wash the leather and dry it on a sheet of glass to make it a bit stiffer, but I couldn’t tell any difference before and after washing (maybe I did it wrong). For the most part, the new valves behaved much better and solved the problems I was having. A few of them misbehaved in testing, not always for obvious reasons, but replacing them solved the problem.

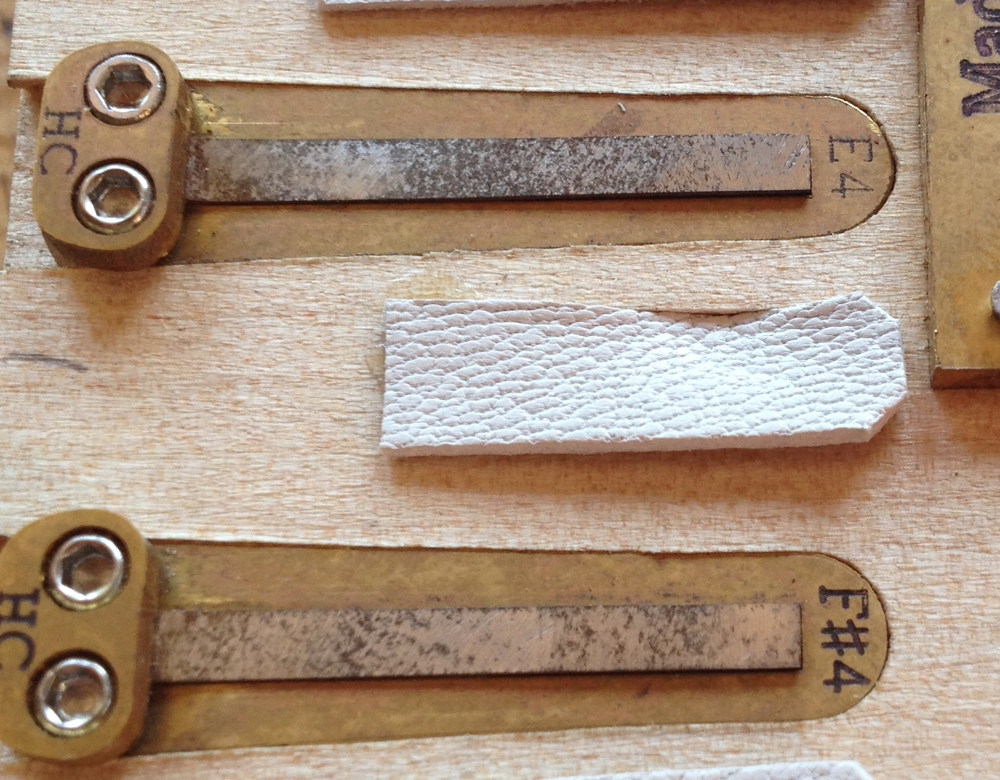
Here’s one of the misbehaving valves where I was able to find the cause. If I played the blow reed, then played the corresponding suck reed very softly, it would start muffled, then ‘pop’ and play normally.

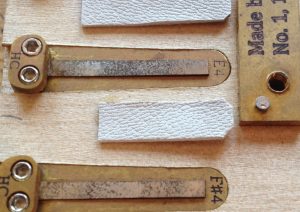
It turned out I had glued it off-centre, and one edge of the valve was getting sucked down into the wind slot.

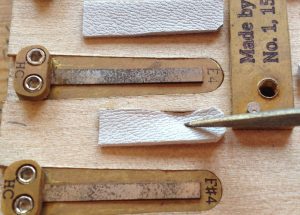
Replacing it in the correct position solved the problem. It’s quite tricky to get them positioned right because you can’t see the slot while you are gluing the valve down. I’ve considered drawing a centre line in pencil first.

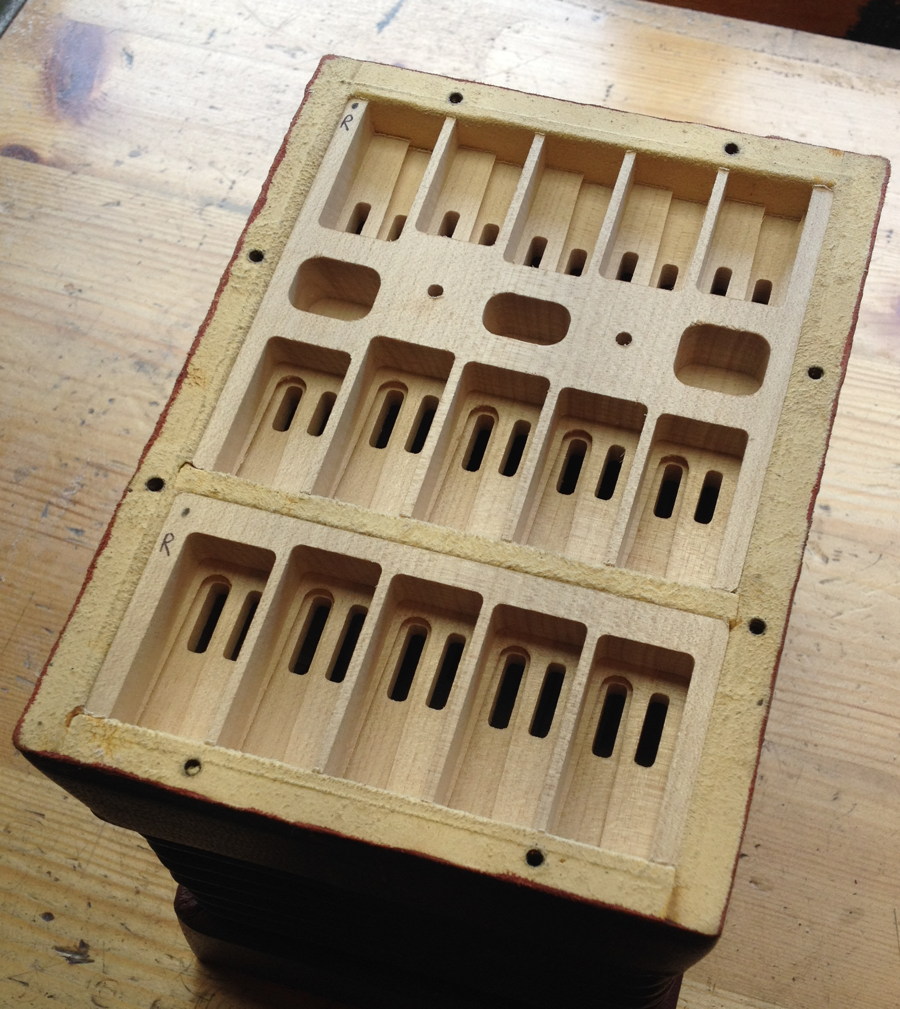
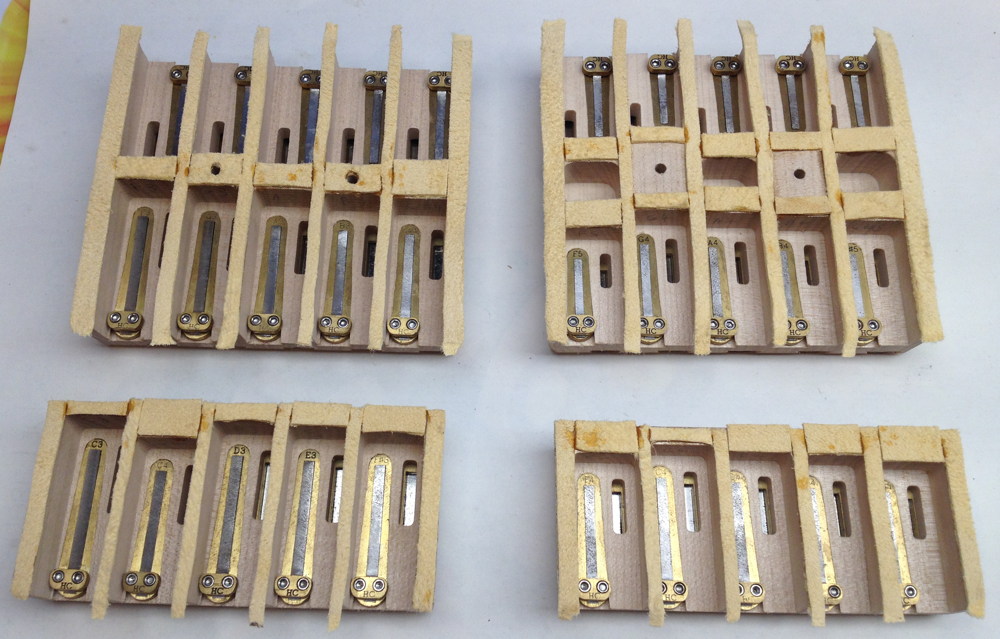
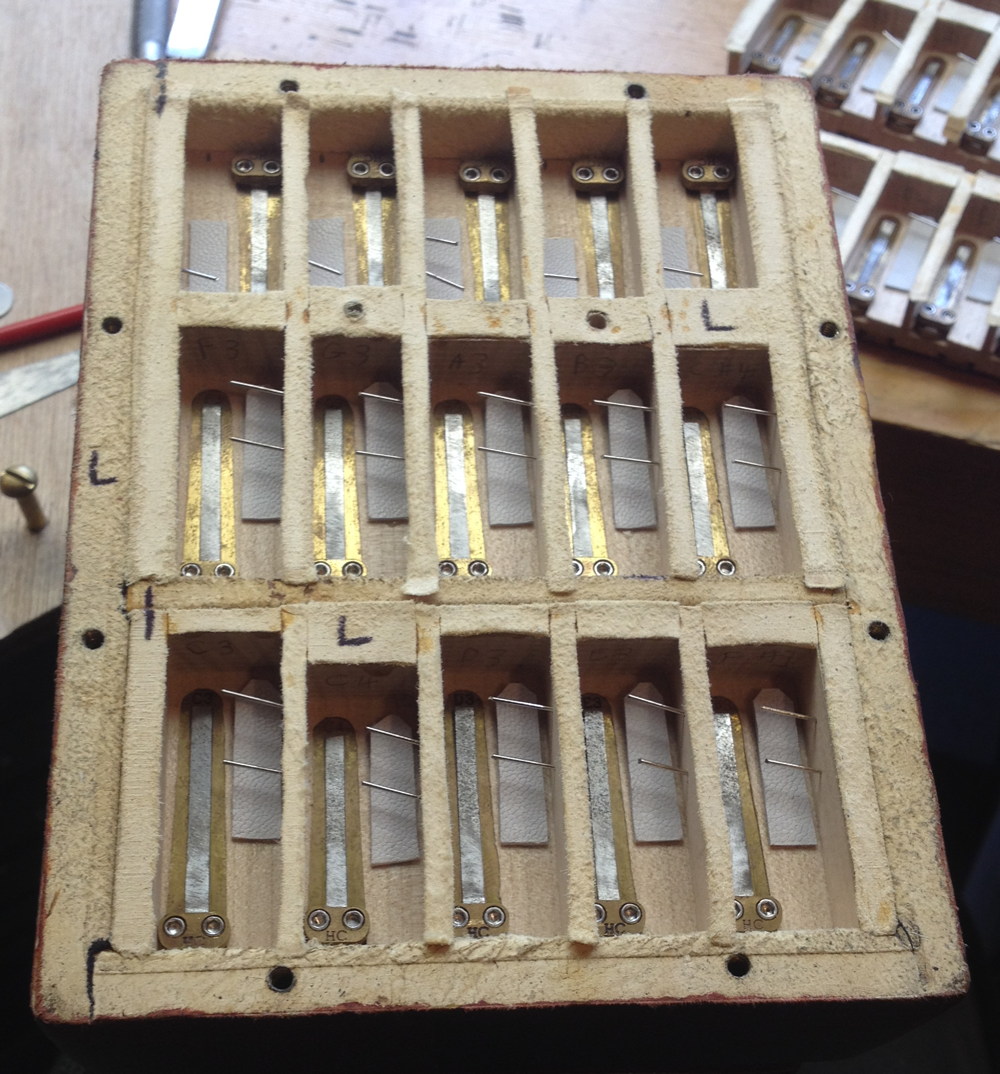
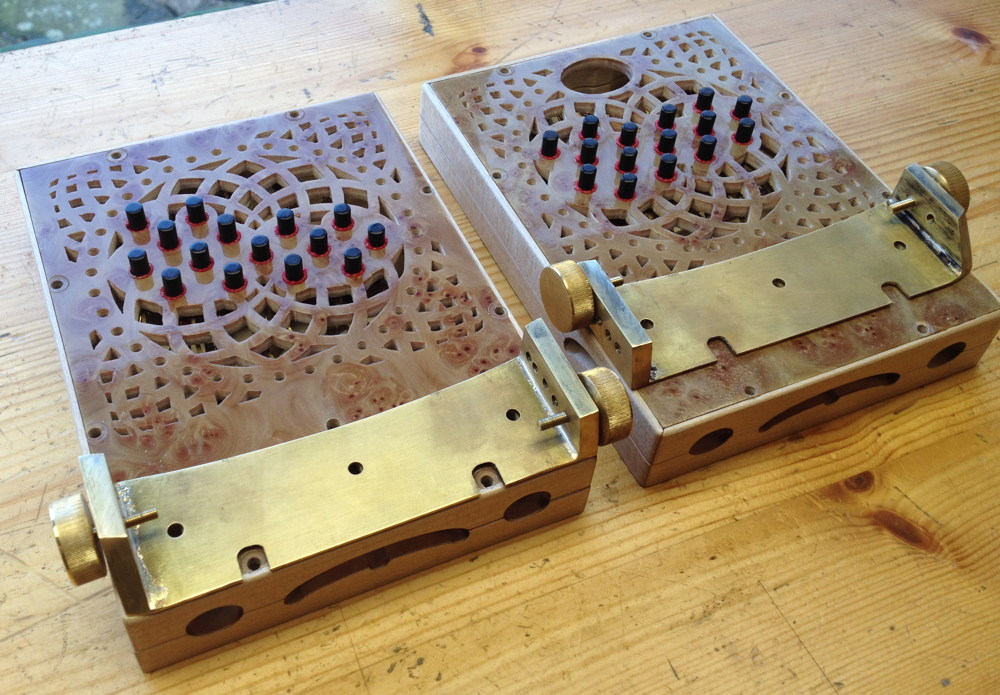
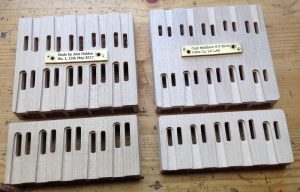
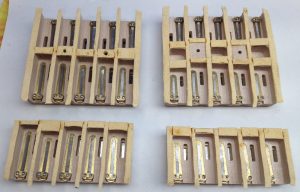
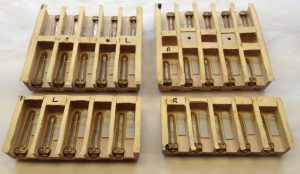
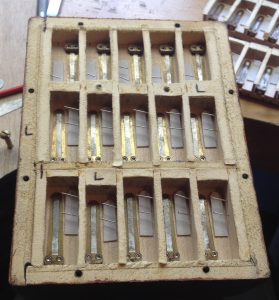
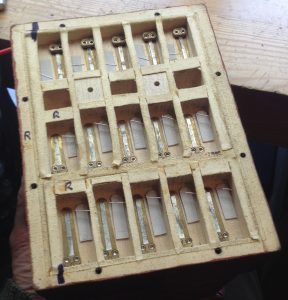
The finished reed pans. Note all the marks in biro indicating where and which way round they fit.

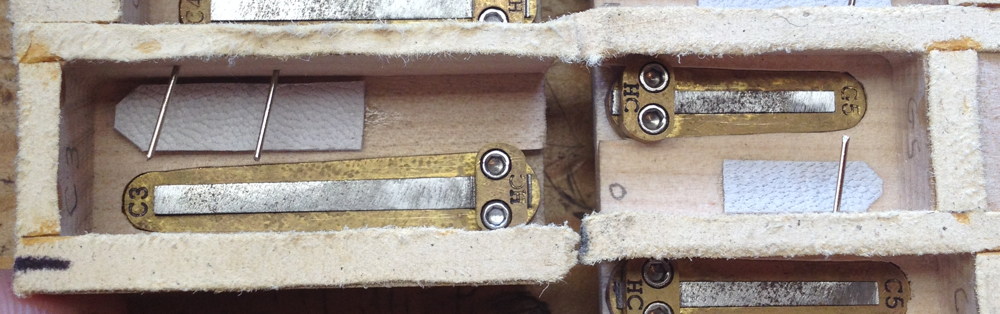
These two pictures show the difference in size between the biggest chamber (C3) and the smallest (G5). In hindsight I suspect I could have made them all a bit smaller, but I was trying to be conservative and working on the theory that a too-small chamber will sound terrible, whereas a too-big one will just start up slowly. In fact, as far as I can tell, they all seem to respond pretty quickly.

The final thing remaining was fine tuning all the reeds, and bits and pieces of troubleshooting: tweaking the action to eliminate ciphers, replacing misbehaving valves, etc. The client asked me to tune the reeds in quarter comma meantone, with G as the root note. I made a quick video clip showing it playing a few chords, though in hindsight this doesn’t really show it off very well. You’ll have to take my word for it that it has a much nicer sound in person than recorded on an iPhone microphone. I hope at some point I’ll get to hear what it sounds like in the hands of a good player.

https://www.instagram.com/p/BWuuyH5DyWq/

Turning End Bolts

On my first instrument, the ends were held on with commercially-made stainless steel allen-head M3 screws. They work fine, but I felt they gave the instrument a bit of a modern, almost industrial look.

I am currently working on restoring a vintage Lachenal Anglo for a client, and the end bolts and captive nuts are missing or badly worn due to past over-tightening (probably from trying to cure leaks that were actually due to internal structural problems). Needless to say, it wouldn’t have been appropriate to replace them with modern screws. Rather than try to source a better second hand set from a parts dealer, I decided it was time to figure out how to make my own new brass end bolts from scratch.

Bidirectional Reed Experiments

Recently I was asked to try to come up with a concertina reed that works in both directions, or at least to figure out why it hasn’t been done before. Ordinarily, a free reed only speaks when you suck air down past the tongue, into and through the vent in the frame. Most concertinas have a pair of reeds controlled by each button; one inside the reed chamber that only sounds on the pull stroke and another mounted on the underside of the reed pan that only sounds on the push stroke. Anglo instruments take advantage of this to play different notes on pull and push (this is known as bisonoricity), whereas English and Duet instruments play the same note in both directions so they need a pair of identical reeds for every button. If it was possible to make a bidirectional reed that worked as well as two standard reeds, it could potentially enable unisonoric instruments to be made smaller, lighter, and cheaper.

The way I went about solving the problem was to first build what was pretty much a standard reed in an oversized frame and check that it sounded normally in the suck direction, then screwed on a roughly horseshoe-shaped plate that fit around the tongue. I didn’t expect this to work because there was no way for a significant amount of air to get past the tongue to start the oscillation cycle, and indeed it didn’t.

bidi_reeds_1

I also modified my bellows bench a little to allow me to block up the standard dovetail socket and screw the new oversized frame to it elsewhere, and provided a means to block the one-way valve that normally releases air when I raise the bellows so that the rig only works in the suck direction.

bidi_reeds_2

Next I took the horseshoe back off and started experimenting with filing away various parts of the bottom of the horseshoe vent around the tongue, to provide some space for air to get to and past the tongue and allow it to start. Eventually I got it to sound, albeit poorly, in the suck direction, and it even made a tiny bit of sound in the push direction.

I had a theory that the triangular profile resulting from filing the underside of the horseshoe vent was causing the airflow to be cut off too gradually in the blow direction, so I next made a new horseshoe piece, this time with a square-sided recess milled into the underside so there was air space all around the tongue. This was supposed to cut the flow off more cleanly when the tongue swung up into the horseshoe vent.

bidi_reeds_3

This did work a little better, however it was very inefficient, very quiet, and worked much better in the suck direction than the blow direction. I figured that the reason it worked unequally was because the reed tongue was profiled only on the top surface, so when it passed into the bottom vent it cut the airflow cleanly and suddenly whereas when it passed into the top vent it cut it progressively from the tip towards the root.

In order to try to solve this asymmetry, I built a second, more complicated, reed. On this one the reed tongue is set into the bottom frame by half the thickness of the reed stock, it is profiled equally on top and bottom of the tongue, and I also restricted the air pocket to the last third of the tongue, which I tried to profile fairly flat so that it cuts the airflow fairly cleanly in both directions.bidi_reeds_4

The second reed was the most successful prototype I built, however it revealed the biggest flaw with the idea. When set up carefully it works pretty equally in both directions, however the amplitude is very limited compared to a standard reed:

I believe I now understand the reason for this, however it is a little tricky to explain. Before starting my experiments I had observed that with a standard reed playing at normal volume, the tongue swings well above and below the restriction point at the entrance to the vent. I imagined that with the bidirectional reed, it would swing past both restriction points and generate a similar amplitude level, perhaps with a different tone. This was based on a couple of misunderstandings about how reeds work.

My current understanding of what happens with a standard reed when it first starts up is that the tongue gets drawn down towards the frame (it needs to be set such that at rest there is a slight gap between the tongue and frame so air can start flowing). I don’t fully understand the physics behind why this happens, but it seems to me that the faster the airflow into the vent, the harder the tongue gets pulled down. The tongue descending towards the vent opening restricts the airflow into the vent, the force pulling the tongue down reduces, and the tongue springs back up, eventually peaking slightly higher than its rest position. Because it is higher, the gap between the tongue and the frame is larger and more air is able to flow through it than on the first cycle, so it gets drawn down a bit further, and springs back a bit higher than before. Over the course of a number of cycles, the amplitude builds up and up until the tongue is swinging a long way below the top of the vent. In order for this build-up to work, it’s important that every time the tongue swings a bit higher, it results in more air flowing through the vent, which causes the tongue to be pulled down harder and the amplitude of the oscillation to increase. Eventually the oscillation reaches an equilibrium level that depends on the pressure differential between the top and bottom of the reed frame. If you squeeze the bellows harder, the tongue oscillates to a greater height and the ‘packets’ of air being chopped up by the tongue passing through the frame are larger and more energetic, which results in a greater volume of sound from the instrument.

What goes wrong with my bidirectional reed that prevents it developing a decent amplitude at normal bellows pressure is that the second vent restriction, the one ‘above’ the tongue (whichever direction that happens to be), cuts off the air supply whenever the tongue tries to swing higher than the opening into the second frame. It’s impossible for the amplitude of the oscillation to ever build up any higher than the second frame, because it restricts the air supply as the tongue swings higher instead of allowing more air through. It is a lot like the governor on an engine, which throttles the fuel supply whenever it tries to exceed a certain speed.

It is possible to increase the amplitude at which the limiting occurs by increasing the distance between the two vent openings inside the reed, however there is a limit to how far you can take this. If the distance is too wide, the reed oscillations take several seconds to build up to an audible level, or never start up at all. It also becomes impossible to deliberately play the reed very quietly: you end up with a reed that has essentially no dynamic range.

To make matters worse, as well as the limited volume issue, there are several other disadvantages to this type of reed:

  1. They seem to be less efficient (i.e. they use more air than a standard reed operating at a similarly low amplitude), possibly because the way it is constructed to allow it to perform equally in both directions has the side effect of not cutting the airflow very cleanly in either direction.
  2. They are considerably more difficult to make than a unidirectional reed, probably something like 75% of the work of making a pair of standard reeds. A lot of the extra work has to do with making both frames a tight fit around the tongue without catching on the sides. Because nearly all of the cost of a hand-made reed like this is in labour time, it wouldn’t be a large cost saving to make an instrument with half the number of bidirectional reeds.
  3. They are significantly bigger and heavier than a standard reed because of the need to be able to screw the two parts together; you would save a little compared to a pair of standard reeds but not as much as you might think.
  4. There are a bunch of issues around the fact that what you would call the ‘set’ on a standard reed is fixed at manufacture-time by the relationship between the height of the recess and the thickness of the tip of the tongue. You can’t easily alter it deliberately, and it is possible to alter it accidentally as a side-effect of tuning the reed. It’s also important for the tongue to be set precisely central between the two frames, otherwise it starts poorly or not at all in one direction or the other.
  5. I don’t know for sure, but I suspect this design would be more susceptible than a standard reed to getting dust and fluff caught inside it and impeding its operation, because the air gets forced through a narrow recess inside the reed.
  6. It goes without saying that this type of reed is useless for an Anglo instrument because it produces the same note in both directions.

Following up on a slightly different line of inquiry, I made two final experimental reeds, one which only had a rectangular recess right at the tip, and another which was very similar but with a triangular recess instead. Neither of these worked as well as the second reed, I suspect because they only have a tiny amount of space for air to squeeze past the tongue. They sound in both directions (just about), but are very inefficient and quiet.

bidi_reeds_5

bidi_reeds_6

Here is an audio recording I made of the four experimental reeds plus a standard reed for comparison. The first reed had the second horseshoe fitted.

Although this work didn’t lead to a usable product, it was still a useful exercise for me in that I believe I now have a significantly better understanding of how concertina reeds actually work.

No. 12

No. 12: A 40 Button Maccann Duet

My twelfth concertina was a special 40 button Maccann Duet with some custom ergonomic features.

Specification
  • 40 buttons (+ air): 20 notes per side, one octave apart
  • Lowest note on left hand is G3
  • Six sides, 6 3/8″ wide
  • 3/16″ diameter brass capped buttons
  • 2mm button height and travel (buttons stop flush with end plate)
  • Air button in right thumb position, 8mm high
  • Black button bushing cloth
  • Amboyna veneered end plates and walls
  • Thuya burr, ogee profile borders
  • Thuya burr handrails, extra tall with curved top and adjustable position
  • All external woodwork stained dark red and French polished
  • Flat ends with fancy fretwork
  • Seven fold plain black goatskin bellows
  • Black imitation leather bellows papers
  • Aluminium alloy reed frames
  • Aluminium alloy action levers
  • Long scale steel reeds on both sides
  • Radial sloped sycamore reed pans with no inner reed chambers
  • Bach/Lehman tuning, A=440Hz
  • Weight: 1305g

Pint-size Printing Press

Here is my new toy essential concertina-making workshop tool (mug of tea is for scale):

adana1

adana2

It’s a little Adana High-Speed No.1 (also known as a HS1 or 3×2)  self-inking platen printing press, possibly dating back to the 1930s. I plan to use it to print decorative bellows papers and maker’s labels, and possibly also stationery and marketing materials – compliments slips, business cards, bookmarks, beer mats, etc. I could perhaps even take a few small commissions as a sideline (wedding invitations and the like!). The maximum size of forme you can fit in the bed is 3 3/4″ x 2 5/16″ (95 x 59mm), though obviously the paper can be a little bigger than that if the design has margins around the edge. I got it cheap because it looks a bit tatty and it’s missing several parts, many of which are no longer made.

Some of you are probably wondering at this point, “why bother?” I much prefer the appearance of Letterpress printing over modern laser or offset printing because the type makes a 3D impression in the paper (you can also use proper metallic gold or silver ink, which you can’t do with a laser). It’s almost certainly also the method that was used on original Victorian concertinas. Although there are still a handful of commercial letterpress printers around who would probably be willing to print my designs for a fee, I want to do the printing myself on a machine in my own workshop with plates I’ve designed and made myself, for the same reasons that I’m planning to make all the other parts of the concertina myself.

Luckily you can download the original user manual for free. It is ‘arrestingly written in a non-technical style.’

printing_made_easy

From these instructions I gather the way you use it is to place an arrangement of (missing) movable metal type and furniture called a forme in a (missing) chase or clamp it directly into the bed, use a (missing) hand roller to transfer some ink onto the (missing) inking disk, then move the handle most of the way down and back up to pick up some ink on the (missing) pair of inking rollers and transfer it onto the face of the type. Next you place your piece of paper or card on the (missing) tympan (which is held to the platen by the (missing) tympan clips), lining the bottom edge up against the (missing) lay gauge. Finally you push the handle all the way down to press the paper onto the type. When you release the handle the (missing) spring-loaded gripper finger pulls the paper off the type.

adana3

I’m not bothered about the fact that it didn’t come with any metal type, furniture, chases, quoins, etc. because I’m instead planning to make my own printing plates after designing them on a computer. I have a few different ideas for ways to make the plates. The most obvious one is to use sheets of photo-sensitive polymer that are designed for the purpose (I already have a UV exposure box for PCB photo-etching); the main drawback with them seems to be that they aren’t super robust and they have a limited shelf life; perhaps a few years at best. For one-off print runs that would be fine. I suppose it wouldn’t be too much of a hardship to make new polymer plates every couple of years.

Alternatively I could use the same techniques that I use for PCB etching to make etched brass printing plates (using spray-on photo-resist). If I can get that to work and produce clean sharp edges, brass is hard enough that the plates ought to last pretty much forever as long as I don’t abuse them. Another idea I’m considering is to cut brass or aluminium plates on the CNC milling machine with a small vee engraving bit. That ought to produce excellent clean results, although it would probably be quite a slow process and any sharp internal corners might require cutting by hand with a fine graver. It might not be trivial to convert the design into G-code either. I’ve even considered using the mill to engrave a positive “matrix” into a piece of aluminium and use that to cast plates in type metal. One potential advantage of this method is I could mill a single matrix for a bellows paper or logo design and then cast as many copies of it as will fit into the bed of the press.

I’ve had to buy a new pair of inking rollers because, although I probably could have made the mechanical parts, I don’t have any practical way of casting the special soft rubber compound onto them. Luckily they are still made, though a pair cost me more than I paid for the entire machine!

I’ve also ordered a cheap soft rubber hand roller made by “Speedball” (isn’t that slang for an illegal substance?) to ‘mill’ the ink (work it until it’s totally smooth) on a sheet of glass and transfer it to the inking disk.

The inking disk shouldn’t be too hard to make. I’m planning to cut it from 3mm engraver’s brass sheet with a scroll saw, round off the edges, and braze a steel hub to the bottom. I haven’t yet decided how to make the ratchet on the bottom that rotates it to evenly distribute the ink, but I have a couple of ideas. The simplest way seems to be a circle of holes drilled in another disk soldered/glued to the bottom. The point of the pawl is a bit worn, but interestingly it looks like it was made to be reversible when the first point wears out:

adana4

The tympan clips will be trivial to make from stainless steel sheet. The tympan/packing is a bit of mystery to me – it would probably be easy to make if I knew exactly what to make it from (it seems to be some combination of card and paper). The purpose of it is to provide a soft surface between the paper and the platen so that the type makes a visible impression in the paper and isn’t damaged by being forced hard against the metal platen. More research and probably experimentation needed.

The lay gauge will probably not be too difficult to make from a strip of brass or aluminium and some small screws and wing nuts, though I don’t fully understand the illustrations of it in the manual – it has various cutouts and holes in it that I haven’t yet worked out the purpose of.

The most difficult replacement part to make looks like being the gripper arm and gripper finger. This is the part that holds the paper against the tympan so that when you release the handle the paper doesn’t remain stuck to the type (if it did, the inking rollers would probably run over the back of it before you had a chance to manually remove it). It needs to be adjustable for different sizes and thicknesses of paper and there needs to be a long spring so it can easily be lifted up to replace the paper. I’ll also need to track down a nut that fits the shaft so that I can attach it to the machine (almost certainly won’t be metric; possibly 2BA or similar).

No. 1: Brun Part 2: End Plates and Hand Rails

Apologies for the long delay since part 1 of this short series about how I built my first instrument, Holden Concertinas No. 1, a small rectangular 30 button Hayden Duet. I have now finished the instrument and begun design and tooling work on No. 2, which will be a more conventional hexagonal 30 button Anglo.

First a caveat. This was my first instrument, built from scratch without plans or instructions, in some cases involving materials and techniques that were new to me, not under the direct guidance of an expert (though several experienced makers offered useful advice when I had a specific question). I was constantly figuring out how to do things and building tools as I went along, and sometimes my ideas didn’t work out perfectly, or by doing a process one way I learned something that helped me to see a better way to do it. In some cases I was limited by the tools available to me, and I made a point of making everything myself in my own workshop (apart from the stainless steel screws). I think overall the instrument turned out remarkably well, with a few mainly cosmetic flaws, but there is certainly plenty of room for improvement when I build No. 2. This article is the story of how I did it on my first attempt and what I learned along the way, not a definitive guide to building one yourself.

The wooden end plates were made from 3mm birch plywood (the best quality I could find), hammer-veneered using hot hide glue and a veneer hammer I made myself from oak with a brass blade. The top veneer is a very pretty fir burr (or burl for the Americans), with a cheaper beech veneer on the bottom (you always veneer both sides of a board at the same time to reduce warping; in this case it also helped to thicken and strengthen the board). Unfortunately on the finished instrument the beauty of the pattern is rather hidden by all the piercings, buttons and handles, though there are areas where it is still visible. I dried the board between paper in a simple press for a week or so. After taking it out, it warped slightly, but it was flexible enough that screwing the plates to the rigid end boxes pulled them flat again, and in fact I now find that after a few months being held flat by the boxes, they remain flat when I take them off.

I decided to try French polishing the instrument, and I thought it would be easier to polish the board before I cut out the fretwork (in hindsight this was probably a mistake). This was my first time using the technique. It took a very long time, I made a bunch of mistakes, and the results weren’t entirely satisfactory. I learned a great deal, though, and I’m sure the next one will be better. One of the problems I ran into is that in the UK the sort of alcohol you can buy in a DIY shop (methylated spirits) has a small amount of poison and purple dye added to it to prevent people drinking it. It turns out that if you dissolve blonde (clear) shellac in ordinary purple meths, the dye doesn’t evaporate along with the alcohol, it stays in the finish. The thicker the finish, the deeper the purple, and due to inexperience I accidentally made the finish on the end plates way too thick. Funnily enough the change was so gradual I barely noticed it happening, until I happened to place the polished board next to an offcut of the original veneer! For my second instrument I am planning to try dissolving the shellac in clear ethyl alcohol that I found being sold online for medicinal purposes; it’s quite a lot more expensive than meths per litre, but I don’t need huge amounts of it to polish a concertina.

Next I cut the board into two pieces and stuck my cutting templates to them, then drilled all the holes on the CNC mill. Ignore the fact that the mounting holes appear to be in the wrong places – there was a reason I had to do that, which I’ll talk about in the next instalment. The fretwork design is my own, inspired by Indian mandala designs. Circles within circles within a circle within a square. It may not be to everybody’s taste but I am rather proud of it. The space below the fretwork was left empty because I knew the handles needed to go down there, but I didn’t drill any mounting holes at this stage because I hadn’t yet figured out exactly how or where they were going to attach.

I couldn’t drill the button holes to final diameter on the CNC mill because the drill bit I had was too long for the Z height of the machine, so I instead drilled small pilot holes and then manually enlarged them on the pillar drill. I was a bit worried the face veneer would splinter out when the drill bit entered the board, but I used a sharp brad point bit, fed it in gently, and they all turned out perfectly.

The end plates fit into rebates in the end boxes (in order to hide the cut edge of the plywood), which meant I had to do some fiddly manual trimming of the edges using a block plane and shooting board to get them to fit in perfectly without a gap.

I cut the fretwork by hand with a vintage fretsaw. It may look tedious but I actually really enjoy this part of the job!

Here is a little video clip of me working on the piercing while listening to Lady Maisery on the stereo (you have to click it again to stop it playing or it will automatically repeat):

https://www.instagram.com/p/BOo5Y5mACys/

After I’d finished piercing and peeled the sticky paper templates off, I found that the thick shellac finish had gone rough, so I decided to sand it down and try polishing it again. 

The result was a significant improvement, though not totally perfect. In hindsight I probably should have kept going, taken all the shellac off, and completely started from scratch, but I was loath to do that because of the many hours it had taken me to build it up in the first place.

I reamed the button holes out a little from the back using a taper hand reamer, then glued in bushes made from 0.85mm piano bushing cloth. This is a fiddly job that is difficult to do neatly, though I found that I got better and quicker at it with practice. Here’s a quick video clip showing how I did it using hot hide glue. I’m working from the back but aiming to get the front edge of the cloth to sit flush with the front face of the end plate because it’s not possible to neatly trim it flush afterwards.

https://www.instagram.com/p/BO_-jBWAfd_/

After the glue had dried, the buttons fit in the bushes but there was too much friction, so I turned a tapered polished brass rod the same size as the buttons and used it in the milling machine spindle at 10,000 RPM to burnish the inside of each bush. This had almost no effect! Second attempt, I made another tapered rod that was slightly larger than the buttons, and waggled it around a bit in each hole. This made the holes just right so the buttons went up and down with hardly any friction or noise. After a couple of weeks I found that a few of the buttons were sticking because the bushing cloth had bounced back, so I repeated the burnishing operation. This second burnishing seems to have done the trick; months later the buttons are still working smoothly.

The extra bit of felt sticking out of the back of each button hole was in some cases interfering with the cross holes in the buttons and preventing them closing fully, so I trimmed them all flush with the back of the plate.

On to the hand rails (I know I’m skipping over the casework and action; I’ll cover those in another instalment). I had an idea to try making more ergonomic handles and spent a while experimenting with a set. Unfortunately they didn’t really work out for various reasons that are outside the scope of this article, but I’ll include a couple of pictures because I think they looked rather pretty.

Back to the drawing board, I decided to make a pair of simple Anglo-style hand rails, but with the ability to adjust them backwards and forwards, and a spacer block that allows the height to be raised or lowered.

The top parts of the rails were made from slightly spalted apple wood from a tree that was taken down in my best friend’s orchard:


The spacers below the main rails were made from contrasting sycamore wood:

While planing the two pieces to match each other, I clamped them together using the same bolts and captive nut plates that would later be used to hold them onto the end plates:

Because the handle could be adjusted back and forth, it didn’t make sense to attach the strap to a fixed point on the side of the action box, which meant I instead had to put the strap clamp screw on the end of the rail. This meant making a captive nut that fit into the end of the rail, and was held very securely by one of the main attachment bolts passing through a cross hole drilled through the nut:

This wasn’t my first attempt at making thumb screws: the earlier ergonomic handles had four larger-diameter screws. I think the final ones I put on the instrument turned out reasonably well, though the knurling isn’t as neat as I’d like due to the knurling tool I bought being a bit too sloppy. I am planning to make a stronger tool with finer wheels before I knurl the screws for the second instrument.

I lightly French-polished the handles and cut the straps from 2mm full grain veg tanned calf skin. I think the shape worked out OK, though I did the decorative creasing around the edge using a tool improvised from an old soldering iron and it went a bit wonky in the curved areas (I’m planning to get or make a better creasing iron before I make the next set of straps).

I found that after playing the instrument for a few minutes the thumb screws started to unscrew themselves. The solution came in a photo I found of a Dipper instrument that had the thumb screws in the same location: a clamp plate like a large washer that is bent around the end of the rail. This prevents the screw turning when the strap moves and looks quite snazzy too! I have since seen exactly the same arrangement on instruments made by Geoffrey Crabb. I put the two bends in the clamp by clamping it in the middle of a toolmakers’ clamp that happened to be the same width as the rail (1/2″).

The final touch on the end plates was to add my maker’s label. The design was hand lettered by my talented friend, Oliver Densham, in a style inspired by the labels used on vintage Victorian instruments. I laser-printed it onto archival grade paper and sprayed it with a special protective lacquer intended for decoupage art, so it should hopefully last a long time.

No. 13: A 40 Button Müller English

My thirteenth concertina was a beautiful English concertina with Müller-style keyboard and hand rests/straps, plus some additional thumb-operated bass drone buttons.

Specification
  • 40 buttons: 18 treble + two bass buttons on the left, and 19 treble + 1 bass button on the right. Also has an air button on the left.
  • Six sides, 6 1/3″ (161mm) wide.
  • 5.7mm diameter nickel-silver capped buttons with domed profile.
  • 3mm button height and 3mm button travel (buttons stop flush with end plate).
  • 2:1 action lever ratio giving 6mm pad lift.
  • Three bass drones operated by 10.6mm diameter flat topped nickel-silver capped thumb buttons.
  • Brass reed frames with long scale steel tongues, except for the bass reeds which are extra-long and have phosphor-bronze tongues.
  • Brass sheet riveted action levers.
  • Full-width flat nickel silver end plates with crimped edges.
  • Extra-fine hand cut fretwork with custom decorative elements and hand engraving.
  • Dark red button bushing cloth.
  • Black bog-oak thick-veneered action box sides.
  • Solid bog-oak hand and thumb rests.
  • Seven fold black goatskin leather bellows, fully leather covered.
  • Real gold tooling on the bellows ends.
  • French polished external woodwork.
  • Hand engraved silver decorative inlays on the hand rests.
  • Sycamore reed pans with parallel chambers and multiple chamber depths.
  • Tuned Equal Temperament, A=440Hz.
  • Weight: 1600g
  • Special hand made brown leather hexagonal hard case.