Reeds

No. 1: Brun Part 7: Reed Pans

The seventh part of the story of how I built my first concertina is about the reed pans; the removable boards that carry the reeds and valves.

One thing I have learned is that the reed pan layout is one of the most difficult and important aspects of designing a new instrument from scratch, and it has to be done in conjunction with the action board layout. It’s no good coming up with a nice logical arrangement of chambers on the reed pans, if it means some of the pad holes end up underneath the keyboard, or the levers have to snake around all over the place to reach the appropriate pads, or you have to use levers that are too short to operate smoothly. Sometimes you have to compromise in one area or another, either in the reed pan (e.g. making reeds smaller because there isn’t room for the ideal size of chambers), or in the action (e.g. making two levers cross over each other or bend sideways).

This being my first instrument and a brand new design, I spent several days at the design stage figuring out a good compromise. When I began the process, I wasn’t even sure how many buttons I was going to end up with (the design brief specified the overall size of the instrument, to include as many buttons as practical in that form factor). The design I came up with looks pretty simple and logical, however in order to reach it, I tried and discarded a number of more complex arrangements. The three main compromises I ended up making were that a few of the levers are shorter than ideal (those buttons feel a bit stiffer than their longer neighbours); six of the chambers are in the centre of the instrument (for reasons I don’t fully understand, they sound a bit less good than chambers on the outside – this is a well-known phenomena in the concertina world); and I was forced to abandon the idea of including an air button.

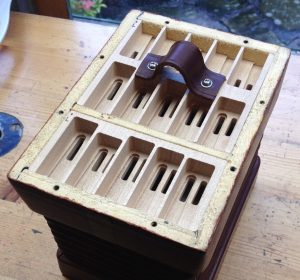
You might find it interesting to take another look at the photos of Wheatstone’s Duett concertina of the 1850s. My Brun is the same size but with an extra three buttons per side. To achieve that, I went with a similar reed pan arrangement but with a second, smaller pan on each side. Wheatstone’s had one pan with two rows of six chambers; mine has a pan with two rows of five and a second pan with one row of five. Five columns is actually a fairly tight fit in the available width. I tried fitting in six and it was ridiculously tight: I suspect Wheatstone must have used narrower reed frames and smaller diameter pads, which probably had a negative effect on the sound it produced. My actions are a more conventional riveted lever type, and I suspect are probably more comfortable to play.

My first idea for making the reed pans was to mill them from thick pieces of birch plywood. This didn’t really work, because the chamber dividing walls were too weak due to the cross-grain layers, causing them to break during the machining process.

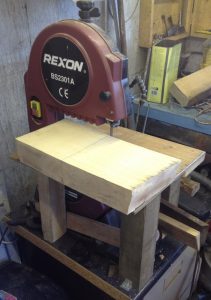
Plan B was to mill them from solid quartersawn sycamore. Using quartersawn wood means it will move and warp less due to changes in humidity level. The little bandsaw I had at the time was just barely powerful enough to rip the slab I had in the thin dimension.

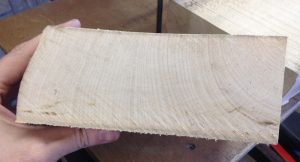
Looking at the end grain, you can see it is reasonably quartersawn towards the bark side of the piece. Because the pans only needed to be a little over 4″ wide, I was able to pick the best section.

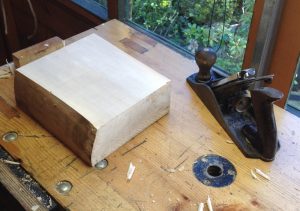
Planing one face true.

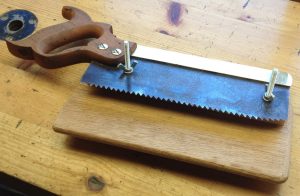
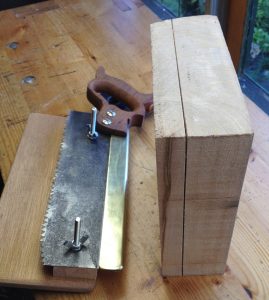
The bandsaw was never going to resaw the full width of the board, so I had to do it by hand. Step 1 was to make a kerfing saw; a special tool that cuts a shallow kerf at a specific distance from the face of the board.

This kerf was then used to help guide the path of an ordinary rip saw.

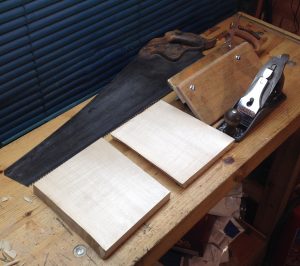
Here are the two roughly sawn reed pan blanks, with the rip saw I used behind them. I’ve since got a bigger rip saw with coarser teeth that would have made the job a bit easier, but it wasn’t too bad really because the boards are so small.

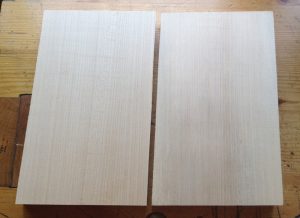
At this point I put the blanks on one side and started recording their weight once a day. Although this slab was supposedly kiln dried before I bought it, it still seemed to have a higher than equilibrium moisture content inside. They lost a few grammes of moisture each over the first few days, and warped a little too. After a couple of weeks they stopped losing weight, so I felt they were probably stable enough to carry on working on them. First I planed one face of each flat and smooth (this face was to become the bottom of the pan) and ripped them narrower, being careful to follow the direction of the grain as closely as possible.

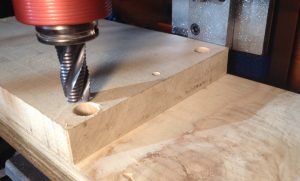
I left the other face alone because I planned to use the milling machine to flatten it, thus getting it very accurately parallel.

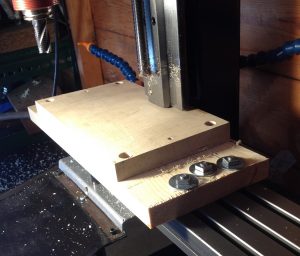
Problem! When I mounted the blank on the milling machine, the back edge fouled on the bottom of the Z axis slide before it was far enough back for the cutter to reach the front of the board.

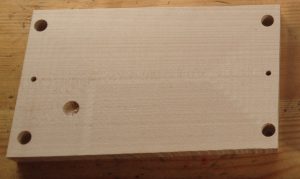
The solution was to make a thinner fixture that (just) allowed the blank to fit under the Z slide. The two small holes in the middle of either end match with registration pins in the spoilboard, thus allowing the blank to be flipped over and still be in the same position, so the bottom reed slots end up in the right place relative to their chambers.

Oops. I did something stupid in zeroing the Z axis and plunged the 1/2″ end mill a few mm deep into the first blank. This could have been a major setback as I didn’t have a spare blank prepared, but luckily I managed to reposition the pan on the blank such that the damage was in an area that was due to be milled out anyway.

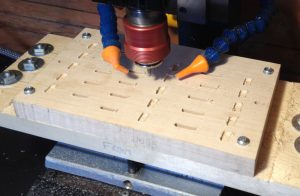
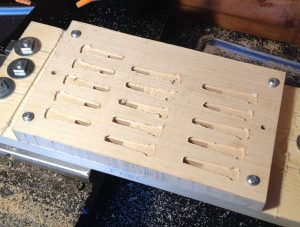
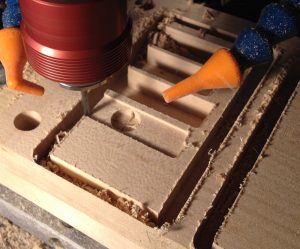
After truing up the top surface, I flipped the piece over and cut the bottom slots. There needed to be little pockets next to each dovetail slot for the dovetail cutter to start in, because the tool isn’t designed to be able to plunge into the work. I cut the wind slots for the bottom reeds at the same time as the dovetail slots, to ensure they are perfectly aligned with each other.

Bottom reed slots cut.

Back to the top again. I cut the outsides of the pans before the chambers, but not all the way through the board, because this reduced the amount of stress on the dividing walls. This picture shows how I managed to position my previous accident inside a region that was due to be removed.

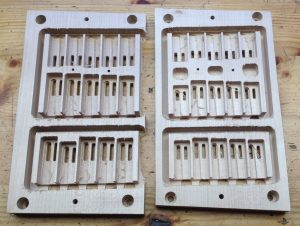
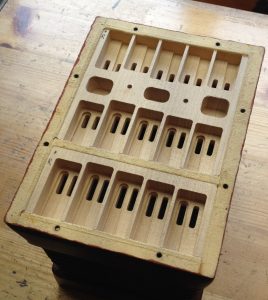
Both reed pans fully routed. The left hand one is off-centre because of the previously mentioned repositioning.

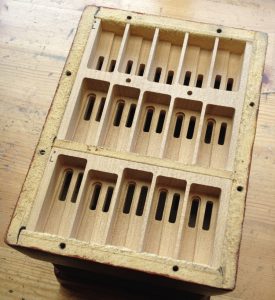
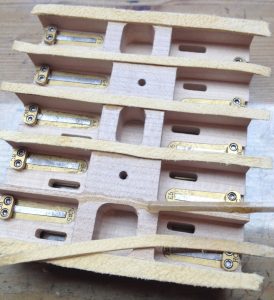
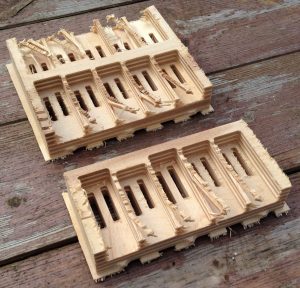
This picture shows a few interesting things. In order to fit the reeds in as tightly as possible, the frames overlap, but not quite enough for a dovetail slot to break into the opposite side’s wind slot. They also undercut the walls slightly, more so at the outside edge (because the frames are tapered). Thirdly, I tried something new here that I haven’t heard of any other maker doing in this way: I made the chambers different depths, based on a ratio of the chamber length. It was common for English concertinas to have sloping pans, where the chambers at one end were deeper than at the other, but that only really works when it’s possible to arrange the pan in such a way that the pitches gradually increase from one end to the other. The way I did it here, it was possible to have a deep chamber right next to a shallow one (the first and second chambers are an octave apart).

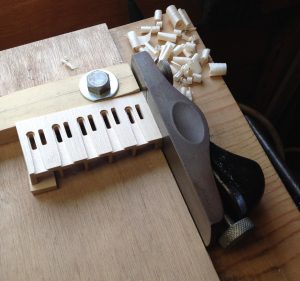
The inner walls of the bellows frame are tapered to get a good seal, so I had to cut a matching taper on the outsides of the reed pans. The side walls I was able to do on the shooting board with a shim to tilt it up.

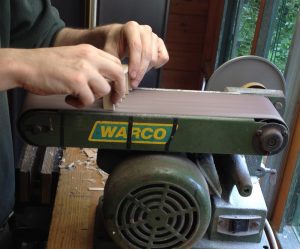
I daren’t try to use the shooting board to plane across the ends of the chamber walls, so I used the linisher for that instead.

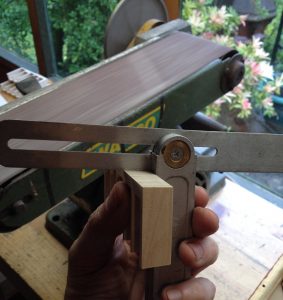
Checking the angle with a bevel gauge.

It took a fair bit of careful work to get a good fit because the earlier problems with the frames not gluing together perfectly square meant the holes the reed pans had to fit into weren’t quite square either. In hindsight it might have been easier if I’d fit the pans to the frames before I put the chamois leather gaskets on the frames, and it definitely would have been much easier to do it before attaching the bellows to the frames.

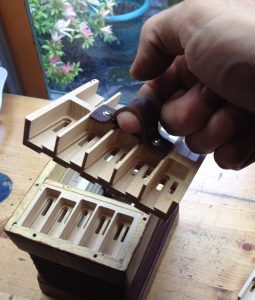
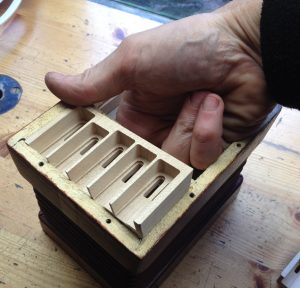
If you’re familiar with more conventional concertina reed pans, you’re probably wondering at this point how you pull out the reed pan (which tends to be a fairly tight fit) without a hole in the middle to put your fingers through. Because I didn’t have any space for the finger hole, particularly on the left hand side, I instead attached captive nut plates on the bottoms of the larger pans and made a leather handle that screws onto the pan.

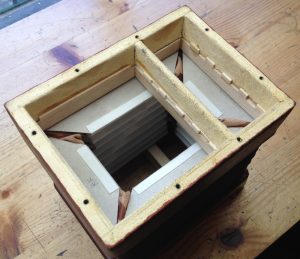
Once you have lifted out the larger pan, you can put your fingers through the hole and push out the small pan from underneath.

Here’s a quick video clip showing the first time the instrument made a sound:

https://www.instagram.com/p/BUKcZ9XDiGZ/

When I made the bellows frames I didn’t know how deep the reed pans were going to be, so I allowed a generous depth of 20mm and put off the decision until later. As it happens, I eventually made the left hand pan 18mm deep and the right hand pan 16.5mm, which meant I then had to add some sort of spacer blocks that stopped the pans going in too deep. I thought I could just make strips that went all the way around, but they fouled on the bottom reed clamps so I had to cut a lot of notches out of them. In hindsight I went about this a particularly difficult and tedious way, and on future instruments I will be reverting to the traditional-style corner blocks instead, preferably fitting them to the frames before the bellows!

Gluing strips of chamois leather to the tops of the walls with rabbit skin glue. I found that skiving the ends of these strips needs a slightly different technique to skiving bellows leather because the chamois is so soft and stretchy.

All the gaskets installed.

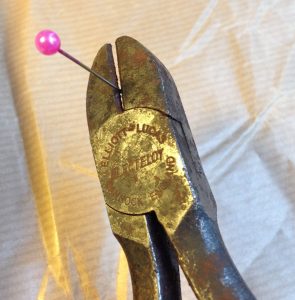
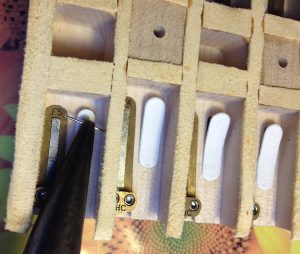
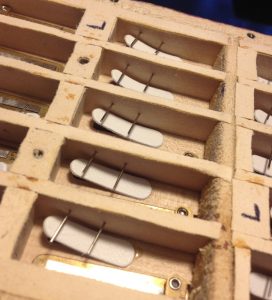
I made the valve restraint pins from chrome plated sewing pins. After struggling to push a few of them through the chamber walls with needle nose pliers, I found they went in a bit easier if I sharpened them on a stone first.

There’s a bit of a knack to deciding exactly where to place the pins, so as to allow the valve to open properly without getting stuck. On my next one I’m planning to try making the pins from a slightly smaller diameter stainless steel spring wire instead.

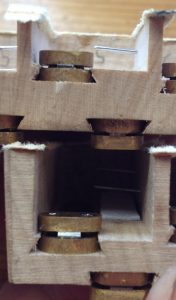
I had lots of problems with the valves. My first attempt, I cut them by hand from sheepskin skiver, and they were terrible. The leather was too stiff, and every note sounded muffled if it played at all. My second attempt, I bought a set of valves from a parts supplier, and I’m not totally sure what the problem was but they didn’t seem to want to stay flat against the pans. This photo shows how some of them have lifted up until they are touching the restraint pins. This caused a problem with the bottom few notes making a sort of ‘raspberry’ noise if you changed bellows direction while holding the button down because the valves weren’t keen to stay closed.

On advice from several other makers, I ordered some hides of Columbia Pneumatic Leather from Columbia Organ Leathers (who are based in a town called Columbia, Pennsylvania, not the Republic of Columbia). It’s not cheap but it’s nice stuff. I removed all the previous valves (I found the easiest way was to just rip them off, then use hot water to remove the remnants of the old glue) and cut a new set, mostly from the extra heavy weight hide, though I did use the heavy weight for the higher notes. It was recommended to me to wash the leather and dry it on a sheet of glass to make it a bit stiffer, but I couldn’t tell any difference before and after washing (maybe I did it wrong). For the most part, the new valves behaved much better and solved the problems I was having. A few of them misbehaved in testing, not always for obvious reasons, but replacing them solved the problem.

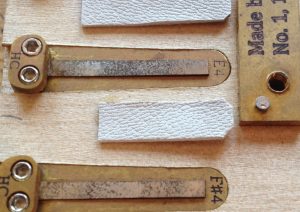
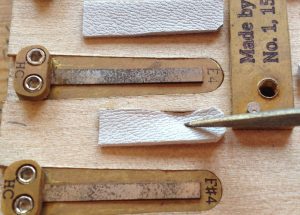
Here’s one of the misbehaving valves where I was able to find the cause. If I played the blow reed, then played the corresponding suck reed very softly, it would start muffled, then ‘pop’ and play normally.

It turned out I had glued it off-centre, and one edge of the valve was getting sucked down into the wind slot.

Replacing it in the correct position solved the problem. It’s quite tricky to get them positioned right because you can’t see the slot while you are gluing the valve down. I’ve considered drawing a centre line in pencil first.

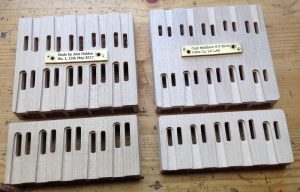
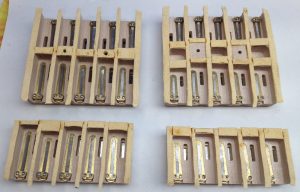
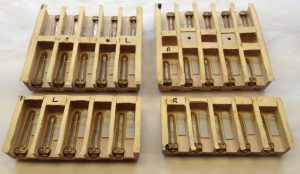
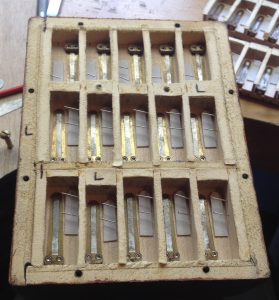
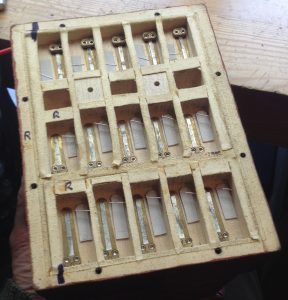
The finished reed pans. Note all the marks in biro indicating where and which way round they fit.

These two pictures show the difference in size between the biggest chamber (C3) and the smallest (G5). In hindsight I suspect I could have made them all a bit smaller, but I was trying to be conservative and working on the theory that a too-small chamber will sound terrible, whereas a too-big one will just start up slowly. In fact, as far as I can tell, they all seem to respond pretty quickly.

The final thing remaining was fine tuning all the reeds, and bits and pieces of troubleshooting: tweaking the action to eliminate ciphers, replacing misbehaving valves, etc. The client asked me to tune the reeds in quarter comma meantone, with G as the root note. I made a quick video clip showing it playing a few chords, though in hindsight this doesn’t really show it off very well. You’ll have to take my word for it that it has a much nicer sound in person than recorded on an iPhone microphone. I hope at some point I’ll get to hear what it sounds like in the hands of a good player.

https://www.instagram.com/p/BWuuyH5DyWq/
No. 1: Brun Part 6: Reeds

The sixth instalment in the story of how I built my first concertina is about the reeds. I’m not going to cover every step of the process because it was very similar to my previous posts on the subject, apart from a few minor improvements and the fact that I had to make sixty of them in twenty four different pitches.

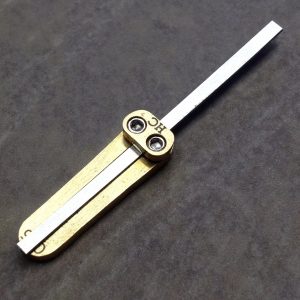
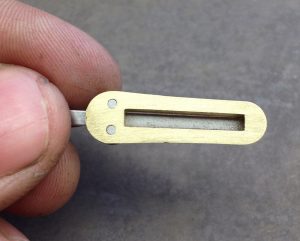
Something unusual I did (it might even be the first time it’s been done by a concertina maker) is I made a different size of frame for every pitch instead of making do with a limited number of frame sizes, each one being used for two, three or even four pitches. I started by measuring the vent dimensions of the reeds in a Lachenal English I own and plotting them on a graph. They were pretty lumpy but they followed a general trend. I then fitted curves to the graph and used them to derive a formula for the reed scaling. I plugged those formulas into a spreadsheet, which calculated the vent dimensions for all the pitches I needed. The outer frames were all the same angle and tip radius, with a constant distance between the tip of the frame and the tip of the vent. A slight drawback with the way I did it is that the longer reeds ended up with thinner edges than the shorter ones; when I design the next set I may try to come up with a way to reduce that effect.

I have since learned that the reeds I based my scale on were probably what is known as “short scale”. A fellow maker sent me a set of measurements of reeds from a higher quality vintage instrument, which appears to have both longer low reeds and shorter high ones, i.e. the range of pitches is stretched out over a wider range of lengths. I understand short scale reeds were typically used when the maker needed to fit a lot of reeds into a given space, which actually makes a lot of sense for this particular instrument because the reed pans are very tightly packed. I don’t think I could have fit long scale reeds in it if I had tried. My next concertina will have the same number of buttons in a larger instrument, so I plan to use longer scale reeds in it. I have been told that longer scale reeds have better pitch stability and responsiveness, particularly on the low end.

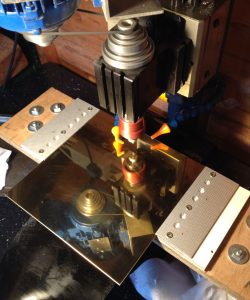
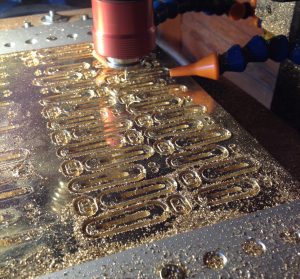
As before, I cut the frames and clamps from 2mm brass sheet on my CNC milling machine. This time I left them at the full 2mm thickness.

When I did the prototype reeds, each frame took a very long time to mill. Before I made the first full set I spent a while experimenting with feed rates and depth of cut (wasted some material and broke a couple of end mills in the process), and came up with a reliable rate that is significantly faster than what I was using before. I also dropped what was by far the slowest part of the process: bevelling the edges of the frames with lots of tiny steps. They now come out of the milling stage with straight sides.

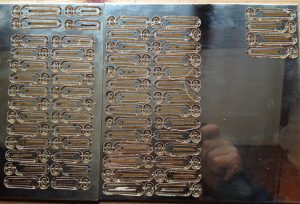
The full set of sixty frames and clamps, before cutting them free of the stock.

After cutting them free, I tapped all 120 clamp holes and screwed them together. The clamp is a different size for each pitch too, so it’s important not to mix them up!

I filed off the flashing and the remains of the tabs with a hand file. In hindsight it would have been quicker to use my die filer to clean up the frames, though the clamps are probably too small to do that way.

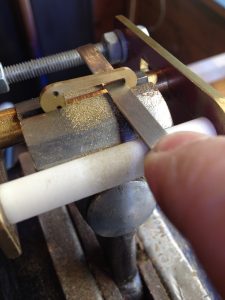
A little improvised fixture to hold each reed frame while I square up the vent corners with a needle file. It’s crucial to get the tip corners as perfect as possible otherwise you can’t get the tongue to fit really closely without clipping the frame.

The vent relief angles on my Lachenal reeds were very inconsistent and often rounded; I suspect they were quickly filed by eye without a guide. I set my guide to an angle that was roughly the average of the angles on the Lachenal reeds and used it for all of my reeds.

I used my die filing machine with the table tilted over to 7.5° to bevel the frame edges, filing up to a line engraved by the CNC mill. I deliberately left them a bit on the tight side, then later on after I’d made the reed pans, I hand fitted each frame to its slot with a hand file.

https://www.instagram.com/p/BTTeGiqjHiH/

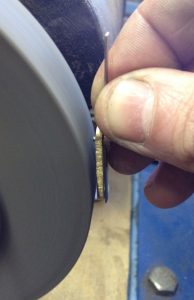
I shortened the clamp screws by first clamping the reed tongue blank in the frame, then grinding the screws almost all the way on a slow grinding wheel, followed by lapping them flat on a piece of fine emery paper glued to a sheet of glass.

All the tongues roughly sheared to size.

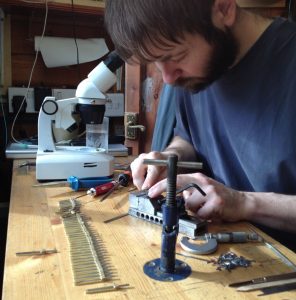
Draw filing the edges of the tongues to clean them up, then fitting them precisely to their frame with the aid of my microscope. This is probably the most difficult and painstaking part of the process to get right.

All the tongues initially fitted to their frames; many hours of work have gone into them at this point.

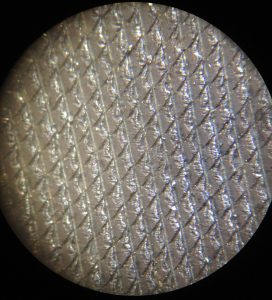
My file was feeling pretty dull so I had a look at it under the microscope. All the teeth had their edges fractured off. No wonder it wasn’t cutting so well any more!

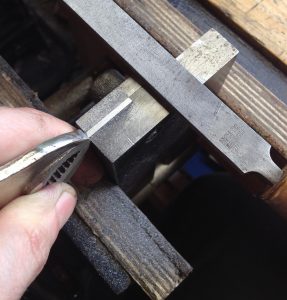
I probably should have bought a new file at this point but I kept going and did much of the profiling with it (I also used a three square file for some of the work). I can’t remember if I’ve written about the fixture in this picture before. It has an adjustable-height step that you place the tongue against. The clamp is a pair of locking pliers that have been modified to have a sharper nose.

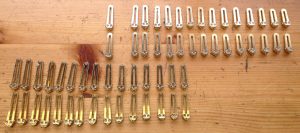
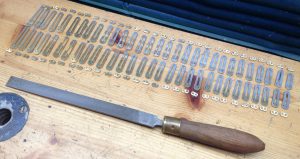
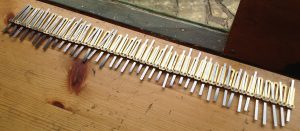
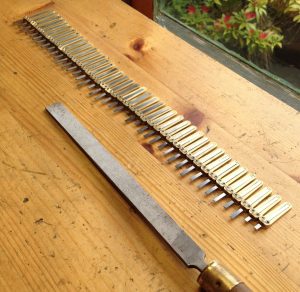
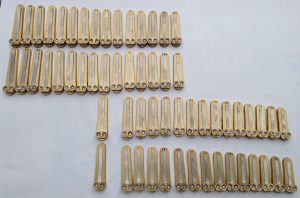
The full set of reeds, profiled and rough-tuned. They start out very high initially and go lower as you profile them. I stopped filing when they reached somewhere between +5 and +20 cents sharp on the tuning bench, knowing that they were likely to go a bit flatter once in the instrument. The way they are arranged in this photo shows the unisonoric reed pairs for the left hand on top and the right hand on the bottom, with a few notes of overlap in the middle. If it was an English or Anglo concertina the distribution would look very different.

It’s been said by other makers that, of the many time-consuming stages involved in making an English-style concertina from scratch, the reeds are the greatest. I think I can definitely agree with that statement. I probably spent at least a couple of hours on every reed, maybe more when I include time later spent troubleshooting and fine-tuning.

Bidirectional Reed Experiments

Recently I was asked to try to come up with a concertina reed that works in both directions, or at least to figure out why it hasn’t been done before. Ordinarily, a free reed only speaks when you suck air down past the tongue, into and through the vent in the frame. Most concertinas have a pair of reeds controlled by each button; one inside the reed chamber that only sounds on the pull stroke and another mounted on the underside of the reed pan that only sounds on the push stroke. Anglo instruments take advantage of this to play different notes on pull and push (this is known as bisonoricity), whereas English and Duet instruments play the same note in both directions so they need a pair of identical reeds for every button. If it was possible to make a bidirectional reed that worked as well as two standard reeds, it could potentially enable unisonoric instruments to be made smaller, lighter, and cheaper.

The way I went about solving the problem was to first build what was pretty much a standard reed in an oversized frame and check that it sounded normally in the suck direction, then screwed on a roughly horseshoe-shaped plate that fit around the tongue. I didn’t expect this to work because there was no way for a significant amount of air to get past the tongue to start the oscillation cycle, and indeed it didn’t.

bidi_reeds_1

I also modified my bellows bench a little to allow me to block up the standard dovetail socket and screw the new oversized frame to it elsewhere, and provided a means to block the one-way valve that normally releases air when I raise the bellows so that the rig only works in the suck direction.

bidi_reeds_2

Next I took the horseshoe back off and started experimenting with filing away various parts of the bottom of the horseshoe vent around the tongue, to provide some space for air to get to and past the tongue and allow it to start. Eventually I got it to sound, albeit poorly, in the suck direction, and it even made a tiny bit of sound in the push direction.

I had a theory that the triangular profile resulting from filing the underside of the horseshoe vent was causing the airflow to be cut off too gradually in the blow direction, so I next made a new horseshoe piece, this time with a square-sided recess milled into the underside so there was air space all around the tongue. This was supposed to cut the flow off more cleanly when the tongue swung up into the horseshoe vent.

bidi_reeds_3

This did work a little better, however it was very inefficient, very quiet, and worked much better in the suck direction than the blow direction. I figured that the reason it worked unequally was because the reed tongue was profiled only on the top surface, so when it passed into the bottom vent it cut the airflow cleanly and suddenly whereas when it passed into the top vent it cut it progressively from the tip towards the root.

In order to try to solve this asymmetry, I built a second, more complicated, reed. On this one the reed tongue is set into the bottom frame by half the thickness of the reed stock, it is profiled equally on top and bottom of the tongue, and I also restricted the air pocket to the last third of the tongue, which I tried to profile fairly flat so that it cuts the airflow fairly cleanly in both directions.bidi_reeds_4

The second reed was the most successful prototype I built, however it revealed the biggest flaw with the idea. When set up carefully it works pretty equally in both directions, however the amplitude is very limited compared to a standard reed:

I believe I now understand the reason for this, however it is a little tricky to explain. Before starting my experiments I had observed that with a standard reed playing at normal volume, the tongue swings well above and below the restriction point at the entrance to the vent. I imagined that with the bidirectional reed, it would swing past both restriction points and generate a similar amplitude level, perhaps with a different tone. This was based on a couple of misunderstandings about how reeds work.

My current understanding of what happens with a standard reed when it first starts up is that the tongue gets drawn down towards the frame (it needs to be set such that at rest there is a slight gap between the tongue and frame so air can start flowing). I don’t fully understand the physics behind why this happens, but it seems to me that the faster the airflow into the vent, the harder the tongue gets pulled down. The tongue descending towards the vent opening restricts the airflow into the vent, the force pulling the tongue down reduces, and the tongue springs back up, eventually peaking slightly higher than its rest position. Because it is higher, the gap between the tongue and the frame is larger and more air is able to flow through it than on the first cycle, so it gets drawn down a bit further, and springs back a bit higher than before. Over the course of a number of cycles, the amplitude builds up and up until the tongue is swinging a long way below the top of the vent. In order for this build-up to work, it’s important that every time the tongue swings a bit higher, it results in more air flowing through the vent, which causes the tongue to be pulled down harder and the amplitude of the oscillation to increase. Eventually the oscillation reaches an equilibrium level that depends on the pressure differential between the top and bottom of the reed frame. If you squeeze the bellows harder, the tongue oscillates to a greater height and the ‘packets’ of air being chopped up by the tongue passing through the frame are larger and more energetic, which results in a greater volume of sound from the instrument.

What goes wrong with my bidirectional reed that prevents it developing a decent amplitude at normal bellows pressure is that the second vent restriction, the one ‘above’ the tongue (whichever direction that happens to be), cuts off the air supply whenever the tongue tries to swing higher than the opening into the second frame. It’s impossible for the amplitude of the oscillation to ever build up any higher than the second frame, because it restricts the air supply as the tongue swings higher instead of allowing more air through. It is a lot like the governor on an engine, which throttles the fuel supply whenever it tries to exceed a certain speed.

It is possible to increase the amplitude at which the limiting occurs by increasing the distance between the two vent openings inside the reed, however there is a limit to how far you can take this. If the distance is too wide, the reed oscillations take several seconds to build up to an audible level, or never start up at all. It also becomes impossible to deliberately play the reed very quietly: you end up with a reed that has essentially no dynamic range.

To make matters worse, as well as the limited volume issue, there are several other disadvantages to this type of reed:

  1. They seem to be less efficient (i.e. they use more air than a standard reed operating at a similarly low amplitude), possibly because the way it is constructed to allow it to perform equally in both directions has the side effect of not cutting the airflow very cleanly in either direction.
  2. They are considerably more difficult to make than a unidirectional reed, probably something like 75% of the work of making a pair of standard reeds. A lot of the extra work has to do with making both frames a tight fit around the tongue without catching on the sides. Because nearly all of the cost of a hand-made reed like this is in labour time, it wouldn’t be a large cost saving to make an instrument with half the number of bidirectional reeds.
  3. They are significantly bigger and heavier than a standard reed because of the need to be able to screw the two parts together; you would save a little compared to a pair of standard reeds but not as much as you might think.
  4. There are a bunch of issues around the fact that what you would call the ‘set’ on a standard reed is fixed at manufacture-time by the relationship between the height of the recess and the thickness of the tip of the tongue. You can’t easily alter it deliberately, and it is possible to alter it accidentally as a side-effect of tuning the reed. It’s also important for the tongue to be set precisely central between the two frames, otherwise it starts poorly or not at all in one direction or the other.
  5. I don’t know for sure, but I suspect this design would be more susceptible than a standard reed to getting dust and fluff caught inside it and impeding its operation, because the air gets forced through a narrow recess inside the reed.
  6. It goes without saying that this type of reed is useless for an Anglo instrument because it produces the same note in both directions.

Following up on a slightly different line of inquiry, I made two final experimental reeds, one which only had a rectangular recess right at the tip, and another which was very similar but with a triangular recess instead. Neither of these worked as well as the second reed, I suspect because they only have a tiny amount of space for air to squeeze past the tongue. They sound in both directions (just about), but are very inefficient and quiet.

bidi_reeds_5

bidi_reeds_6

Here is an audio recording I made of the four experimental reeds plus a standard reed for comparison. The first reed had the second horseshoe fitted.

Although this work didn’t lead to a usable product, it was still a useful exercise for me in that I believe I now have a significantly better understanding of how concertina reeds actually work.

Reed Tongue Shear

When I made my first prototype reeds, I found that it is nearly impossible to cut 0.9mm hardened and tempered spring steel with hand shears. After I obtained and restored a heavy duty industrial bench shear that was strong enough to cut the metal, I learned that it is extremely difficult to accurately and consistently cut narrow, tapered strips to a specific width and angle. Because the fit of the tongue to the frame is crucial to the performance of the reed, the only thing I could do was to cut the tongues significantly wider than necessary and spend a long time painstakingly filing them down to final fit. The bench shear also had a tendency to bend and sometimes even twist the tongues, making it necessary to carefully straighten them out before profiling.

A solution to my problem came in the form of Geoffrey Crabb’s description of a press tool his family has used for all the reeds they have made since Victorian times. I made a few small changes to the design, mainly because my press is a different type1, which necessitated rotating the blades through 90 degrees.

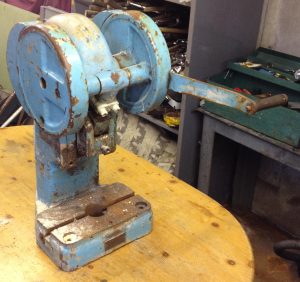
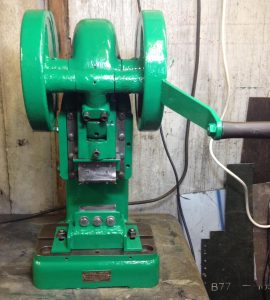
This was how my press looked when I first acquired it. It is a Smart & Brown H5 2-ton toggle press. Although it looked cosmetically rather tatty, it was fully functional with not much wear.

reedtongueshear1

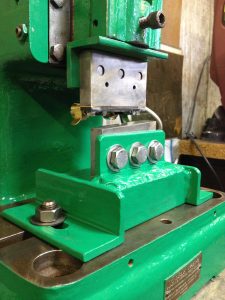
And here is the restored press with the shear tool I made for it installed:

reedtongueshear2

I made the blades from 15mm thick O1 tool steel that I hardened and tempered myself, and the holders are made of various oddments of scrap mild steel that I stick-welded together (my welds may not be very pretty but they are strong enough!).reedtongueshear3

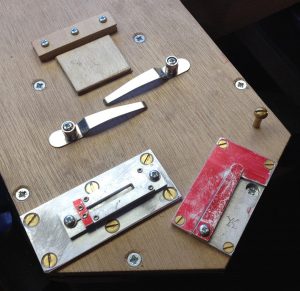
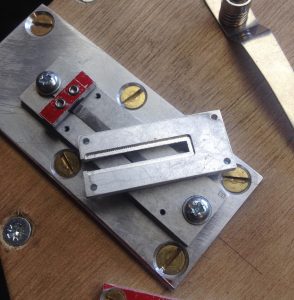
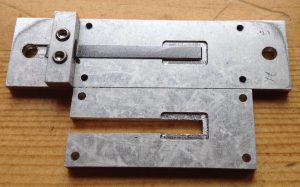
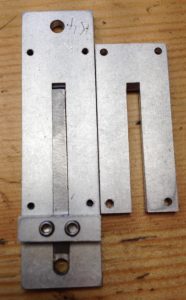
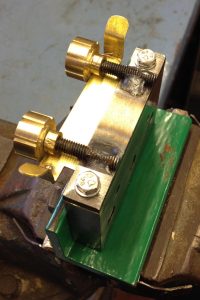
This thing bolted onto the bottom of the moving blade is the clever part. It has a 1mm tall slot with a moving spring-loaded brass plate inside it that acts as a width stop and ejector.reedtongueshear4

You insert a piece of stock (already sheared roughly to length on the bench shear) into the slot until it stops against the brass plate. The two brass thumb-nuts control the position of the brass plate, thus setting the desired width and taper angle of the tongue. After pulling the press handle to shear the metal, the tongue is now trapped inside the slot, so you pull the plate towards you using the two bent tabs, ejecting the tongue, then a pair of springs pulls the plate back against the adjuster nuts. See this brief video for a demonstration:

I’ve found it helps to have a box on my lap to catch the sheared-off stock and the ejected tongues before they fall on the floor!

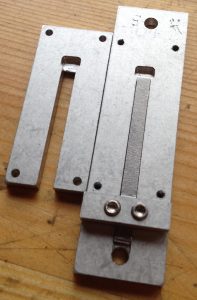
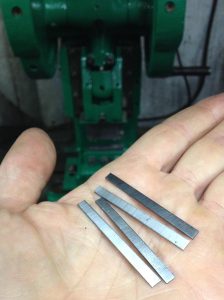
With the new tool I was able to cut these four identical tongue blanks in less than a minute. They still need deburring and a bit of finish-fitting with a file, but much, much less than when I was trying to cut them with the bench shear.

reedtongueshear5

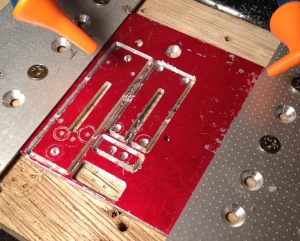
Note that, as Geoffrey Crabb pointed out in his description of the process, it is preferable to turn the stock over between each cut so that the burrs are both produced on the same face of the tongue blank rather than opposing corners. The face with the two burrs on it becomes the bottom of the tongue, because once you lightly stone the burrs off it leaves you with a nice sharp, square edge.