Tools

Moore & Wright Spirit Blowpipe

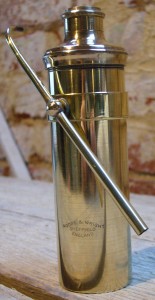
I love old well-made tools. Recently I picked up a vintage Moore & Wright spirit blowpipe (I thought they only made measuring tools!). It’s a very nicely made brass wick burner with a pipe that allows you to blow a stream of air across the flame. This creates a very hot, concentrated flame that can be used for hard soldering. I may not actually use it in concertina production (I have several modern gas torches than are more convenient and powerful), but I thought readers might be interested to see it.

blowpipe1

blowpipe2

I haven’t quite got the hang of it yet; it’s much trickier to use than a gas torch. It also doesn’t seem to produce much heat. I suspect it would work much better on a jeweller’s charcoal soldering block because then any excess oxygen in the stream would make the charcoal burn and generate extra heat. I tried it with a piece of ordinary barbecue charcoal but it crackled and spat sparks at my face so I quickly gave up! I also suspect the meths I’m using may be too dilute to produce a really hot flame.

Here’s a video of me experimenting with it. As you can see the brass got hot enough to anneal it but I doubt it was hot enough for silver soldering.

Update: I spent a while this afternoon practising with the blowpipe and successfully made several silver-soldered brass joints on the refractory brick in the video above. The key seems to be to blow very lightly and consistently (using circular breathing technique) in subdued lighting so you can see the parts of the flame clearly, and at all costs don’t let the blue inner cone dwell on the work. It is far colder than the outer flame. It also helped to push out a bit more wick to get a slightly larger flame. The job took longer than it would have with a cheap butane gas pencil torch, but I got there in the end.

Crafty Concertinas

I’m in the early stages of designing a logo for Holden Concertinas that will also be used as the maker’s label on my instruments, and I mentioned to a friend that I was considering including the phrase “Hand crafted in England.” I intended that phrase to put across concepts like small production quantities, hand assembly, care and attention to detail, tradition, built by an individual who really cares about the end product. In other words the opposite of “Mass produced on an assembly line in China.” My friend pointed out that hand crafted may be a controversial claim to make because I am intending to use CNC machine tools to produce some of the parts for my concertinas. I wondered whether I would be safe if I dropped the word hand, e.g. “Crafted with Care in England” or similar, though I’m uncertain if that is any better (and it doesn’t sound as good to my ear).

Since then I’ve been thinking about what the word craft and the term hand crafted mean to me and reading other opinions on the subject. I came across an interesting essay this morning about the ongoing debate over the meaning of the marketing term craft whisky (apparently there is such a thing – I had never heard of it) that made me question whether I can use the term craft at all when I am only just starting out in the business of musical instrument making. After all I certainly wouldn’t dare to call myself a master craftsman at such an early stage in the development of my new career, though neither would I say that I am completely inexperienced or lacking in craft skills (including the use of traditional hand tools).

In the case of my concertina-making operation I will be assembling all the parts and tuning and finishing the instruments by hand. A fair amount of skill will be required and little or no use of power tools, so I think this part of the process certainly ought to count as hand craft.

What about the parts that I will be assembling? Most of the screws and the action rivets I will probably buy ready-made because they are so generic that there would be little point to making them myself. The rest of the parts I intend to make in my own workshop, with the possible exception of laser-cut metal end plates (a machine powerful enough to do that kind of work is far outside my budget). The raw materials I’ll be making the parts from will be things like seasoned hardwood, brass sheet, spring steel strip, various kinds of tanned leather, card stock, wool felt, hide glue, shellac. That is to say, pretty much the same types of raw material that traditional concertina makers like Wheatstone and Lachenal used back in Victorian times (though I don’t intend to use bone, ivory or endangered woods, and may also use make some use of more modern materials and adhesives when appropriate). The tools I will be using to make the parts can be divided into four categories:

  1. Hand-powered tools that require a significant amount of manual skill to operate. Things like files, hand saws, hand planes, chisels, skiving knives. Many would include treadle-powered machines like my scroll saw in this category because they are also propelled solely by the muscles of the operator (incidentally, Geoffrey Crabb told me that his reed pan routing machine that was made by his great grandfather in the 1860s was originally treadle powered). Purists would argue that this is the only category of tool you can use if you want to describe your product as hand crafted. In some cases (e.g. chainsaw carving) I might even agree with them! 😉
  2. Externally-powered (typically by an electric motor) machine tools that require a significant amount of manual skill to operate. This includes things like manually controlled lathes and milling machines, drill presses, bench grinders, as well as woodworking machines like bandsaws and table saws, planer/thicknessers and drum sanders, even sewing machines. Non-purists will usually allow items made with this type of tool to still be called hand crafted – after all a skilled pair of hands was still required to twiddle the knobs or push the material through the machine in just the right way. It is an area of considerable debate, particularly in cases where the end result is indistinguishable from an item made entirely with hand tools.
  3. Hand-powered tools that require little skill to operate. This is mainly things like punch and die sets used in hand presses. You stick a piece of raw material into the tool, pull the handle, clunk, briefly inspect the part that pops out, and place it in a box if it looks satisfactory. Repeat the operation over and over until you have replenished your stockpile of that part. Anybody could be shown how to do it in five minutes. Personally I would describe parts made this way as hand made but possibly not hand crafted due to the lack of skill required. Obviously the design and manufacture of the die sets is another matter – that does require skill, and I intend to perform that part of the process myself too. Does that elevate the parts I’ll be making this way to the status of hand crafted? I don’t know.
  4. CNC machine tools. I intend to make extensive use of small CNC machine tools including a lathe, a wood cutting router, a milling machine, probably a laser cutter (though in that case I’ll have to send my designs out to a commercial machine shop), and possibly a surface grinder for profiling reed tongues (which I may need to build myself because commercial ones are rare, expensive and larger than I need). Wire EDM is also worth considering, specifically for cutting the reed frame slots. The main reason I’m planning to use CNC where it’s practical to do so is to reduce the amount of time I spend doing highly-repetitive machining operations that a robot can do faster and more consistently without getting tired or bored. I’m pretty sure this doesn’t count as hand crafted because there isn’t a human hand guiding or powering the tool as it cuts. Can it be called craft though? This brief article on the subject argues that it can. Considerable skill is certainly required to teach a machine to make a new part, and in many cases also to make jigs to hold the parts securely and accurately while they are being machined, but once that has been done you can pretty much load a piece of raw material into the machine, press ‘start’, and go off to do something else while it works its way through the list of instructions. Admittedly the kind of machine I’ll be able to afford will require a lot more manual tending (e.g. changing the tool bit part way through a job, or turning the workpiece over so that it can machine the other side) than the big machining centres used by commercial machine shops that can go all the way from bar stock to bucket of finished parts without human intervention. Most of my parts will also require some manual finishing-off, e.g. deburring edges, polishing (where externally visible), and tapping threads. The reeds in particular, arguably the most important parts in a concertina, will require a considerable amount of skilled hand work to finish them off after the components have been roughed to shape using the CNC milling machine (traditionally, this roughing out stage was usually done using punch and die sets in a fly press).

Enough rambling. I’d like to know what you think. Will my concertinas be crafted or merely made? Is it valid to describe them as hand crafted if some of the parts in them were machined by power tools and even robots?

Bellpush Backbox

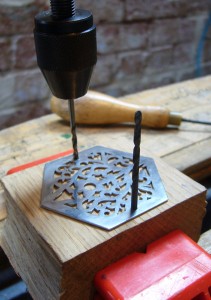
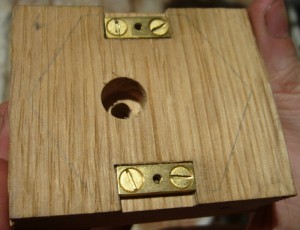
I had a day off yesterday, so I managed to make a fair bit of progress on the bellpush. I made the captive nut plates in the morning, then in the afternoon and evening I made the backbox. I decided to make it from a solid chunk of seasoned oak for good weather resistance. My first job after planing the top surface smooth was to spot through the locations of  the two top mounting screws the same size as the clearance holes in the top (i.e. 2.5mm). In order to get them exactly the right distance apart, I drilled the first hole and stuck the shank of a spare drill bit in it while I drilled the second one. For this kind of delicate wood drilling I like to use a hand cranked drill because it gives you a much better feel for the amount of pressure and torque you’re applying to the bit than an electric drill does.

bellpushbackbox1

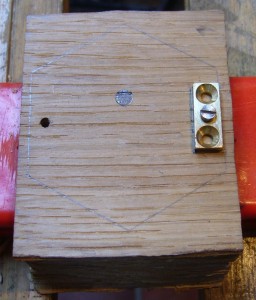
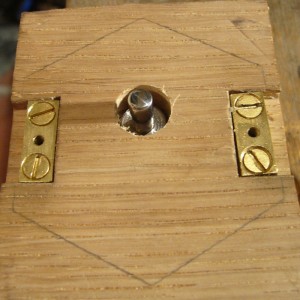
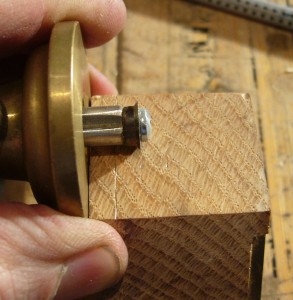
After drilling the pilot holes, I used a screw inserted through the nut plate to locate it in exactly the right position for chiselling it into the surface of the block.

bellpushbackbox2

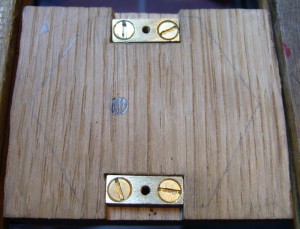
It’s trickier than it looks to inset them neatly. The second one is less squiffy than the first! I also must have mis-calculated the width of the nut plates because they were supposed to end up flush with the outside of the box, but there is actually about a 1mm step in. At least both the tapped holes are in exactly the right place, which was the most important thing.bellpushbackbox3


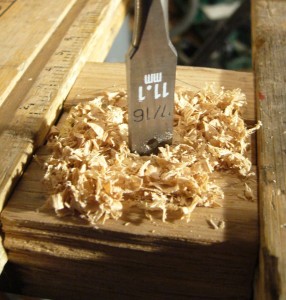
Next I drilled a small diameter pilot hole in the middle of the button hole and used it to guide a sharp flat boring bit to cut a slightly-oversize recess for the large diameter lip of the button (a forstner bit would probably be better but I haven’t got one of those and it worked well enough). The depth of this recess will set how far the button can be pressed in (minus the thickness of the spring).

bellpushbackbox4


Finally I opened up the rest of the pilot hole to slightly over the diameter of the bottom part of the button:

bellpushbackbox5

I had to chamfer the bottom of the button a little to get it to slide smoothly in the hole (should really have thought of that when I was turning the sleeve).bellpushbackbox6

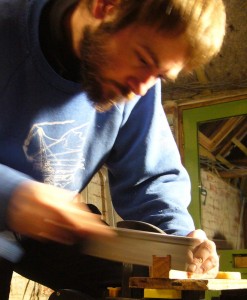
Next I sawed the block to the same shape as the top using my new gent’s saw:

bellpushbackbox7

After a bit of planing to smooth off the saw marks and get it down to the exact size, I thought it looked a bit plain:

bellpushbackbox8

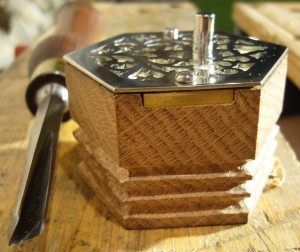
So I scribed three parallel lines near the back of the box: bellpushbackbox9

And carved some fake bellows with my Ashley Iles Vee gouge:bellpushbackbox10


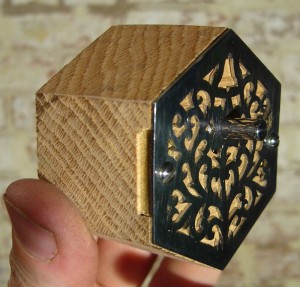
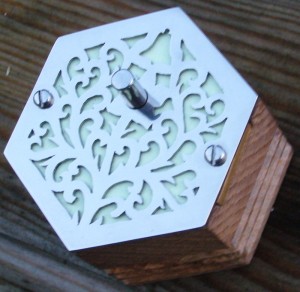
The plastic film behind the fretwork is a tasteful pale green in daylight:

bellpush_preview

But at night it glows in the dark, which looks really cool if I do say so myself! 😉 (Sadly, it only glows this brightly for a few minutes after charging it up by shining an electric light at it.)bellpushbackbox11

Gent’s Saw

Following on from this morning’s post, I had been thinking for several months that I would like to learn to sharpen wood-cutting hand saws. A pre-requisite for that was buying a saw that is made from appropriate steel that can be successfully re-sharpened. This tends to mean either a vintage/antique saw made before the invention of modern hard-point disposable saws, or a new ‘heirloom quality’ carpenter’s saw from a company like Lie-Nielsen Toolworks. The new ones are justifiably expensive, as are restored vintage tools from a reputable dealer (especially if they are a particularly ‘collectible’ example). If you haven’t got much money to spend the third option is to take a chance on an unrestored vintage saw and hope that you can successfully restore it yourself. That was the option I went with, partly because I wanted to teach myself saw sharpening and didn’t want my first attempt to be on a valuable tool in case I made a mess of it.

The biggest gap in my wood saw collection was a small fine-tooth backsaw, bigger than a razor saw but smaller than a tenon saw. That means either a gent’s saw or a dovetail saw (the main difference between them, as I understand it, being that a gent’s saw has a round turned handle and a dovetail saw has a pistol grip handle. Dovetail saws may also be slightly bigger). I searched around on eBay and found a vintage Sheffield-made 7″ gent’s saw from a vintage tool dealer with excellent feedback. It was cheap enough to take a chance on, didn’t look too bad in the photos, and the condition was described as “Blade is quite sharp, tool is good to use.” Now “quite sharp” is a subjective term and I like my cutting tools to be very sharp, so I fully expected to need to sharpen and probably re-set it. What I didn’t expect was for the blade to be kinked.
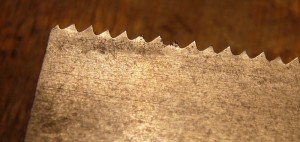
sawsharpening1

It was rather hard to take a photo that showed the kink (it was more obvious to the naked eye). It had obviously been caused by somebody getting the heel of the blade stuck in a saw cut and pushing it over sideways, something that is quite easy to do if you’re pushing too hard because the blade is very dull (which it was). It may not look like much, but it had the effect of causing the heel of the blade to have far too much set on one side, which forced it to cut in a curve rather than a straight line. The next photo shows what happened when I attempted to make a straight perpendicular crosscut through a piece of softwood. Personally, I wouldn’t have described this saw as ‘good to use.’ Update: I’ve been in touch with the eBay seller and we agreed on a partial refund.
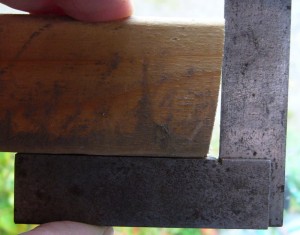
sawsharpening2

My tin-bashing experience came in handy here, and a few minutes of careful work with a lead mallet and a slightly domed anvil took out the kink. It flattened out the set too, but that wasn’t a problem because I intended to re-set the whole blade anyway. Here’s the blade after straightening and polishing it to reduce drag:
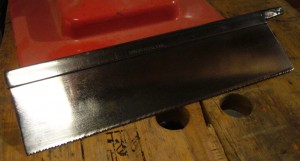
sawsharpening3

The photos I took of jointing the blade (filing the tops of all the teeth to make them the same height) and sharpening them with a triangular file didn’t come out very well. Suffice it to say that after watching a few instructional videos and reading some tutorials I didn’t find it difficult. The videos from Lie Nielsen are easy to follow. Marking all the teeth with a Sharpie so you can easily tell which ones you’ve already filed was a good tip, and an Optivisor was helpful to see what I was doing clearly. The teeth were previously filed with a rip cut profile (optimised for cutting along the grain rather than across it), so I decided to keep it like that for simplicity’s sake, though I made the rake angle slightly more aggressive.

I bought an old Eclipse No. 77 saw setting tool to set the teeth. (You need to do this to make the saw cut a kerf slightly wider than the stock of the blade, so that it doesn’t bind and it’s possible to steer it back if it starts to deviate from a straight line.) Incidentally I’ve seen at least three very different tools on eBay with this make and model number – the one I got has a cast bronze body and seems very robustly made. On advice from my friend John Wilson and the Lie Nielsen video, I ground the pin narrower to suit the very fine teeth on my saw (it was made of steel so hard that a file skated off it, so grinding and stoning was the only way to do it). Before and after photos of the reduced width pin:
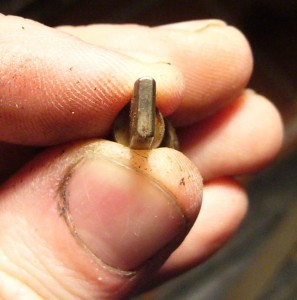
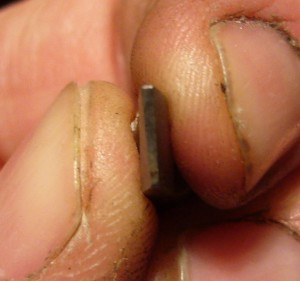
sawsharpening4sawsharpening6

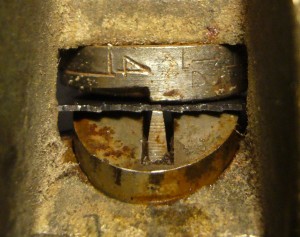
And here is a photo looking in through the window of the saw set with a tooth gripped between the pin and the anvil (rotated to the finest tooth setting, which is probably slightly too coarse for such a fine blade). Again, magnification really helped me to do this part accurately with such small teeth:
sawsharpening7


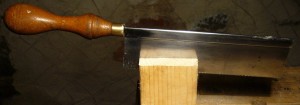
The end result: a nice little saw that cuts well and follows a straight line (I haven’t done anything to clean up the handle yet), and that I have the ability to re-sharpen and re-set whenever I need to:
sawsharpening8