Bellpush Backbox

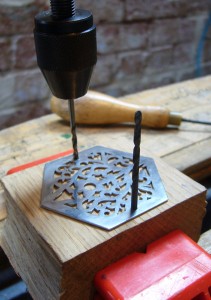
I had a day off yesterday, so I managed to make a fair bit of progress on the bellpush. I made the captive nut plates in the morning, then in the afternoon and evening I made the backbox. I decided to make it from a solid chunk of seasoned oak for good weather resistance. My first job after planing the top surface smooth was to spot through the locations of  the two top mounting screws the same size as the clearance holes in the top (i.e. 2.5mm). In order to get them exactly the right distance apart, I drilled the first hole and stuck the shank of a spare drill bit in it while I drilled the second one. For this kind of delicate wood drilling I like to use a hand cranked drill because it gives you a much better feel for the amount of pressure and torque you’re applying to the bit than an electric drill does.

bellpushbackbox1

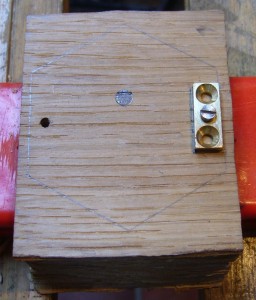
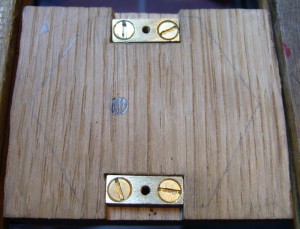
After drilling the pilot holes, I used a screw inserted through the nut plate to locate it in exactly the right position for chiselling it into the surface of the block.

bellpushbackbox2

It’s trickier than it looks to inset them neatly. The second one is less squiffy than the first! I also must have mis-calculated the width of the nut plates because they were supposed to end up flush with the outside of the box, but there is actually about a 1mm step in. At least both the tapped holes are in exactly the right place, which was the most important thing.bellpushbackbox3


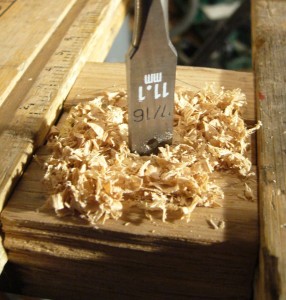
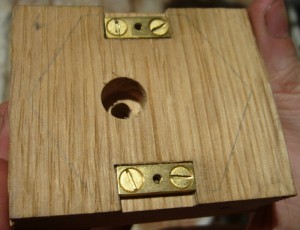
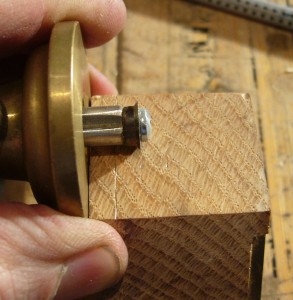
Next I drilled a small diameter pilot hole in the middle of the button hole and used it to guide a sharp flat boring bit to cut a slightly-oversize recess for the large diameter lip of the button (a forstner bit would probably be better but I haven’t got one of those and it worked well enough). The depth of this recess will set how far the button can be pressed in (minus the thickness of the spring).

bellpushbackbox4


Finally I opened up the rest of the pilot hole to slightly over the diameter of the bottom part of the button:

bellpushbackbox5

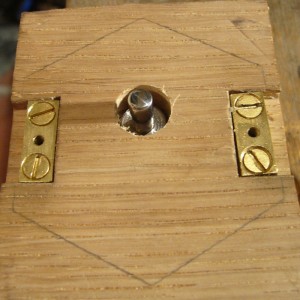
I had to chamfer the bottom of the button a little to get it to slide smoothly in the hole (should really have thought of that when I was turning the sleeve).bellpushbackbox6

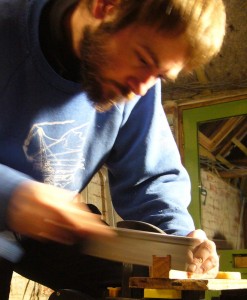
Next I sawed the block to the same shape as the top using my new gent’s saw:

bellpushbackbox7

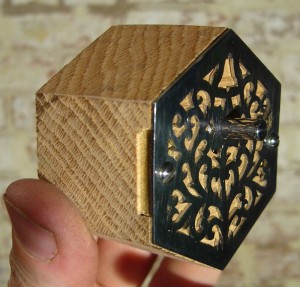
After a bit of planing to smooth off the saw marks and get it down to the exact size, I thought it looked a bit plain:

bellpushbackbox8

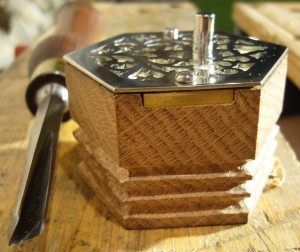
So I scribed three parallel lines near the back of the box: bellpushbackbox9

And carved some fake bellows with my Ashley Iles Vee gouge:bellpushbackbox10


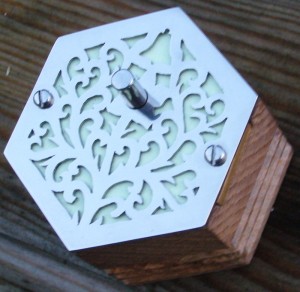
The plastic film behind the fretwork is a tasteful pale green in daylight:

bellpush_preview

But at night it glows in the dark, which looks really cool if I do say so myself! 😉 (Sadly, it only glows this brightly for a few minutes after charging it up by shining an electric light at it.)bellpushbackbox11

More Captive Nut Plates


Following my earlier, unsatisfactory, attempt at making a pair of captive nut plates for the bell push by soldering stainless steel nuts onto thin brass sheet, I bought a set of M2.5 taps and a piece of much thicker (3mm) brass sheet for my second try.

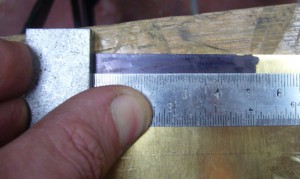
I stained the brass with a permanent marker to make the lines show up more clearly, and marked it out using a steel ruler and scriber under magnification:

nutplates1


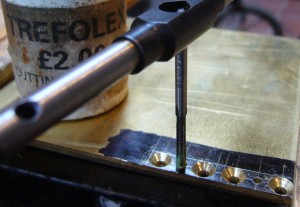
I also upgraded from a cheap, dull wood-cutting countersink bit to a small good quality (Dormer) HSS three flute metal-cutting countersink. The resulting countersunk holes for the wood screws that will hold the plates to the back box are way smoother, cleaner and more accurate as a result. I tapped the M2.5 holes by hand using Trefolex tapping compound (I bought that small pot at a Model Engineering exhibition about 20 years ago and it’s still half full!).

nutplates2


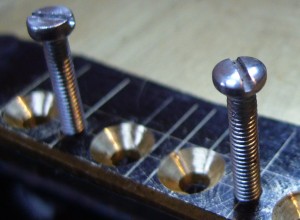
A brief aside about the heads of the visible machine screws/end bolts that hold the top on. This is what the brass bolt heads look like on my antique Lachenal:

nutplates3


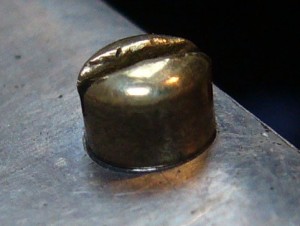
It turns out that head style is called a slotted fillister (I’d not heard that word before I started searching through screw catalogues, and it isn’t in my computer’s spell checking dictionary). I couldn’t find any suitable ready-made M2.5 stainless steel slotted fillister head screws for sale (I much prefer the appearance of slotted heads for this application), so I instead got some cheese-head screws and domed and polished them in the lathe. The next photo shows them before and after modification. Not quite right but I think they look reasonably good.

nutplates4


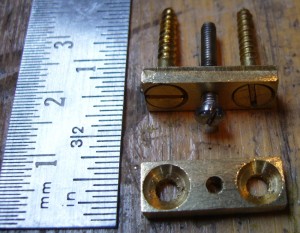
The final photo shows the two finished nut plates. I’m far happier with how these turned out than I was with my first attempt. The brass wood screws are bigger than necessary, but I happened to have a packet of them sitting around and there is enough room to use them. I don’t think there’s much risk of them pulling out of the oak!

nutplates5

Gent’s Saw

Following on from this morning’s post, I had been thinking for several months that I would like to learn to sharpen wood-cutting hand saws. A pre-requisite for that was buying a saw that is made from appropriate steel that can be successfully re-sharpened. This tends to mean either a vintage/antique saw made before the invention of modern hard-point disposable saws, or a new ‘heirloom quality’ carpenter’s saw from a company like Lie-Nielsen Toolworks. The new ones are justifiably expensive, as are restored vintage tools from a reputable dealer (especially if they are a particularly ‘collectible’ example). If you haven’t got much money to spend the third option is to take a chance on an unrestored vintage saw and hope that you can successfully restore it yourself. That was the option I went with, partly because I wanted to teach myself saw sharpening and didn’t want my first attempt to be on a valuable tool in case I made a mess of it.

The biggest gap in my wood saw collection was a small fine-tooth backsaw, bigger than a razor saw but smaller than a tenon saw. That means either a gent’s saw or a dovetail saw (the main difference between them, as I understand it, being that a gent’s saw has a round turned handle and a dovetail saw has a pistol grip handle. Dovetail saws may also be slightly bigger). I searched around on eBay and found a vintage Sheffield-made 7″ gent’s saw from a vintage tool dealer with excellent feedback. It was cheap enough to take a chance on, didn’t look too bad in the photos, and the condition was described as “Blade is quite sharp, tool is good to use.” Now “quite sharp” is a subjective term and I like my cutting tools to be very sharp, so I fully expected to need to sharpen and probably re-set it. What I didn’t expect was for the blade to be kinked.

sawsharpening1

It was rather hard to take a photo that showed the kink (it was more obvious to the naked eye). It had obviously been caused by somebody getting the heel of the blade stuck in a saw cut and pushing it over sideways, something that is quite easy to do if you’re pushing too hard because the blade is very dull (which it was). It may not look like much, but it had the effect of causing the heel of the blade to have far too much set on one side, which forced it to cut in a curve rather than a straight line. The next photo shows what happened when I attempted to make a straight perpendicular crosscut through a piece of softwood. Personally, I wouldn’t have described this saw as ‘good to use.’ Update: I’ve been in touch with the eBay seller and we agreed on a partial refund.

sawsharpening2

My tin-bashing experience came in handy here, and a few minutes of careful work with a lead mallet and a slightly domed anvil took out the kink. It flattened out the set too, but that wasn’t a problem because I intended to re-set the whole blade anyway. Here’s the blade after straightening and polishing it to reduce drag:

sawsharpening3

The photos I took of jointing the blade (filing the tops of all the teeth to make them the same height) and sharpening them with a triangular file didn’t come out very well. Suffice it to say that after watching a few instructional videos and reading some tutorials I didn’t find it difficult. The videos from Lie Nielsen are easy to follow. Marking all the teeth with a Sharpie so you can easily tell which ones you’ve already filed was a good tip, and an Optivisor was helpful to see what I was doing clearly. The teeth were previously filed with a rip cut profile (optimised for cutting along the grain rather than across it), so I decided to keep it like that for simplicity’s sake, though I made the rake angle slightly more aggressive.

I bought an old Eclipse No. 77 saw setting tool to set the teeth. (You need to do this to make the saw cut a kerf slightly wider than the stock of the blade, so that it doesn’t bind and it’s possible to steer it back if it starts to deviate from a straight line.) Incidentally I’ve seen at least three very different tools on eBay with this make and model number – the one I got has a cast bronze body and seems very robustly made. On advice from my friend John Wilson and the Lie Nielsen video, I ground the pin narrower to suit the very fine teeth on my saw (it was made of steel so hard that a file skated off it, so grinding and stoning was the only way to do it). Before and after photos of the reduced width pin:

sawsharpening4sawsharpening6

And here is a photo looking in through the window of the saw set with a tooth gripped between the pin and the anvil (rotated to the finest tooth setting, which is probably slightly too coarse for such a fine blade). Again, magnification really helped me to do this part accurately with such small teeth:

sawsharpening7


The end result: a nice little saw that cuts well and follows a straight line (I haven’t done anything to clean up the handle yet), and that I have the ability to re-sharpen and re-set whenever I need to:

sawsharpening8

Resharpenable Wood Saws

I have found another aspect of traditional woodworking to become slightly obsessive about: re-sharpenable hand saws. Up until a few decades ago, wood saws were made of spring steel and were nearly all intended to be re-sharpened many times over. A carpenter would buy a range of expensive high-quality saws as an apprentice/journeyman, learn how to maintain them, and use them throughout his career. Nowadays, with the possible exception of chainsaw chains and large expensive sawing machine blades, most people use cheap mass-produced hard-point saws that are intended to be thrown away when blunt. Hand saw sharpening has come to be regarded as something of a ‘lost art’.

Don’t get me wrong, the better brands of hardpoint saw intended for professional use aren’t bad – they are very sharp when new and last quite a while as long as you don’t try to cut anything especially abrasive. For the past few months my everyday general purpose hand saw has been a Bahco hardpoint that I pulled out of a skip – a kitchen fitter had chucked it away because it became a little dull after cutting some plastic-coated chipboard worktops.

I believe there are several advantages of re-sharpenable saws:

  1. The good vintage ones are just nicer to look at and use. Well balanced, comfortable, finely shaped hardwood handles. They were expensive items that were meant to last a lifetime.
  2. It’s possible to alter several aspects of tooth shape and set to suit different types of wood.
  3. It’s cheaper in the long run. OK they are more expensive to begin with and you have to occasionally spend a few quid on a new sharpening file, but over the years the cost of all those disposable saws is going to add up.
  4. Related to the previous point, you never need to make that awkward choice that I have faced many times in the past between driving into town and spending £15-£20 on a new saw or continuing to make do with the dull one you’ve already got. Just get out the triangular file and spend ten minutes touching up the teeth.
  5. How environmentally wasteful is it to keep throwing away complete saws just because the edges of the teeth have become slightly rounded?

The main disadvantages are that you have to learn a new skill (not that difficult, it turns out), and because the steel is softer you have to sharpen them more often than you would need to replace a disposable saw.

Got to get to work now, but later on I’ll write a post about my first experience with re-sharpening a hand saw.