Search Results for: 2V0-62.23 Schulungsangebot, 2V0-62.23 Testing Engine, VMware Workspace ONE 22.X Professional Trainingsunterlagen 🐟 Öffnen Sie ⮆ www.itzert.com ⮄ geben Sie ➽ 2V0-62.23 🢪 ein und erhalten Sie den kostenlosen Download 🌮2V0-62.23 Testengine

Lie Nielsen 101 Plane

It was my birthday recently, plus I had just been paid for one of my first commissions since I started Holden Concertinas, so I decided to treat myself to something a bit special. A new, high-quality hand tool that will be useful throughout my career as a concertina maker. After a lot of thought I settled on the Lie Nielsen 101 block plane.

It is very loosely based on the Stanley 101, which was apparently originally intended as a child’s toy but proved popular with modelmakers and was widely copied by other manufacturers. It features several improvements that elevate it to the level of a professional tool: a heavy, accurately machined, cast bronze body, fine screw adjustment for depth of cut, and a thick blade made from A2 steel. I normally prefer to save money by buying vintage tools and refurbishing them, but I think this is one case where the modern version really is a lot better (though if I’d had the option, I’d probably have chosen an O1 blade rather than A2 because it takes a slightly finer edge and is easier to sharpen).
lie_nielsen_101_plane
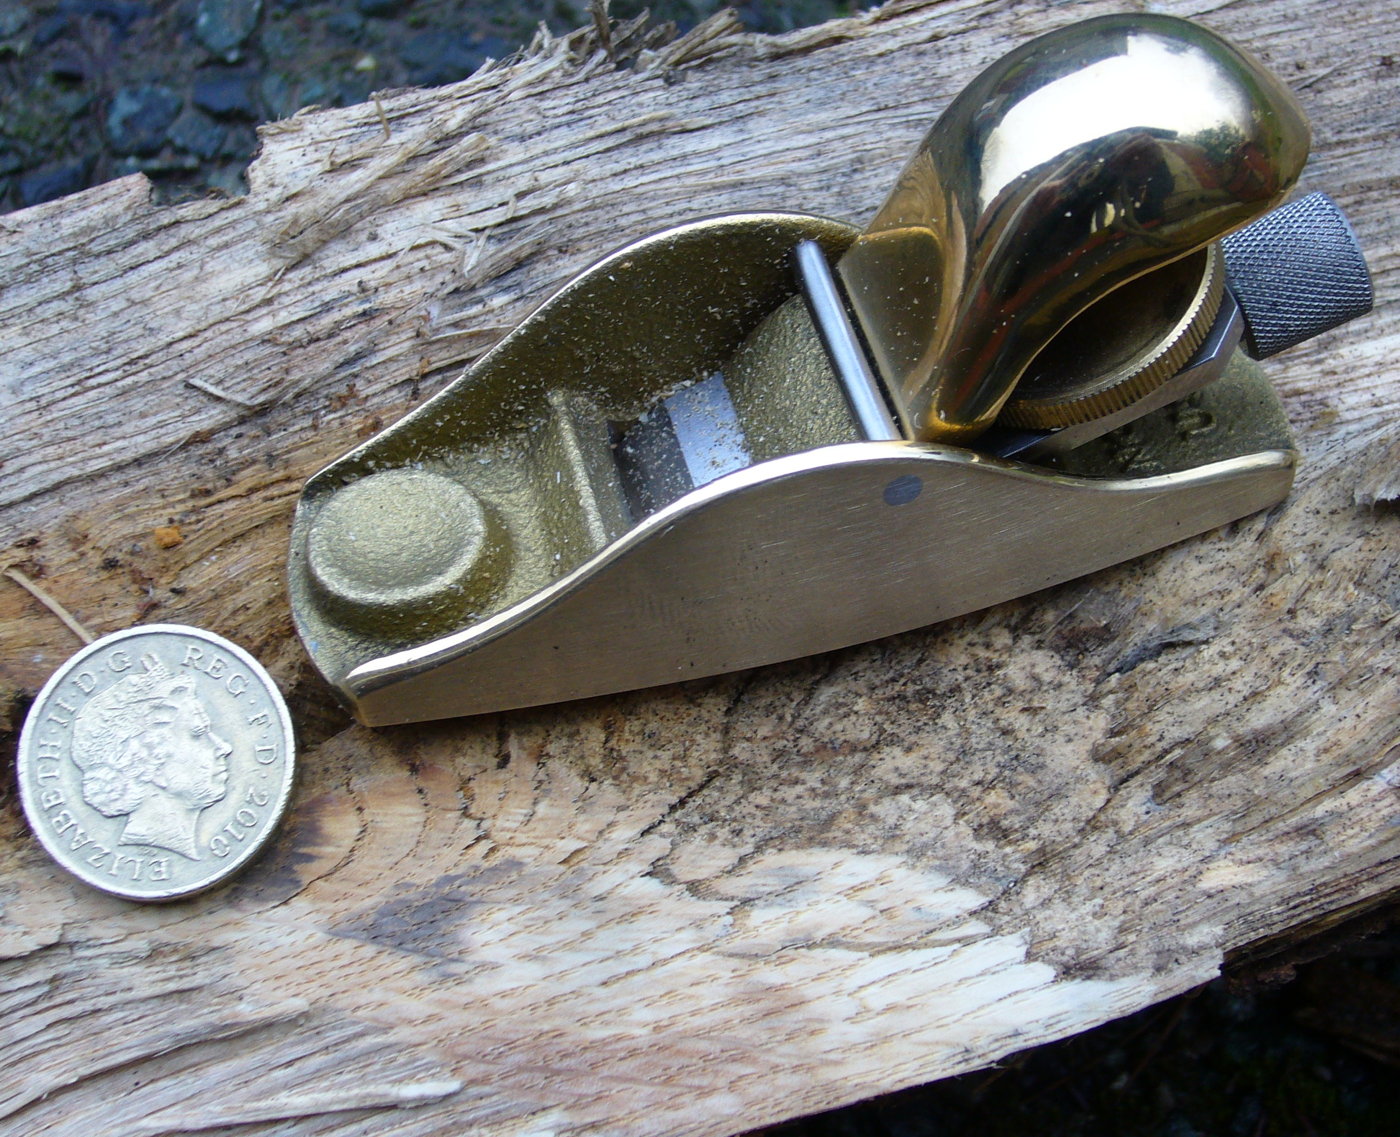
Lie Nielsen advertise it as a violin maker’s plane, though I don’t think there is anything about it that makes it especially well-suited for the tasks involved in violin-making. It’s really just a very small, well made block plane. I can see it being useful for many kinds of small-scale woodworking: model boats, doll’s houses, jewellery boxes, musical instruments, etc.

My one complaint with it is that the blade was dull out of the box. The back and bevel appeared to have been surface-ground and perhaps quickly swiped across a medium grit diamond stone. The surface finish was relatively rough and unpolished, and there was a slight burr at the edge. It would cut if you forced it through the wood but it wasn’t a nice experience. I know people have different standards with regards to tool sharpness and my standards are fairly high, but I wonder how many hand-tool beginners buy a high-end tool like this with the expectation that it is going to work really well straight away. They will have a disappointing first experience of the product because it is basically horrible to use until you have learned how to sharpen the blade. Particularly since the instruction leaflet claims, “The blade comes ready to use. Slight additional honing will increase performance.” Really. It’s a bit like a high-end car maker like Mercedes selling a new car with an empty petrol tank and claiming, “The vehicle comes ready to use. The addition of fuel will increase performance.”

There is an interesting parallel between Lie Nielsen’s business model and my own. Most of LN’s tools are basically copies of vintage tools invented by Stanley and others with slight improvements to the design, improved materials, and modern manufacturing methods. The tools aren’t cheap but they are well-made (apart from the dull blade thing) and highly desirable, and as a result their business seems to be very successful.


Some Personal Background

I have a strong family background in mechanical engineering/manufacturing (father, brother, grandfather, cousin, uncle…), and grew up making models and small electronics projects. I did OK academically in high school, but my favourite subject was what at the time they called ‘design and technology’ (a very basic introduction to making things with wood, plastic and electronics). At sixteen I took a two year vocational electronics course, which I enjoyed and did pretty well in. I also did night classes in things like industrial automation with PLCs, AutoCAD, and got my amateur radio license. I had a summer job repairing circuit boards at a world-famous maker of professional mixing desks. At this point I probably could have dropped straight into an electronics design job (if I could have persuaded anyone to hire me without a degree), figured out what I didn’t know as I went along, and been reasonably successful at it.

Instead I went down the default ‘smart kids go to university’ path, and embarked on an electronic engineering degree. I alternately struggled to cope with the large amount of heavy maths and theory, and was bored by the small amount of practical content (which my vocational course had already covered in more depth). After the first year I came very close to dropping out, but was persuaded by family and friends to keep going, because to give up would be to fail and ruin my chances of a well-paid career in engineering (or so it seemed at the time). By the end of the course, my enthusiasm for making things had been fairly thoroughly squashed, and I fell into an unrelated desk job in IT that I soon came to hate but felt trapped in.

Fast forward a few years and a couple of side-tracks that I need not go into now. Gradually my enthusiasm for making things returned in the form of hobby electronics projects. I also developed a fascination with old machinery and for a while I put most of my spare time into restoring vintage cars. I became more and more bored and unfulfilled in my day job, and in hindsight I admit I wasn’t performing it to the best of my ability because it no longer held any excitement or interest for me. I should have got out earlier than I did, but I didn’t have a clear idea of what else I could do, given my lack of experience in any industries other than the one I wanted to escape from.

In 2009 the IT consultancy I worked for went bust and my situation changed completely. Thanks to my best friend I found myself working on the restoration of a historic building, which involved teaching myself traditional carpentry and masonry skills. I took up wood carving as a hobby and was commissioned to make two sets of puppets. I took up blacksmithing as a hobby because I wanted to be able to forge my own wood carving tools, and was commissioned to make several hundred hand-forged nails. I tried my hand at jewellery making and sold several pieces. I did more physical labour and became fitter as a result. I was earning far less money than in my previous career, but I had rediscovered the joy of learning new practical skills, making things, and solving problems with my hands.

For several years I floated around rudderless from project to project, without a good idea of what I wanted to do long-term, other than that it had to involve working with my hands and brain, preferably involving a wide range of different skills. One day I happened to buy an antique concertina. I needed to do a fair bit of restoration and repair work to get it playable, one thing led to another, and in the end I realised that what I really want to do with my life is to become a full-time maker of high-end instruments.

No. 10: A 45 Button Crane Duet

The tenth instrument I built was another Crane duet. It was for John Thornton of Hampshire, the same client who commissioned No. 4. I am fortunate to have several customers who, after receiving their first Holden concertina, immediately placed an order for a second one. No. 10 is very similar in many ways to No. 4, with one obvious difference (metal instead of wooden ends) and a lot of small differences that I will list later. You might find it interesting to read my article about No. 4 as background to this article.

In this video, John performs five tunes on No. 10 and talks a little about his modifications to the standard Crane duet layout.

Photos: End Plates

There are a lot of choices when it comes to the end plates of a concertina.

On an instrument with wooden end plates, I usually use a decorative veneer on the front, a cheaper hardwood (e.g. maple or beech) veneer on the back, and a core of solid sycamore. The grain of the outer veneers (unless it is a burl) will run perpendicular to the core, which improves the strength and stability of the board. I glue the layers together with epoxy resin to avoid injecting water into the board that would cause it to warp when it dried.

For example, this is a laminated amboyna burl board for one of No. 8’s end plates:

The most basic option is simple flat wooden end plates with a plain black veneer like No. 11:

Or flat nickel silver end plates with a crimped border like this Crabb Anglo I restored:

No. 12 has flat wooden ends with a fancy Amboyna burl veneer with red stain:

No. 6 has inset raised ends made from nickel-plated nickel-silver:

No. 8 has flat amboyna-veneered ends like No. 12 but without any stain:

No. 10 has inset raised metal ends like No. 6, but made from polished aluminium alloy:

So far I have only shown traditional Victorian-style foliate patterns, mostly designed by myself. No. 7 was particularly special to me; it has raised wooden ends with a non-traditional oak tree and butterfly pattern that I designed in collaboration with the client:

No. 9 has flat nickel-plated end plates with two very different fretwork designs provided by the client (photos taken before polishing and plating):

This design in particular was very time-consuming to hand-pierce due to all the nooks and crannies.

No. 1 was also a bit unusual. It has flat wooden end plates, but I tried to imply a 3D effect with the geometric design (you can tell that my piercing and French polishing skills have improved a lot since I made this one):

I have also worked with a professional illustrator, Nina Dietrich, on two end plate designs, for No. 3 and No. 4.5. No. 3 has flat wooden end plates with a rippled maple veneer, and I used pyrography (wood burning/pokerwork) to add black lines to enhance the 3D effect of the knotwork design:

No. 4.5, also designed by Nina Dietrich, has flat nickel-silver end plates, using hand engraving to mark the lines in the design:


No. 14: A 48 Button Viennese Duet

Illustration by Nina Dietrich

My fourteenth concertina was a small, lightweight, 48 button duet with an unusual keyboard layout inspired by an antique Viennese concertina. We modified the concept slightly by giving the instrument the same keyboard curve, spacing, and hand rails/straps as a Crane duet rather than the slanted straight rows and English-style thumb straps and finger grips of the Viennese original. We felt this change improved the ergonomics as well as freeing up all four fingers to be used for playing.