No. 1: Brun Part 1: Introduction

For the past few months I have been hard at work designing and building my first concertina. It has been a long and at times difficult journey, and I have renewed respect for the Victorian pioneers of this complicated little instrument.

The inspiration came from my first client. He wanted something similar to an unusual rectangular 4 ½” by 6″ 24-button instrument developed in the 1850s by the Wheatstone company, the Duett. This was the first concertina with a duet button layout, i.e. one where the two ends have independent keyboards, with some overlap in range. The new instrument, however, was to have the Wikki-Hayden keyboard layout, as many buttons as I could fit in, riveted action, bigger bellows, nicer handles and straps, more attractive fretwork (but not the traditional acanthus-leaf style), and generally better build quality and finish.

After many hours spent in CAD, laying out various different reed pans and action boards, I came to the conclusion that the most buttons I could practically fit in was thirty; fifteen per side. I could have just about squeezed in a couple more chambers into the right hand side reed pan underneath the keyboard array, but there was no way I could place pads over them on the action board. Thirty buttons is unusually small for a Hayden layout so the choice of which notes to include was always going to be a compromise. In consultation with Brian Hayden, I considered a few different layout options before settling on this one, on the basis that it should be usable in the most common folk music keys of C, G and D. The lowest note on the right hand side is middle C.

Over the next few posts, I’m going to cover how I developed and built the instrument.

Reed Pan Router Bit

I’ve spent hours searching for a commercially-made router bit that has the right dimensions to cut the dovetail slots in a traditional reed pan. It needs to be an unusually small diameter, but if you want to be able to cut the top slots after installing the chamber side walls as it was done originally (some of them undercut the walls), it needs to have a disproportionately long ‘neck’ between the cutter and the shank. On the plus side, the slot is quite shallow so the neck doesn’t need to be ridiculously skinny. In the end I decided to make my own.

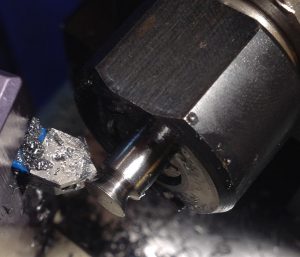
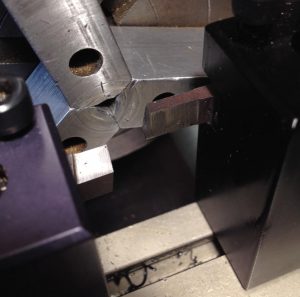
I started with a piece of 1/4″ silver steel. After putting it in a collet and facing the end, I used the side of a threading tool to turn the tapered section, being careful to produce a sharp corner without significantly reducing the diameter of the base of the cone. I made it just long enough to be able to cut a 2mm deep slot, to avoid weakening the neck section unnecessarily. I set the tool holder over to produce the desired 60° taper:

dovetailbit2

Next I extended some more stock from the collet and turned the ‘neck’. On my first attempt, swarf obscured my view of the work and I accidentally retracted the carriage too far to the right and put a groove in the cone area. There was no option but to start again! The second time, I used the tailstock as a right-hand carriage stop to protect the cone.

dovetailbit3

The trickiest part of making your own router bit is producing the flutes without a special tool cutter/grinder machine. I cut three helical flutes by hand with a very small triangular saw file, then hardened and tempered it and sharpened the edges with diamond needle files:

dovetailbit4

Unfortunately it didn’t work well at all. It splintered the surface badly, then overheated:

dovetailbit5

Back to the drawing board. I studied a lot of photos of commercial dovetail router bits on Google Images and came up with a very different two-flute shape. Here’s a quick clip of me filing the relief angles on the second router bit with my saw file (click to stop it after you’ve seen it once, because the Instagram player auto-repeats):

https://www.instagram.com/p/BNC0Pi6APbx/?taken-by=alexholdenmaker

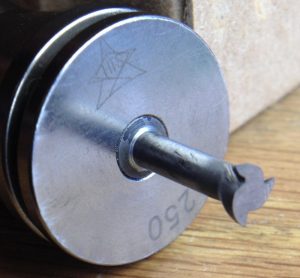
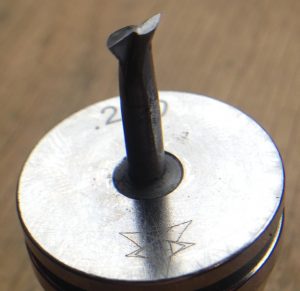
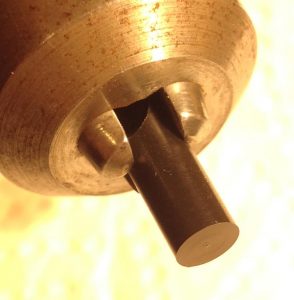
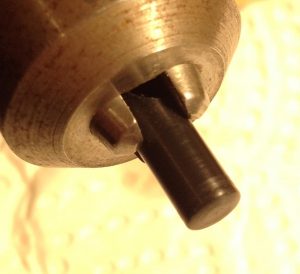
And this is the finished bit, after heat treatment and sharpening. The thing it’s inserted into is one of my milling machine’s quick change tool holders:

dovetailbit6

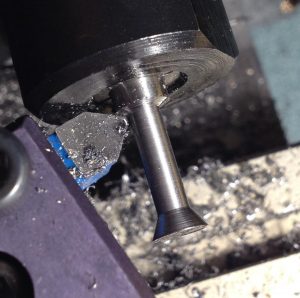
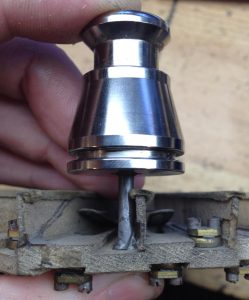
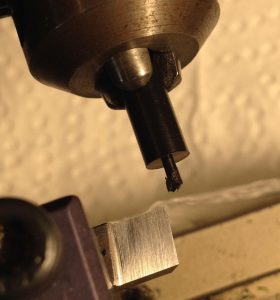
This photo shows the reason why it needs a long neck (I made it a bit longer than would have been necessary for this Treble English, in case I want to make an instrument with deeper bass reed chambers at some point):

dovetailbit7

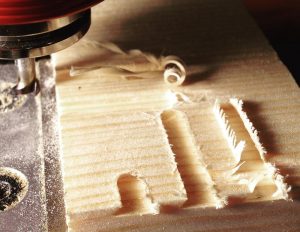
The second router bit works pretty well. Here’s a clip of it cutting a reed slot in a piece of scrap pine:

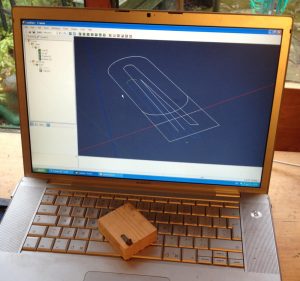
Programming the CNC mill to machine the slots is surprisingly complicated. The CAM software I’m using doesn’t understand how to cut a pocket with a tool that can’t plunge straight the workpiece and needs to enter and leave the edge of the material. I found a way to trick it into doing what I need, but the entire process filled nearly two pages of my logbook, and I need to do it all again for every size of frame I need to cut!

dovetailbit8

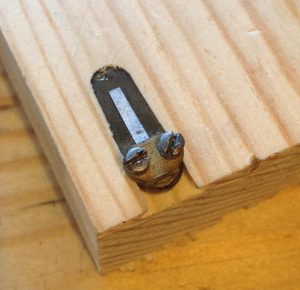
Another problem I ran into is that the outer dimensions of the antique Lachenal reeds I’ve been copying are a bit variable. Not by much, but a tenth of a mm change in width makes the difference between a snug fit and a loose one. This one fits very well – I can throw the block of wood in the air and catch it and the reed is still nicely seated – but the reed taken from the slot next to it (nominally the same frame size) is loose enough that it would fall out. I think when the instrument was built, somebody must have spent a while individually fitting each reed to its slot. Luckily my CNC mill (which I’m using for both the frames and pans) is repeatable to tight enough tolerances that I shouldn’t have this problem.

dovetailbit9

Going Nuts

Quite a while ago I wrote a post about making nut plates for the doorbell project. Since I need twelve of them for a real instrument, and they will need to be accurately inset into the bellows frames, it made sense to program my CNC mill to produce them.

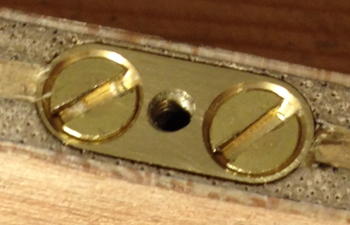
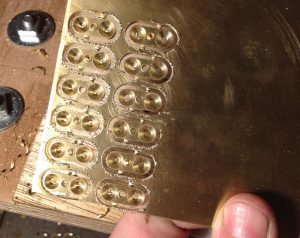
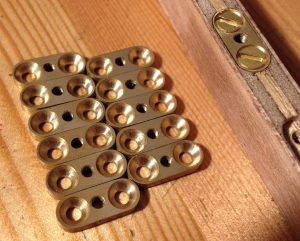
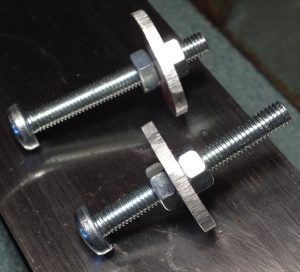
They are made from 2.5mm thick brass sheet. They have an M3 tapped hole in the centre, and two countersunk holes for fixing them to the frames using No 4 x 3/4″ brass screws. This batch of twelve took about 45 minutes to machine:

nutplates1

Of course, after breaking them out of the plate, they still required a bit of manual cleanup and deburring:

nutplates2

I tapped them all by hand using my ultra-high-tech tapping jig.

nutplates3

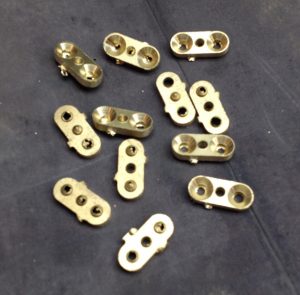
Here is the finished batch of nut plates, plus one of them set into a piece of scrap plywood the same thickness as the wood I’m going to use for the bellows frames. They have rounded ends so that I can cut the inset using a router bit in the CNC mill without having to manually square up the corners with a chisel afterwards.

nutplates4

Acetal Buttons

I made a batch of buttons for my first prototype instrument. For simplicity I decided to use solid black acetal (an engineering plastic, commonly called Delrin, though that is a trademark of DuPont) rather than metal. Acetal is used by most modern concertina makers and it has a number of useful properties; particularly ease of machining, low mass, low friction, and low thermal conductivity (i.e. they don’t feel cold to the touch). I believe the top quality instruments still tend to use hollow metal buttons though.

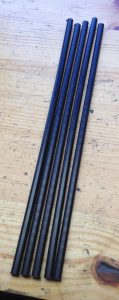
The acetal came through the post in 1m lengths protected by a plastic tube. Long lengths of it are quite bendy. I started with 6mm and turned it down to 4.8mm. Before putting it in the lathe I cut it into 250mm lengths, which was about as long as I dared (shorter would result in more wastage, any longer risks the unsupported left hand end whipping around dangerously). I got nine buttons from each length.buttons2

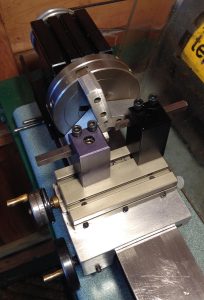
I did most of the work on my manual Taig micro-lathe. I did a few things differently than usual in order to increase efficiency. For instance I set up both a standard right hand tool in the front toolpost and a parting off tool in the back toolpost so I wouldn’t have to mess about changing tools twice per button.

buttons3

buttons4

I made a couple of simple length gauges to control how much of the stock was protruding from the chuck at each stage, then turned up to the Z axis stop (set up to allow the carriage to almost touch the chuck). The short gauge is for the peg on the bottom of the button, and the long gauge is for the main body of the button. I also made full use of the graduations on the cross slide handwheel to produce the two diameters without stopping to measure the part.

buttons5

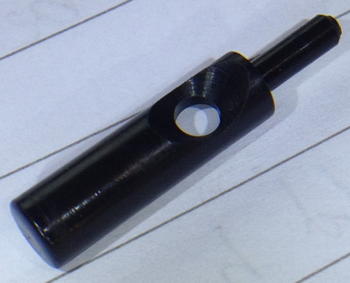
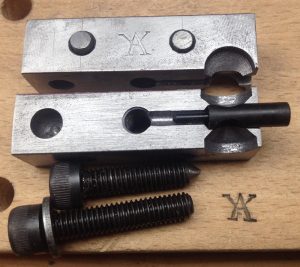
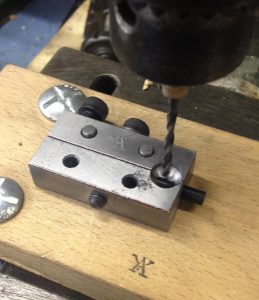
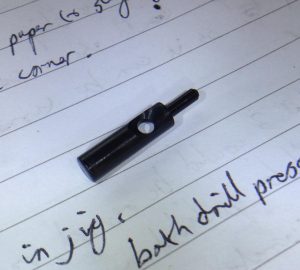
I made a special jig to hold the button while I drilled and countersunk the cross hole on both sides. It is built in such a way that you can turn it over 180 degrees and locate it using the two pins on the baseboard, which is clamped to the drill press table.

buttons6

Although this photo shows a standard jobber drill bit, I found it worked better to first use a smaller, more precise drill press to spot the hole location with a small centre drill, otherwise the bit drifts to one side or the other and you end up with an off-centre hole.buttons7

Finishing the top of the button involved facing off the parting-off stub, hand-sanding to round it off slightly, then flame polishing with a pencil torch to get a smooth glossy finish.

buttons10

buttons11

buttons12

(Close-up picture of the polished button didn’t come out well – it turns out that my camera’s autofocus struggles to lock onto glossy black objects!).

This video shows the whole process:

Here’s a finished button:buttons8

And the full batch (more than I need for the first instrument – I made extra because I wasn’t sure how many I would ruin in the process, and I can always use the extras for my second instrument):

buttons9

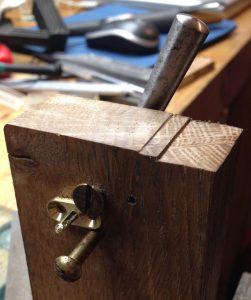
After completing the buttons, I now had prototypes of all the parts of a concertina action, so I decided to put it all together in a little test piece:

As well as the crude box itself, I made the pad, samper, grommet, lever, post, spring, felt washers, button, and both bushes. It is currently sitting on my desk as an executive toy, and I find myself reaching out and pressing the button whenever I’m thinking about a problem!

Update: After a couple of days of pressing the button whenever I happen to be at my desk, it definitely operates smoother and easier than when I first assembled it. I think the pad may be sealing more tightly too.